MetaServer > Help > Convert to Black and White
160-010 MetaServer Convert – Convert to Black and White
With MetaServer’s Convert to Black and White action, you can convert a document to black and white. It has the unique capability to convert specific pages of a document black and white to reduce file size.
For example, if you would only want to make the first 3 pages black and white, you would specify pages “1-3” in the settings. More about this later.
To output the converted TIF or PDF:
Step 1: You add the Convert to Black and White action just before the Export action(s) used to output the converted document.
Step 2: In your Export action(s), select “Processed PDF” or “Processed TIF” as the File source. More about that later.
To add the Convert to Black and White action, select the action after which you want to insert the Convert to Black and White action and press Add -> Convert -> to Black and White. The Setup window will automatically open.

You can also open the setup window of an existing Convert to Black and White action by double clicking it or pressing the “…” button on the right side of the action, as shown below.

In our example, we will make use of the “CB – QUESTIONNAIRES” workflow. This workflow is automatically installed with CaptureBites MetaServer.
TIP: The thumbnail on the right will follow you, so you can easily refer to the Setup window. Click on the thumbnail to zoom in.
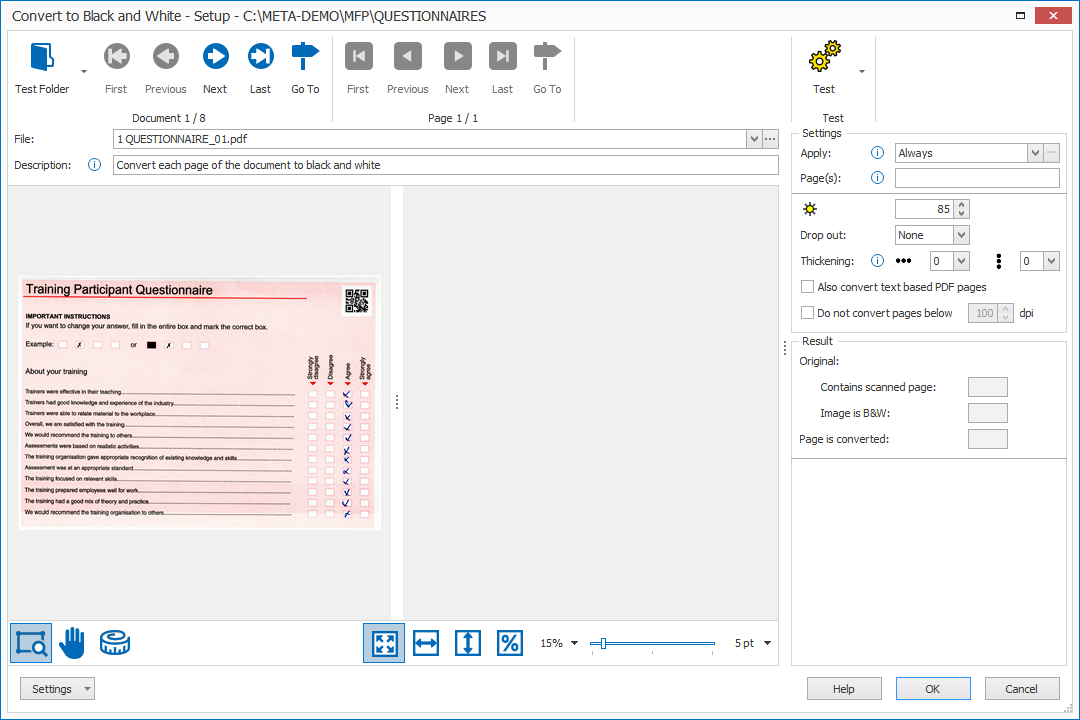
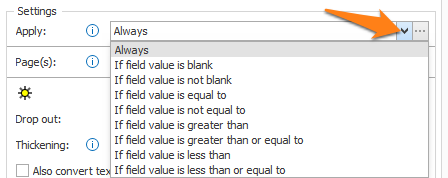
01 – Apply: choose when to apply the action. The default option is Always, which means it will always convert to black and white. Press the drop-down arrow to see all other available conditions. With this feature you can conditionally convert to black and white. For example, to only convert documents of a specific document type.
02 – Page(s): the Convert to Black and White action has the unique ability to only convert specific pages of a document to black and white. You can specify the page number or ranges separated by commas. To convert all pages, leave the field empty.
Some examples:
1-5 = convert the 1st page to the 5th page
1,3, -1 = convert the 1st, the 3rd and the last page
-1 = convert the last page
2–1 = convert the 2nd page to the last page
1, 3-5, -2 = convert the 1st page, 3rd to the 5th page and the page before the last page.
03 – Brightness: by increasing the brightness value, you make the image brighter. This can be useful when working with documents that contain a lot of noise or have a background pattern, like the document in the screenshots below.
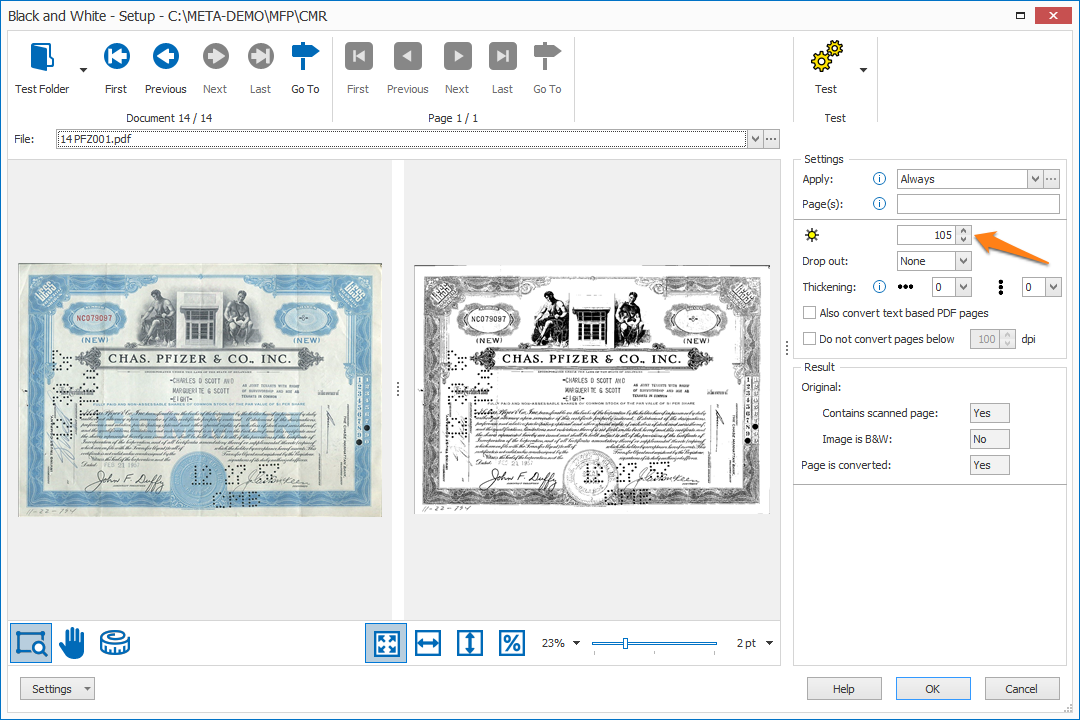
Default brightness (105): the watermark and background pattern are suppressed and produces clearer printed text.
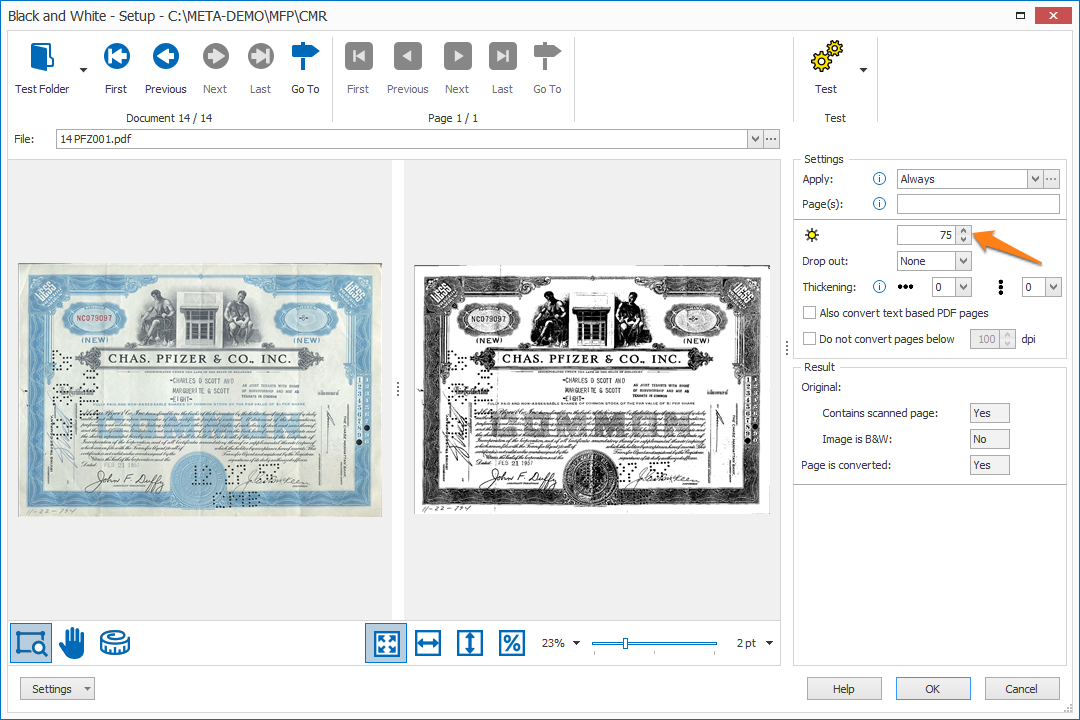
Lower brightness (75): the watermark and background patterns start showing, making the file size larger and less readable.
Reduce or increase the brightness level based on your desired output.
04 – Drop out: when working with documents with lines, details and labels in red, green or blue, you can filter these by using the drop out setting.
Using our example, the questionnaire contains red boxes, lines and a red background. When testing the convert to black and white settings without Drop out, you can see that the boxes are still faintly visible along with the red arrows and lines.
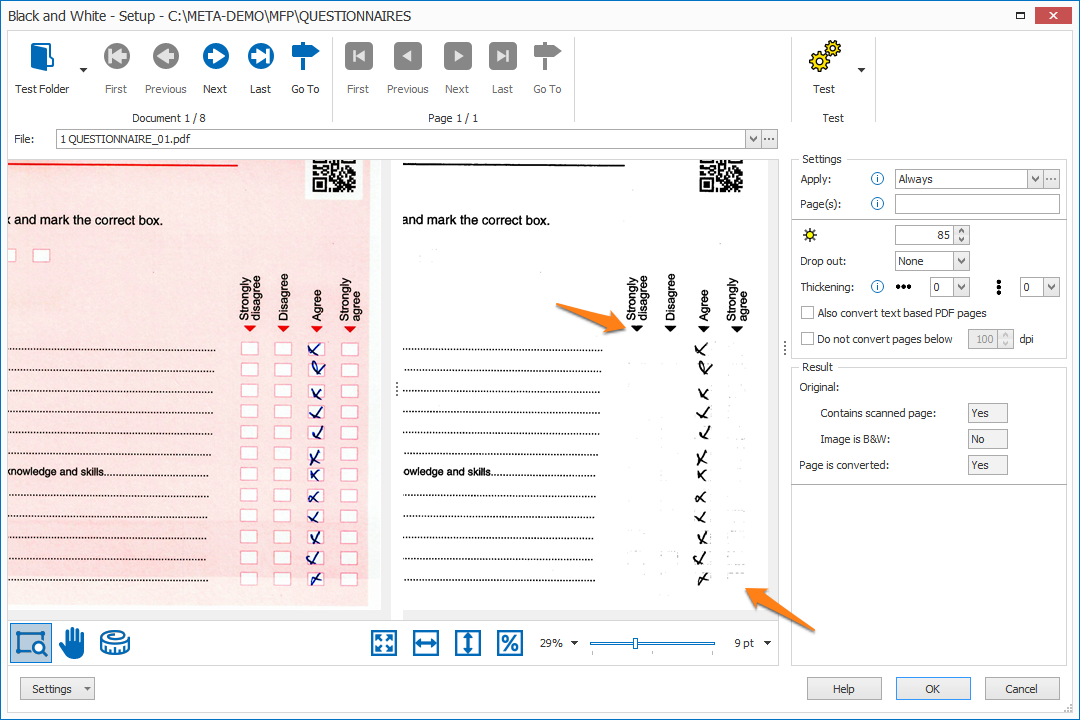
If you don’t want these details in your output, you can filter them out by setting the Drop Out option to “Red”.

Set the Drop Out option based on your desired output.
05 – Thickening: when you need to convert images with dot matrix printed text to black and white, you can use this option to make the text bolder in the selected direction(s). This can improve text readability.
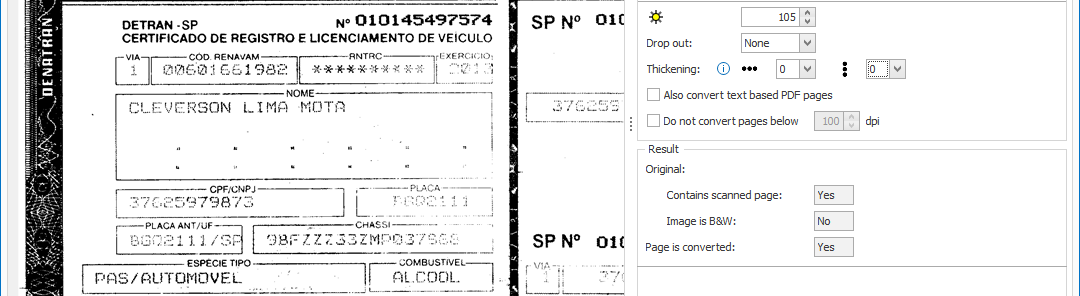
Without thickening, the dot-matrix text is faint.
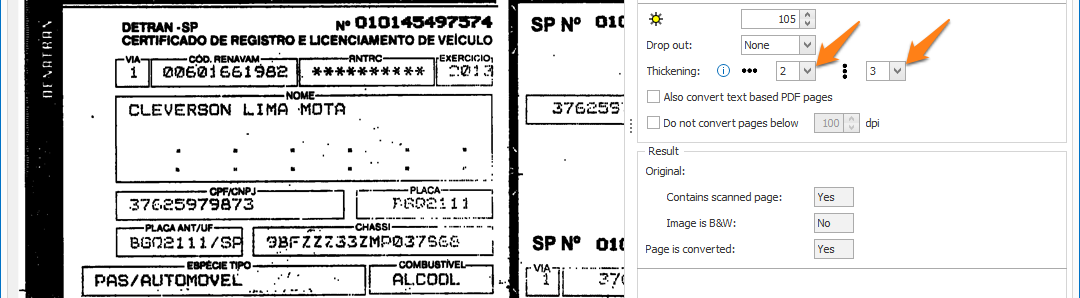
By increasing the thickening value, the gaps are filled between the dots, making the text more readable.
06 – Also convert text-based PDF pages: text-based PDFs, also known as electronic PDFs, contain computer text. They are typically generated by a text-editor programs like MS Word, Excel or by invoice or report creation software. By default, the engine doesn’t apply black and white conversion to electronic PDFs because they already have a small file size.
Enable this option to force the engine to convert the electronic text to a black and white image.
07 – Do not convert pages below … DPI: by default, every document will be converted to black and white. Black and white conversion works fine with 150 DPI or higher but may make text unreadable when converting lower resolution images (below 150 DPI). Enable this option to skip pages lower than the specified resolution.
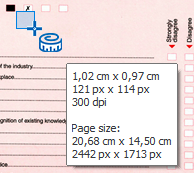
You can check the resolution of your current page with the Measure tool.
The viewer controls are used in several MetaServer Setup windows. So, the buttons and shortcuts to zoom, pan, measure the image works in the same way across all those screens.

From left to right:
01 – Zoom on Rectangle: draw a rectangle on the image. The viewer will fit to the rectangle. Single-click on the image to fit it to the whole page. Hold Ctrl to temporarily switch to the Pan tool, Shift+Ctrl to temporarily switch to the Measure tool.
02 – Pan: pan / move around a zoomed image. Hold Shift to temporarily switch to the Zoom tool, Shift+Ctrl to temporarily switch to the Measure tool.
03 – Measure: measure objects on the image. You can see the zone’s dimensions in cm/inches (depending on your regional settings) and in pixels. It also shows the page’s resolution in DPI and the page size in cm/inch (depending on your regional settings) and pixel.
We recommend you scan your documents with a resolution of 300 DPI for the best OCR result and compact file size.
This tool is useful when you only want to apply black and white conversion for pages lower than a certain resolution. This can be configured with the Do not convert pages below … DPI option.
04 – Fit Page to…: you can fit the page to the viewer window, width, height and original size (this means that 1 pixel on the image matches 1 pixel on your display).
05 – Zoom slider: slide to the left to zoom out, right to zoom in on your image. You can also specify the zoom-range based on the font-size (in pt).
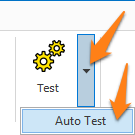
01 – Test button / Auto Test Mode: press the Test button to show the black and white version of the current page and get additional information like if the original page was scanned or electronic or already black and white and if the resulting page was actually converted.
Auto test: press the drop-down arrow next to the Test button to enable Auto Testing. With this you can automatically test each document as you browse through them using the blue document navigation buttons.
NOTES:
Electronic / Text-based PDFs are generated by a computer program like MS Word an Invoice or report creation software etc. Text-based PDFs contain computer text represented by fonts. This type is very compact and if you convert it to a black and white image, the size will typically increase. That’s why we skip the conversion of these PDFs by default.
The TIF format only supports images. Consequently, if you convert a text-based PDF to TIF, it is always converted to an image and the TIF version of a Text based PDF will be typically larger than the text-based PDF.
Scanned / Image-based PDFs contain an image of each of the pages of the document. The black and white version is typically between 15-20 times smaller than the color version. The TIF version and the PDF version of a scanned PDF are typically equal in size.
MetaServer automatically knows when a document is text or image based. By default, in case the page is text-based, black and white conversion will not be applied. In case of a scanned image, it will be converted to black and white. You can change this by enabling the Also convert text-based PDF pages option.
If black and white conversion is applied, the Page is converted value will indicate Yes.
02 – Original: information about the original page.
Contains scanned page: signifies if the original image was scanned or had electronic text.
Image is B&W: signifies if the original image was already black and white.
03 – Page is converted: signifies if the page was converted.
TIP: you can copy the current settings and paste them in another setup window of the same type. Do this by pressing the Settings button in the bottom left of the Setup window and by selecting Copy. Then open another setup window of the same type and select Paste.


To export the converted documents, expand the File Source(s) list in your export action(s) and select “Processed PDF” or “Processed TIF”.
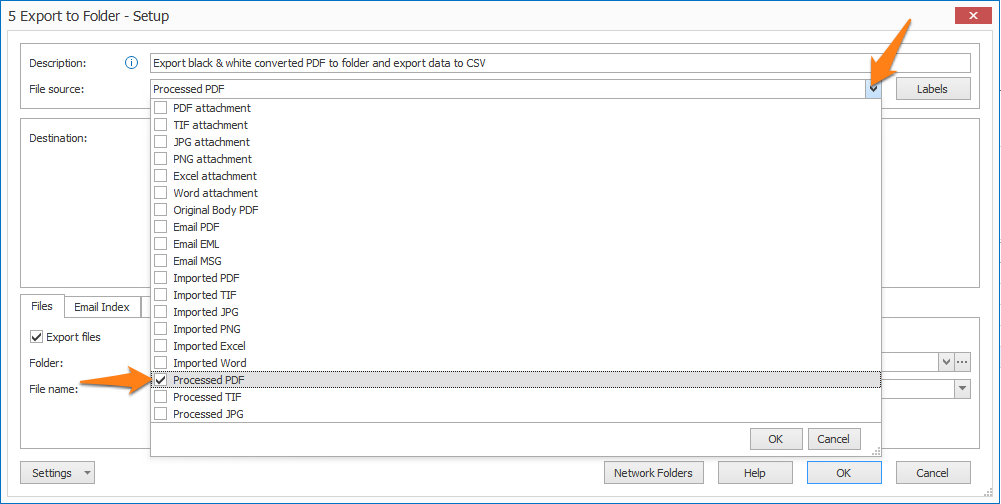
File source selection in Export to Folder
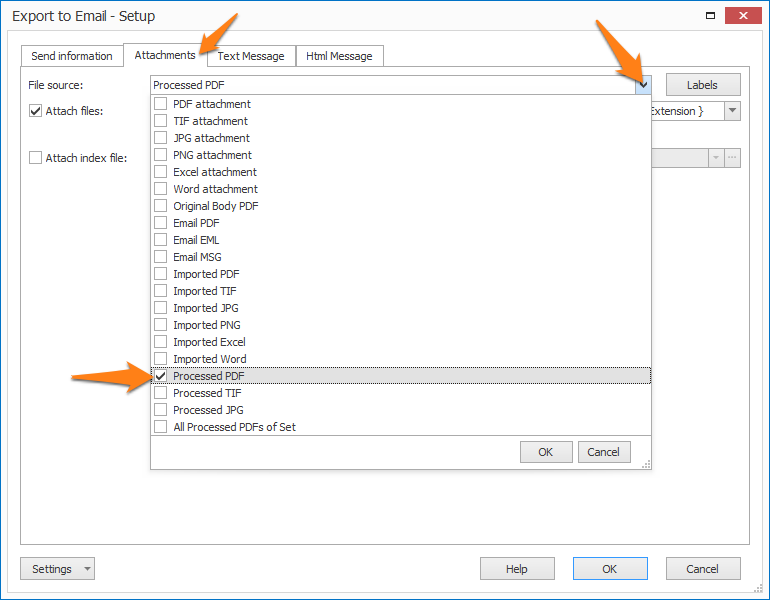
File source selection in Export to Email, if you want to attach the converted document to the email