MetaServer > Help > Convert to Searchable PDF
160-020 MetaServer Convert – Convert to Searchable PDF
IMPORTANT: To enable the searchable PDF action, you first need to install the MetaServer Searchable PDF Module.
With MetaServer’s Convert to Searchable PDF action, you can convert image-based (scanned) PDF, TIF, JPG, PNG, Word and Excel files to searchable PDF files.
It has the unique capability to make a PDF partially searchable to reduce processing time. For example, if you would only want to make the first 3 pages searchable, you would specify pages “1-3” in the settings. More about this later.
To output Searchable PDF:
Step 1: add the Convert to Searchable PDF action just before the Export action(s) used to output the Searchable PDF.
Step 2: in your Export action(s), select “Processed PDF” as File source. More about that later.
IMPORTANT: If you have set a specific JPEG Compression in your Import from Folder or Import Email action, the Q-factor used within the Convert to Searchable PDF action, but only when using the Tesseract engine, will take precedent.
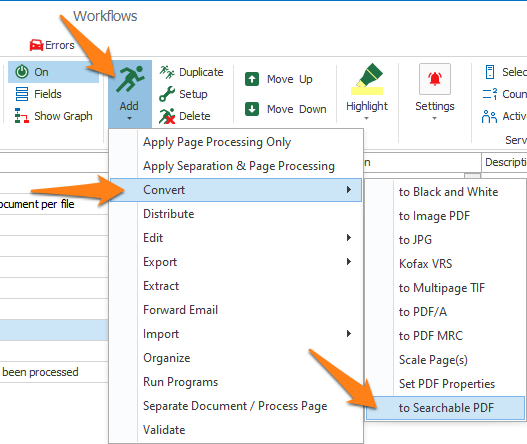
To add a Convert to Searchable PDF action, select the action after which you want to insert the Convert to Searchable PDF action and press Add -> Convert -> to Searchable PDF. The Setup window will automatically open.
You can also open the setup window of an existing Convert to Searchable PDF action by double-clicking the action or by pressing the setup button on the right side of the action or in the ribbon, as shown below.

In our example, we will make use of the “CB – DPE” workflow. This workflow is automatically installed with CaptureBites MetaServer.
TIP: The thumbnail on the right will follow you, so you can easily refer to the Setup window. Click on the thumbnail to zoom in.
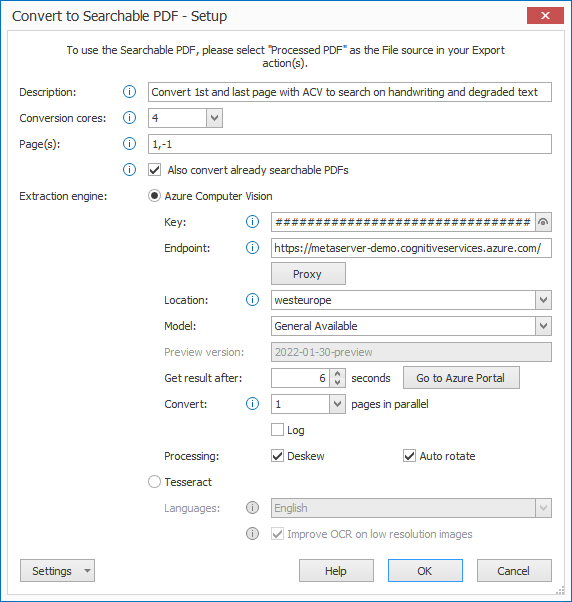
First, add a description to your action.
01 – Conversion cores: by default, the Convert to Searchable PDF action supports up to 4 conversion cores. You can change the number of conversion cores in the Cores setup in Server tab.
In the Cores setup, you can also change the number of pages that are processed in parallel.
Small documents (< 20 pages) process faster by increasing the number of conversion cores and leaving the number of parallel pages converted low (between 1 and 3).
Large documents (> 20 pages) process more efficiently by keeping the number of conversion cores low (1 or 2) and setting the parallel pages converted higher.
IMPORTANT: The conversion cores multiplied by the number of pages converted in parallel should not exceed 32.
02 – Page(s): the Convert to PDF action has the unique ability to make a PDF partially searchable. You can specify the page number or ranges separated by commas. To convert all pages, leave the field empty.
Some examples:
1-5 = convert the 1st page to the 5th page
1,3, -1 = convert the 1st, the 3rd and the last page
-1 = convert the last page
2–1 = convert the 2nd page to the last page
1, 3-5, -2 = convert the 1st page, 3rd to the 5th page and the page before the last .
03 – Also convert already searchable PDFs: disable this option if you want to skip processing PDFs that are already searchable. Keep this option enabled if you want to update any existing searchable PDFs, using the specified extraction engine.
IMPORTANT: Purely text-based, computer-generated PDFs, also known as “electronic PDFs”, are always skipped and never converted to avoid losing the original text.
With “Searchable PDF”, we mean a page containing an image with a (hidden) text layer.
04 – Extraction engine: here you can choose your extraction engine.
1) Azure AI Vision / Azure AI Document Intelligence: if you have a license of the Extract Text (Azure AI Vision) or Extract Text (Azure AI Document Intelligence) module, you can choose to convert your documents using the Azure AI Vision or Azure AI Document Intelligence (“Read” model) engine. This makes it possible to also make handwritten and degraded machine printed text searchable.
We also recommend this engine if your language is not listed in Tesseract’s supported languages (see below).
You can refer to Microsoft’s documentation for both engines below:
– Azure AI Vision’s complete list of supported languages
– Azure AI Document Intelligence (“Read” model) complete list of supported languages
2) Tesseract: If you don’t have a license of either “Azure AI” modules, and your documents are scanned in high quality (300 DPI, color) without any handwritten data (or it’s not important that the handwritten data is converted to searchable text), the free, default Tesseract engine is also a good option.
You can find the list of supported languages for Tesseract below:
English
Afrikaans
Croatian
Czech
Danish
Dutch
Finnish
French
German
Greek
Hungarian
Icelandic
Irish
Italian
Latvian
Norwegian
Polish
Portuguese
Romanian
Russian
Serbian
Slovakian
Slovenian
Spanish
Swedish
Turkish
Welsh
Your endpoint will be automatically populated when you have selected your resource.
In the screenshot above, we have selected an Azure AI Document Intelligence resource called “metaserver-ai-di”.
02 – Deskew & Rotate: if your documents are skewed or rotated incorrectly, you can enable the Deskew and/or Rotate option to optimize Text extraction. It will also result in a corrected version of the page(s).
01 – Languages: press the dropdown arrow to select the language used in most of your documents.
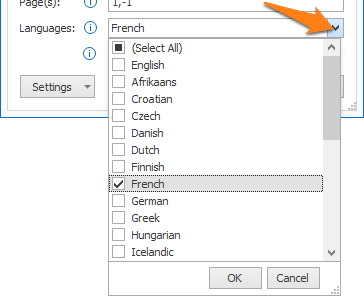
You can select multiple languages, but we recommend to only do so when you have many documents of all selected languages. If it’s exceptional that you have a document in another language, only select the main language. Selecting more languages will slow down the conversion process.
IMPORTANT: If you don’t see all the languages listed, please install the MetaServer Searchable PDF Module.
02 – Improve OCR on low resolution images: to create a searchable PDF with the Tesseract engine, we make use of OCR (Optical Character Recognition) technology. This works best with documents scanned in a resolution between 300 and 400 DPI. If you have document scans with a lower resolution, like 100 or 200 DPI, we recommend enabling this option to improve the OCR result. This option won’t affect 300 DPI or higher resolution scans.
TIP: you can copy the current settings and paste it in another setup window of the same type. Do this by pressing the Settings button in the bottom left of the Setup window and by selecting Copy. Then open another setup window of the same type and select Paste.


To export the documents as searchable PDF, select “Processed PDF” as the File Source in your export action(s).
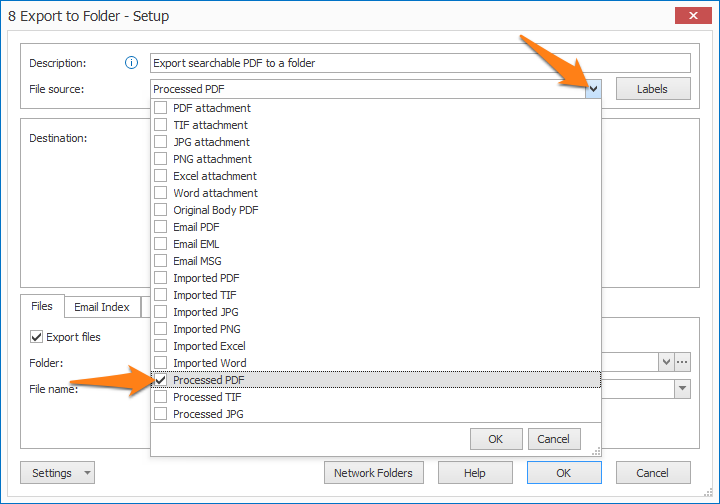
File source selection in Export to Folder
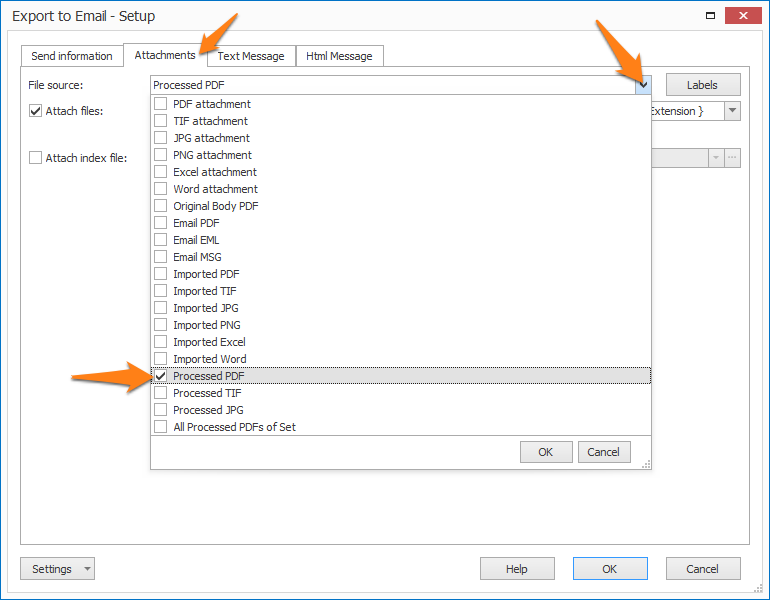
File source selection in Export to Email, if you want to attach the searchable PDF to the email