060-520 MetaTool Extraction – Advanced OCR Rule
Advanced OCR is defined in the MetaTool Extract tab.
Press the Add button and select Zonal Extraction / Advanced OCR to add the extraction rule.
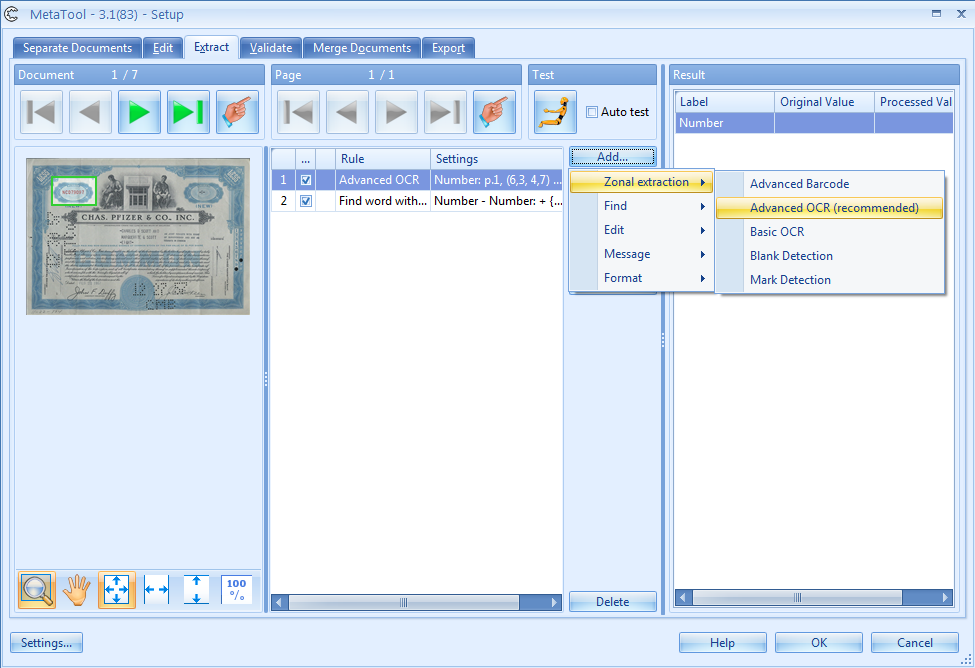
The Advanced OCR Setup window opens.
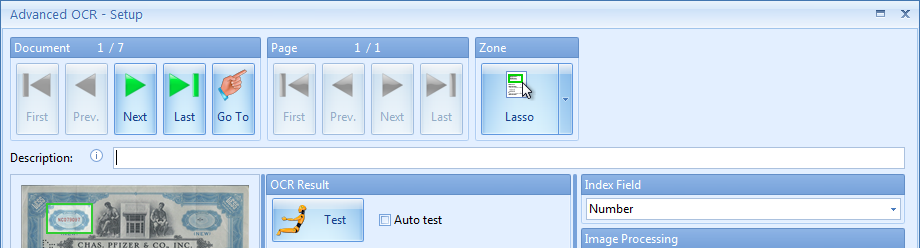
Select the index field to hold the extracted data, and select the zone you would like to extract text from. The zone can be full page, top/bottom half or a custom zone specified with the lasso tool.
After that you can adjust the Image Processing and/or OCR settings. We’ll start with the Image Processing settings first.
01 Advanced OCR Rule – Image Processing Settings
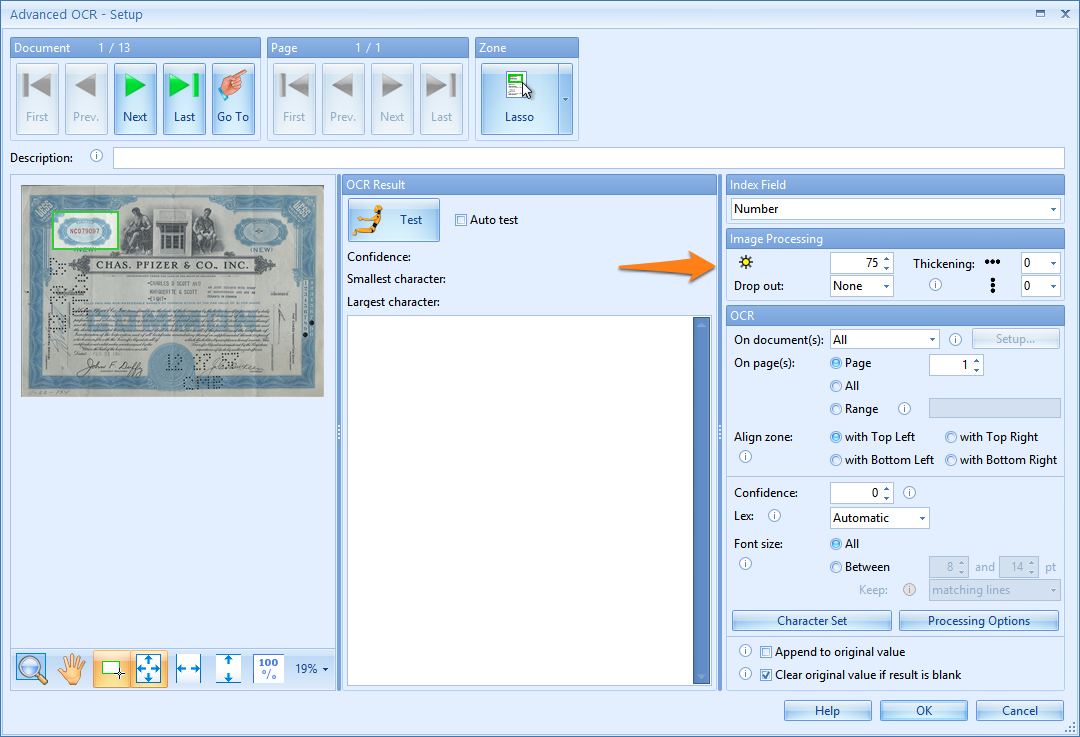
02 – Brightness: (represented by the small sun symbol)
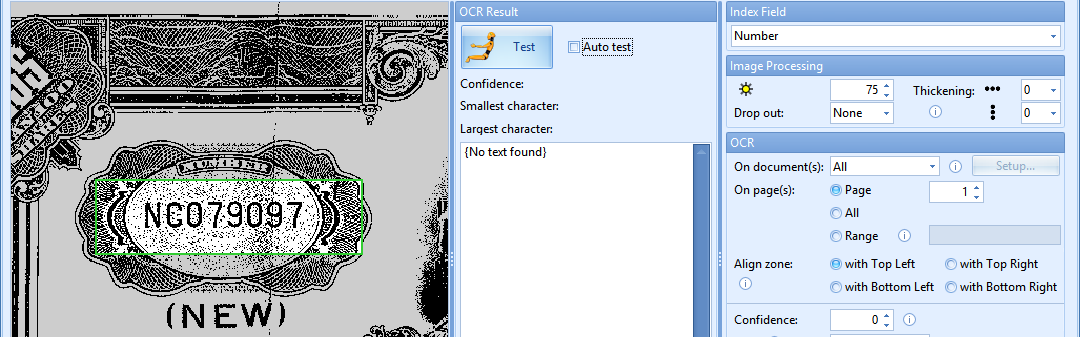
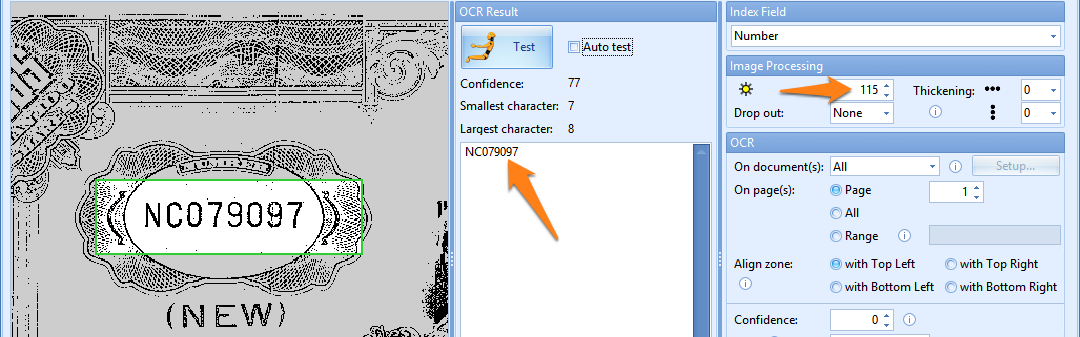
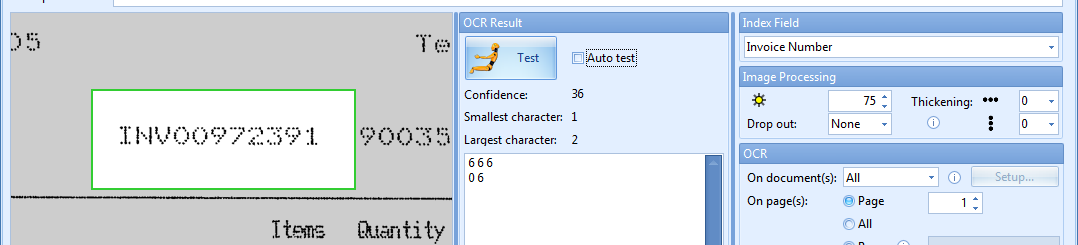
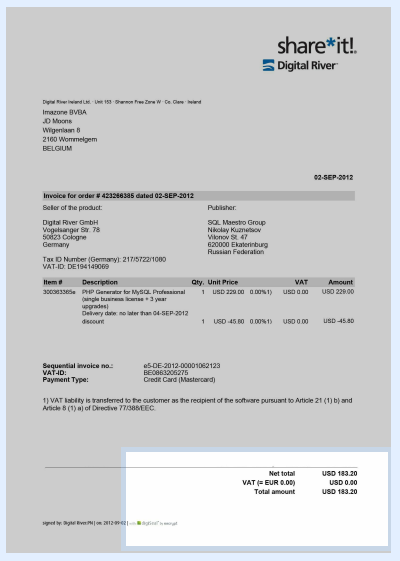
By increasing the brightness value, you make the scanned image brighter. This can be very useful when working with documents that contain a lot of noise or background pattern, like the document in the screen shot below.
If you want to extract the number in the left top corner, select the zone and press the Test button (button with the yellow test dummy icon). You will notice that the default brightness value does not return a correct result. Increase the brightness value to suppress the background noise to get a correct OCR result.
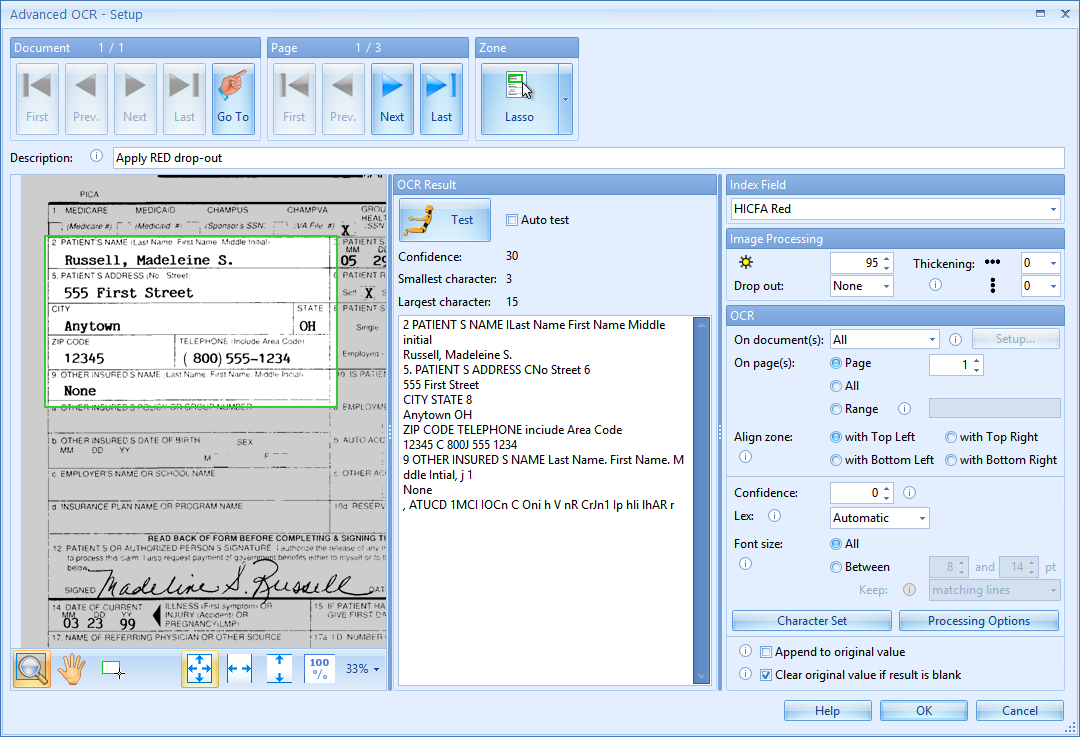
03 – Drop out: When working with forms with lines and labels in red, green or blue, we can filter these by using the drop out setting.
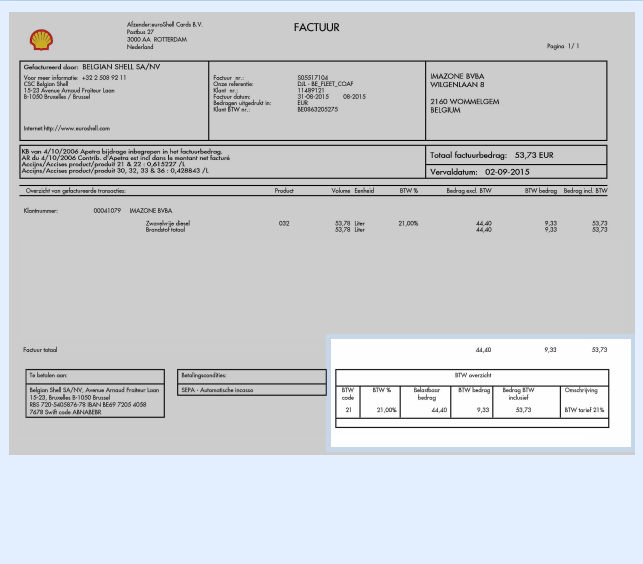
The following example contains such a document and we would like to extract only the variable data and ignore the red lines and labels. When we test the OCR settings, we get some unnecessary data like the labels on the form. Red lines touching the variable text may also return a wrong OCR result.
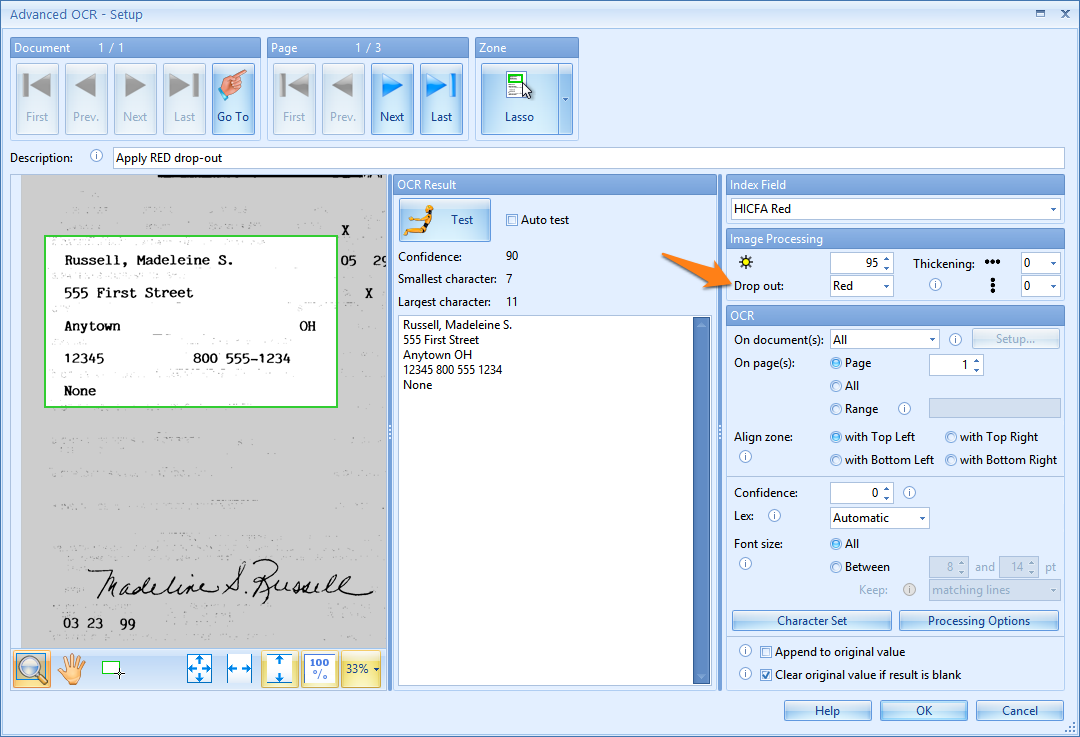
We can fix this by enabling Drop out. Press on the drop down menu besides the Drop out setting and select the color you wish to filter out, in this case red. Now OCR only read the requested values inside the red boxes.
04 – Thickening: when extracting dot matrix printed text, you can use this option to make the text bolder in the selected direction(s). The thickening removes the gaps between the dots and makes each character solid. This improves the recognition considerably.

05 – Append to original value: the result will be added to the value that was already in the index field. Disable this option to overwrite the previous value with the new result.
06 – Clear original value if result is blank: when the OCR process returns nothing, any value already in the index field generated by previous rules or by Kofax Express will be cleared.
02 Advanced OCR Rule – OCR Settings
01 – On Document(s): you can select a condition by pressing the drop-down arrow:
1) First document: only the first document of the batch will be processed.
2) If field value is equal to…: only documents that pass this condition will be processed. You can set up the condition by pressing the Setup button.
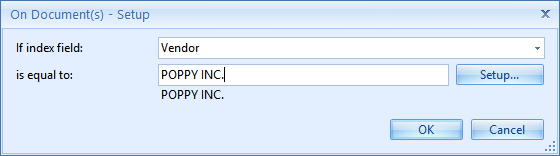
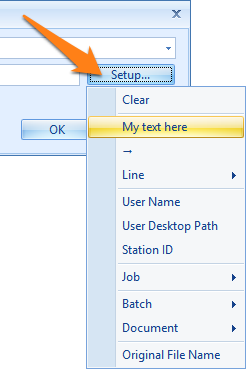
You can set a fixed value or select different system and index values to compose your value by pressing the Setup button.
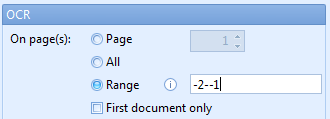
02 – On Page(s): Sometimes the information is on another page than page 1. With this option, you can exactly define which page to extract data from. You can choose between the 4 following options:
1) Page: only reads the page with the given page number
2) All: reads all the pages of the whole batch
3) Range: type in the page numbers or ranges separated by commas. Negative numbers identify pages starting from the end of the document. For example: -2 –1 has a range of the second last page to the last page
4) First document only: only reads the pages of the first document
03 – Align Zone: when documents in a batch are of varying sizes or mixed orientations (portrait and landscape mixed together), you can align your OCR zone in relation to any of the 4 corners of the image: the top left or right corner or the bottom left or right corner. That way the OCR zone will be positioned correctly on all sizes and orientations.
Bottom right alignment of an OCR zone on a portrait oriented image
Bottom right alignment of the same OCR on a landscape oriented image
04 – Confidence Level: Characters with a confidence level lower than the set confidence level, will be ignored and not returned in the result. If set to 0, all characters are accepted.
This can be useful to make sure that critical data is extracted correctly, otherwise it will show up in validation when the confidence is low.
For example, if you need to extract a highly crucial account number of 8 digits, set the confidence level to 95. Any characters lower than 95 will be rejected, resulting in an account number with less than 8 digits. If you set a validation rule in the Validation tab that only accepts account numbers with 8 digits, any account number missing the lower confident digits will need to be manually corrected during validation.
05 – Lex: Lex processing is to avoid confusion between look-a-like characters such as 0 and O, 1 and I, 8 and B. It is language independent. By enabling Lex, you can improve accuracy by interpreting each character in context of the characters around it. Do not enable Lex when working with zones with random character patterns. When in doubt, select the default setting (Automatic).
06 – Font size: Here you can choose to set up a range of acceptable font sizes to only return lines or words containing at least one character within the specified range. You can even choose to only keep the matching characters.
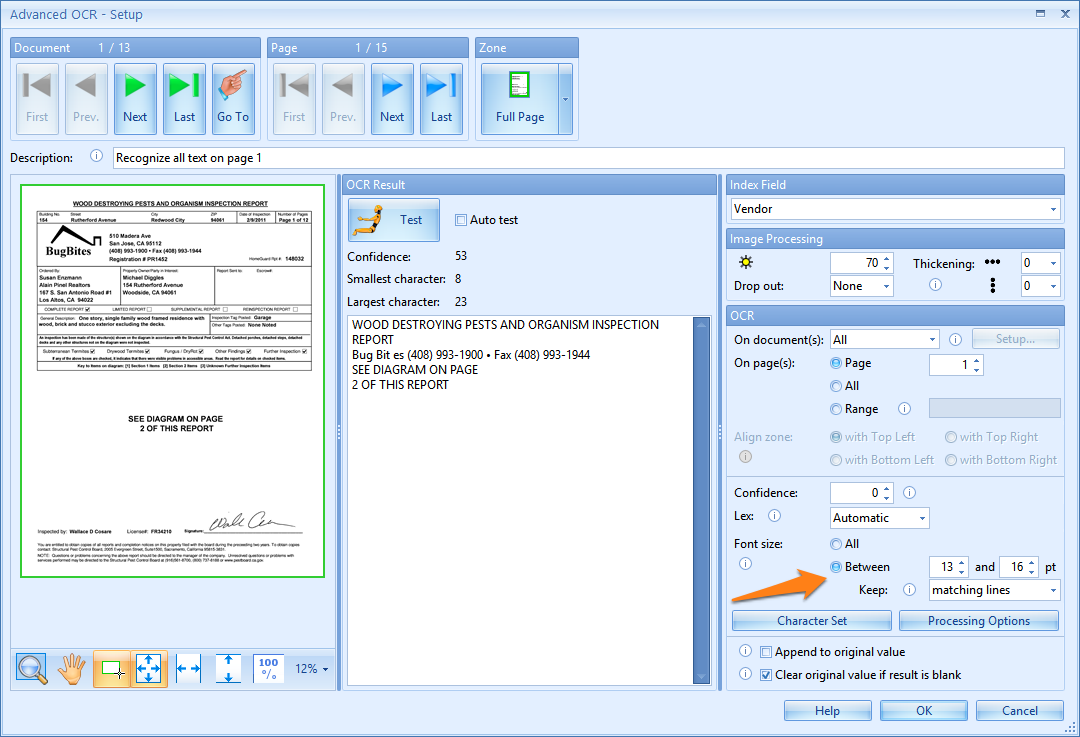
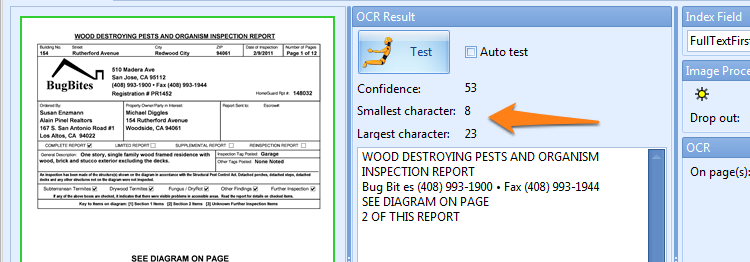
To help you in defining the correct font sizes, the font size of the smallest and largest character is displayed above the OCR test result.
07 – Character set: Use the character set to exclude or include certain characters during extraction.
This can avoid confusion with other characters that never occur in the text zone. For example, if the zone only contains a numeric value, disable all alphabetic characters to avoid confusion between 0 and O or 1 and I.
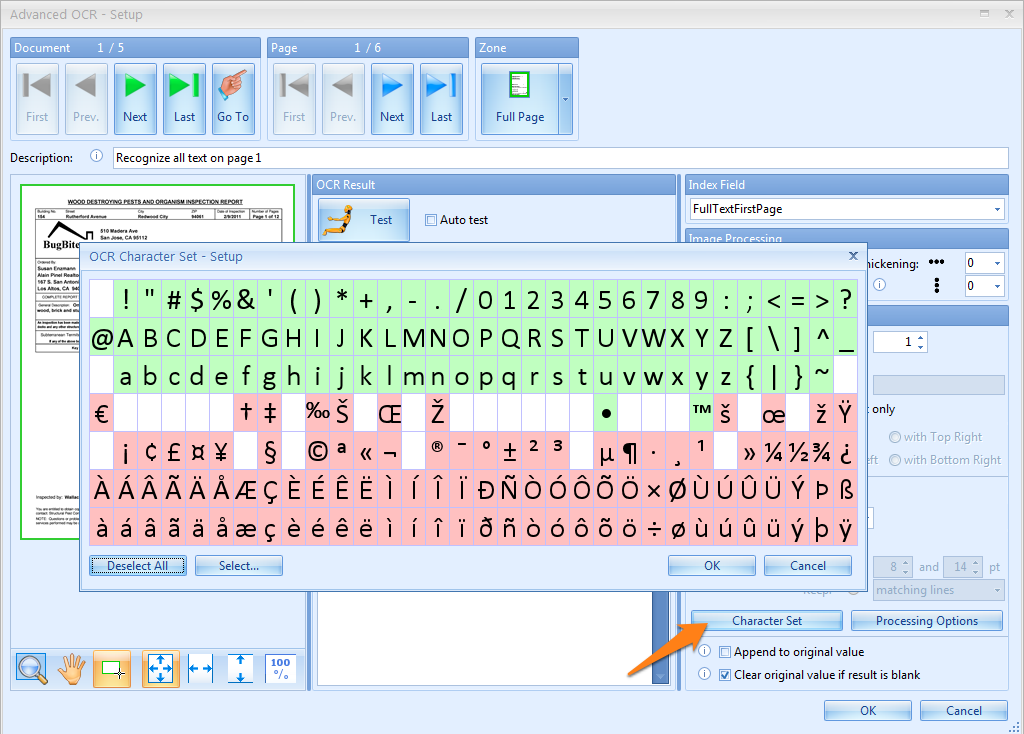
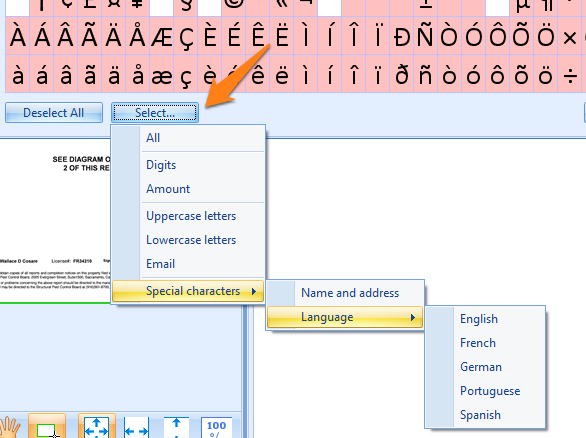
You can also choose preselected character sets by first pressing “Deselect All” and then, under the select button, you can choose between digits, upper- and lowercase letters, a characters set matching a specific language etc.
TIP: Do not use the character set to exclude elements from text.
For example, if you want to read 123/456/789 and reject the / symbols, you may be tempted to exclude the / from the character set. However if you do so, the / symbol will most likely be recognized as a 1 which makes things actually worse. Better is to leave the / symbol in the set and remove it with a “Remove characters” rule.
08 – Processing Options: there are 3 types of processing options:
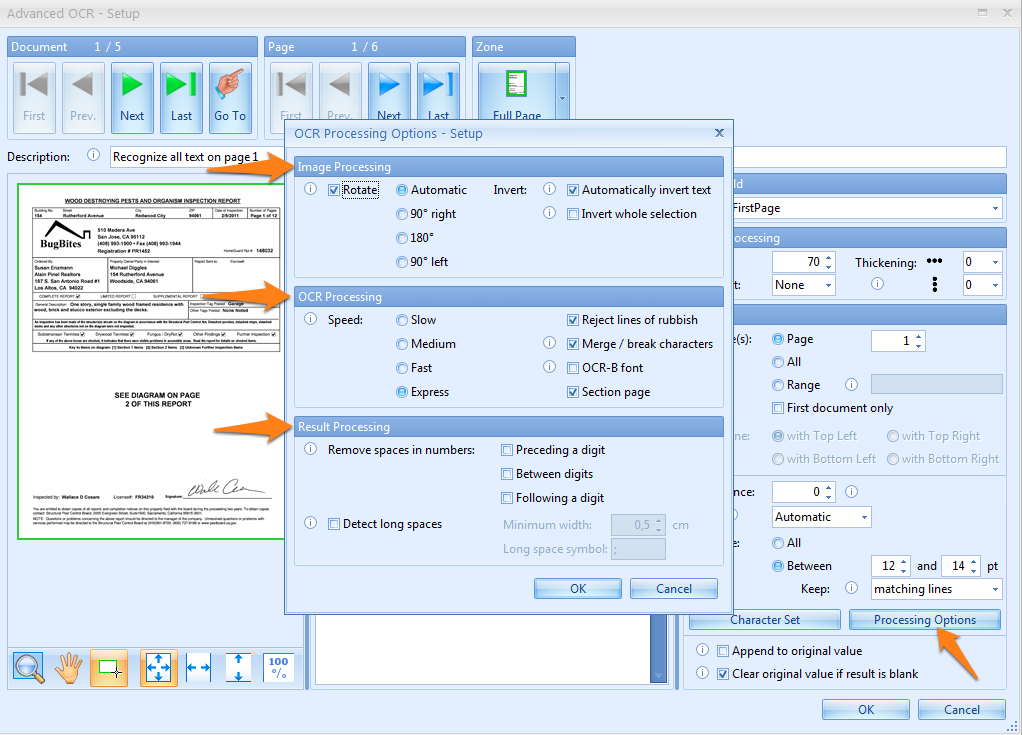
1) Image Processing: here we can adjust the rotation and inversion settings.
Rotate: the selection will be rotated as specified before OCR processing
Invert: automatically detects inverted text object in the selection (white text on dark background) and inverts them before sending the selection to the OCR engine. You can also choose to invert the whole selection.
2) OCR Processing: here we can adjust the processing speed and quality of the OCR engine.
Speed: the speed option indicates how exhaustive the OCR progress should be looking for improvements. There is a small loss in accuracy from slower to faster speed options.
Reject lines of rubbish: this detects random characters with a low confidence level caused by noise in the image. Enable this option to automatically delete lines of rubbish.
Merge/break characters: enable this option when characters stick together. This technology uses font size detection to determine the break points.
OCR-B font: only enable it when the text you want to extract is created with the OCR-B font.
Section page: Experiment with this setting when there are different font sizes on the same line. Sometimes sectioning may drop results when different font sizes occur on the same line.
3) Result Processing: final filtering of the OCR result
Remove spaces in numbers: full text OCR sometimes generates redundant spaces in numeric data. You can reject spaces preceding a digit, between digits or following a digit.
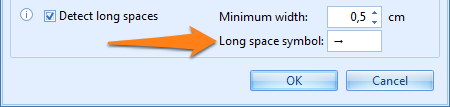
Detect long spaces: replaces long spaces with a specified symbol in the OCR result.
A long space is a space between two words longer or equal to the specified length. By default long spaces are represented by the → symbol and by default the minimum length of a long space is 0,5 cm or 1/5th of an inch.
Handling long spaces can be important when trying to extract amounts. In some regions $95 50 means $95.50. In other words the small space represents a decimal point. In such cases it is important to distinguish small spaces and long spaces.