MetaServer > Help > MFP panel
MetaServer – MFP Panel
01 What is the MFP panel?
Setting up a physical MFP is a bit of a hassle for a quick demonstration of MetaServer. To simulate this, you can use a digital MFP panel with configurable buttons. Like on a real MFP, you would define hot buttons for each workflow that “scan” to the correct folder watched by the corresponding workflow.
You press one of the scan buttons, it copies demo documents to the watched folder and MetaServer does the rest.
02 How to use the MFP panel
Step 1: You can find the MFP panel under:
C:\CaptureBites\MFP panel
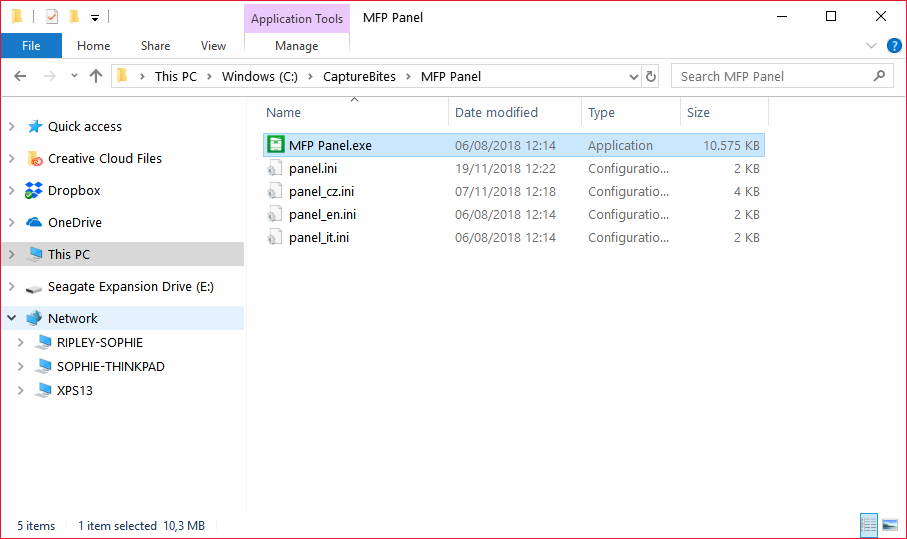
Step 2: Create a shortcut of “MFP panel.exe” on your desktop.
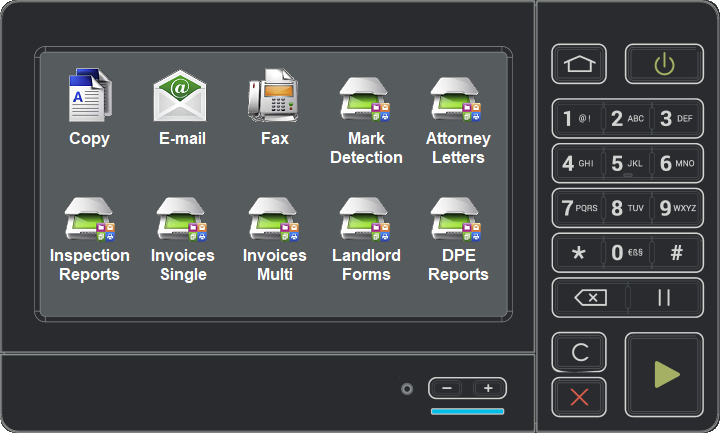
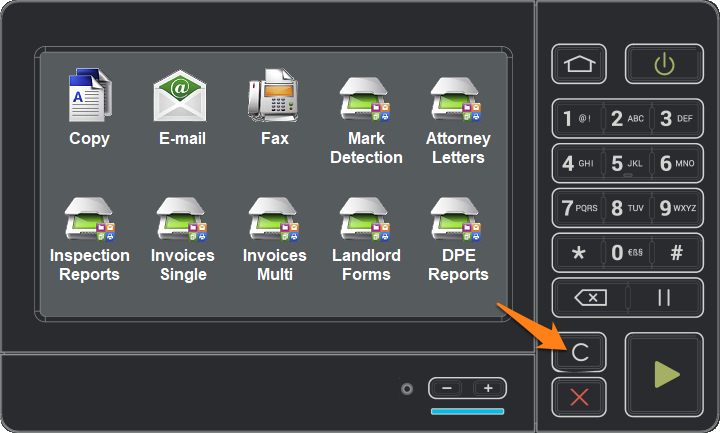
MFP Panel – Button overview
A quick overview of each button’s associated workflow in the default configuration of the MFP panel:
| Copy, E-mail, Fax: | Nothing, not linked to any workflow |
| Mark Detection: | CB – QUESTIONNAIRES |
| Attorney letters: | CB – FLOATING DATA |
| Inspection Reports: | CB – INSPECTION REPORTS |
| Invoices – Single: | CB – INVOICES US (goes directly to Extraction) |
| Invoices – Multi: | CB – INVOICES US (goes through the Organizer first) |
| Landlord Forms: | CB – DOCUMENT CLASSIFICATION (exports to other CB – DOCUMENT CLASS workflows) |
| DPE Reports: | CB – DPE |
When you hover over each button, you can see the path of the demo folder and the watched folder and the action that will be executed when pressed.
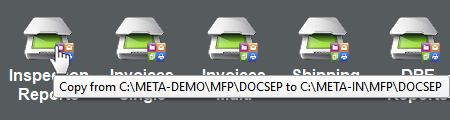
When you press a scan button’s label, the folder containing the corresponding demo documents will open.

Other interesting buttons for demonstrations:
– Close the panel (Esc)
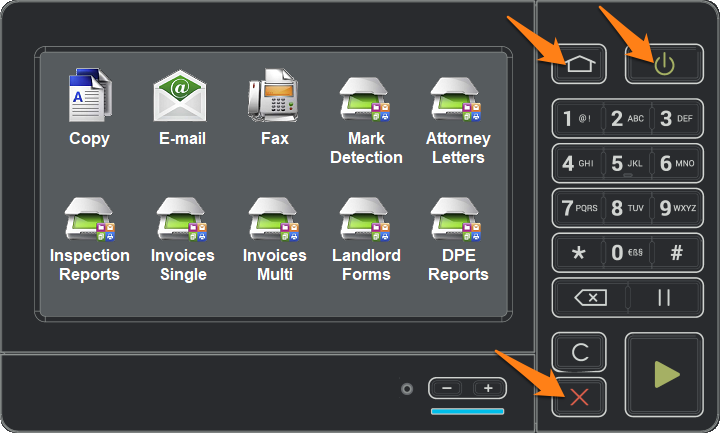
– Reset the Export folder. This deletes everything in the MFP export folder.
03 How to edit the MFP panel
Step 1: Go to “C:\CaptureBites\MFP Panel” and look for the main “panel.ini” file.
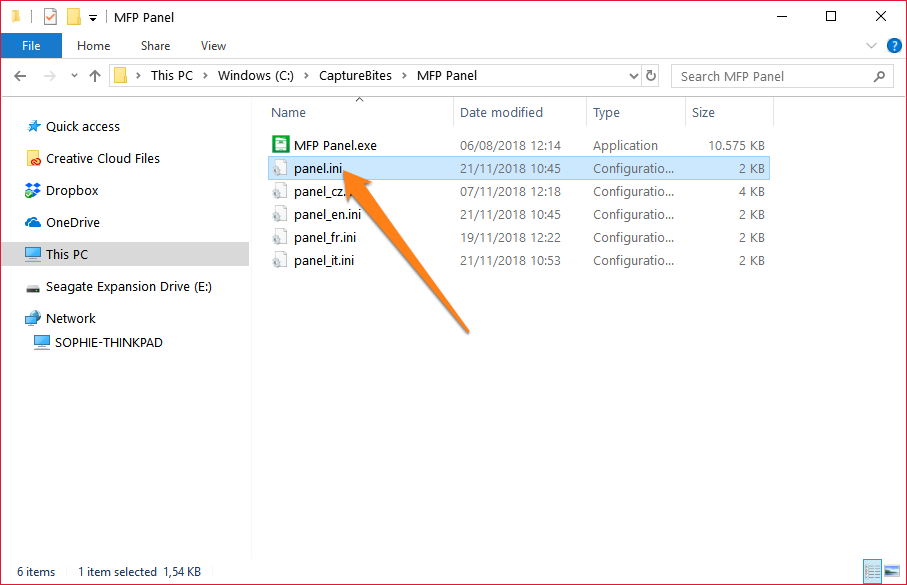
NOTE: it’s recommended to back-up your main panel.ini file before making any edits to it.
Step 2: Open the panel.ini file in a text editor of choice. In the example shown below, we’ve used Notepad++.
Step 3: Edit the paths and labels for any button you want to change. You can refer to the comments in each section for a description.

Step 4: Save your .ini file and run your MFP panel.