MetaServer > Help > Extract > Extract Text (Azure AI Vision)
120-140 Extract – Extract Text (Azure AI Vision)
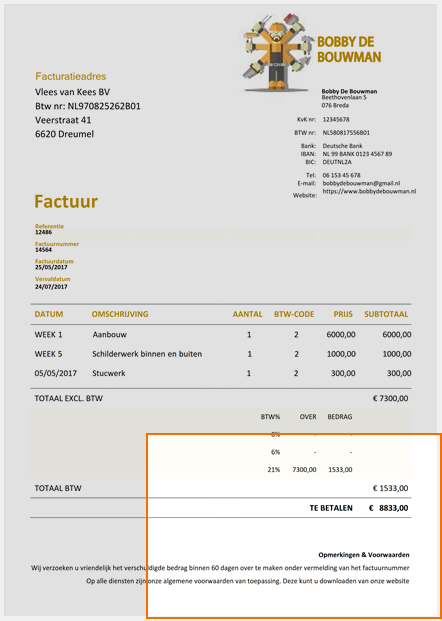
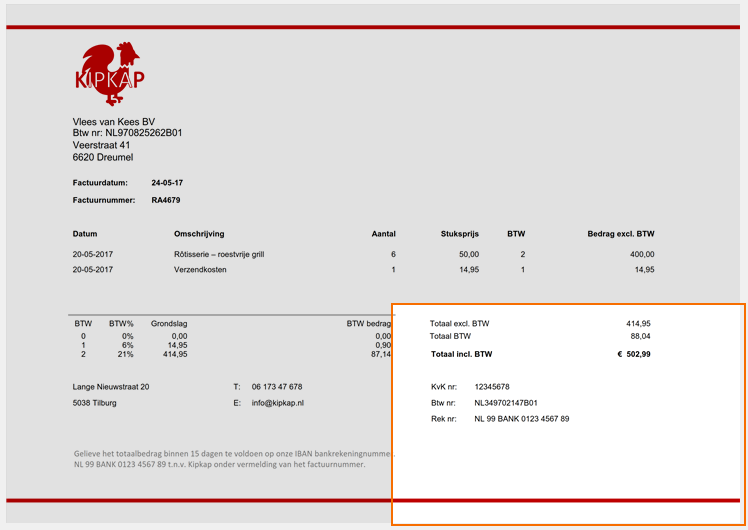
With MetaServer’s Extract Text (Azure AI Vision) rule, (FKA “Azure Computer Vision”), you can extract handwritten text, degraded text and deformed images with text (like those produced with a smartphone) from your imported documents and store the extracted data in fields. The results are impressive and are demonstrated in below examples.
You can specify the pages or zones you want to extract information from.
The engine can also read 122 different languages and detects these languages automatically, even in the same text line. Please refer to Azure AI Vision’s documentation for a complete list of supported languages (“Read” column).
For example (results are below each sample):


NOTE: The way the Azure AI Vision engine works, is that you also need to sign up for the Azure service itself. Paid plans are available starting from 1$ per 1000 pages (S1 Plan). There is also a free, 1-year plan where you can test the engine up to 2500 pages per month (F0 Plan).
IMPORTANT: The processing speed in the free plan (F0 plan) is limited to only 1 call per 2 seconds. For the paid plan (S1 plan), the processing speed is 10 calls per second, which is 20 times faster than the free plan.
For more information on how to apply for a key, please refer to the instructions below.
NOTE: For more technical information about how the Microsoft’s Azure AI Vision engine works (API, OCR, etc.) and how they handle Data privacy and security, please refer to the Microsoft Azure AI Vision documentation.
Extract Text rules are defined in a MetaServer Extract or Separate Document / Process Page action.
To add this rule, press the Add button and select Extract -> Text (Azure AI Vision).

TIP: The thumbnail on the right will follow you, so you can easily refer to the Setup window. Click on the thumbnail to zoom in.

If you haven’t done so already, you need to first add your “Azure AI Vision” resource in the Azure Resources setup, which can be found in the Admin Client’s Server tab.
You can find more detailed information regarding pricing + instructions on how to apply for an “Azure AI Vision” resource here:
https://www.capturebites.com/metaserver/help/server/#10-02
01 – Resource and Endpoint: select your Azure AI Vision resource using the drop-down arrow. If you don’t see your resource listed, please make sure your resource was added in the Azure Resources setup, which can be found in the Admin Client’s Server tab.
Your endpoint will be automatically populated when you have selected your resource.
02 – Apply: choose when to apply the rule. The default option is “Always”, which means that the rule is always applied. Press the drop-down arrow to see all other available conditions.

A good example of conditional extraction, is if you first try to extract a value using the Extract Text rule (= standard OCR engine) but it doesn’t return a valid result. Only then will you let the Extract Text (Azure AI Vision) rule to extract the value.
This speeds up the extraction process and only uses calls to your Microsoft Azure AI Vision resource when your first search didn’t return a good result.

1) If value of field: press the drop-down arrow to select the field value that needs to be evaluated.
2) is equal to / is not equal to / is greater than /…: enter the other value your field value needs to be compared with. You can also press the drop-down button to select different system and index values to compose your value.

03 – Page: set the page number to where the information is located. The default is page 1.
For example:
– Enter 1 for the 1st page
– Enter -1 for the last page
– Enter 1-3 to extract from page 1 to page 3.
– Leave this empty in case you want to extract all pages (same as 1–1)
– Etc.
If a document does not contain a specific page, it is ignored. For example, extracting page “2,3” on a 2-page document will only extract page 2.
Press the setup button to specify which colors to drop out.

To reset all dropout colors to white (off), you can use the “Reset All Colors” button.
NOTE: The filtered image is only used temporarily to improve text extraction. The processed image keeps all the original colors.
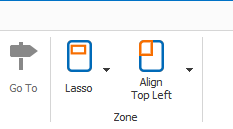
01 – Zone: in the Extract Text (Azure AI Vision) setup window’s toolbar, you will find two Zone tools to specify your extraction zone:

Printed and handwritten text: select this option if your extraction zone contains both printed and handwritten text.
Printed text: select this option if your extraction zone only contains printed text.
Handwritten text: select this option if your extraction zone only contains handwritten text.
In general, we recommend you scan your documents with a resolution of 300 DPI for the best OCR result and compact file size.
For legacy reasons, this setting is retained. We recommend to start using the new Check if confidence is lower than option in the validate rules.
To help you in defining the correct confidence level, you can check the confidence level of each word group in your test result using the “Show info” option. You can also see the highest and lowest confidence level displayed above the test result.

To help you in defining the correct font sizes, you can check the font size of each word group in your test result using the “Show info” option.
You can also see the font size of the smallest and largest character displayed above the test result.

PDF with text: here, you can adjust the length for spaces coming from electronic / text-based PDFs with an existing text layer.
Scanned image (OCR): here, you can choose to let the OCR engine determine the space length (Automatic) from scanned / image-based PDFs and image files (TIF, JPG, etc) or you can adjust the space length using a custom value.
 to searchable PDF")
 to searchable PDF_Example 1")
 to searchable PDF_Example 2")
 to searchable PDF_Example 3")


03 – OCR (Yes/No): there are many types of PDFs. The most common PDF type used with MetaServer are Text-Based PDFs and Image-based PDFs.
Electronic / Text-based PDFs are generated by a computer program like MS Word, Invoice / Report creation software, etc. Text-based PDFs already contain computer text represented by fonts. This text can directly be extracted without any OCR processing.
Scanned / Image-based PDFs contain an image of each of the pages of the document and require OCR (Optical Character Recognition) to convert the images to computer text.
MetaServer automatically switches between electronic text extraction, in case of text-based PDFs and OCR extraction, in case of a scanned image.
This way, your Microsoft Azure AI Vision resource is only called when OCR is required. This saves processing time and calls.
If OCR is applied, the OCR value will indicate Yes.
If you want to see the text-based PDF detection in action, test the following documents:
C:\META-DEMO\MFP\CMR\CMR-01.pdf (image-based PDF)
C:\META-DEMO\MFP\CMR\CMR-02e.pdf (text-based PDF)
The text-based PDF won’t apply any OCR and will show the exact same text of the text-based PDF in an instant. Extracting a text-based PDF is much faster than an image-based PDF because the latter needs to have OCR applied.
The below screenshot shows the result of the text-based “CMR-02e.pdf”:
Even though a line goes straight through some of the text, the text extraction is still perfect because the line is just an object completely separate from the text. The OCR value in the Result panel indicates No.

If you set the confidence level higher than this level, characters with a confidence level below the set level will be filtered out of the result.
TIP: you can copy the current settings and paste them in another setup window of the same type. Do this by pressing the Settings button in the bottom left of the Setup window and by selecting Copy. Then open another setup window of the same type and select Paste.


You are also able to run the Azure AI Vision engine on-premise using Containers through the Docker engine.
Running the engine on-premise can be useful for security and data governance requirements.
You can find a detailed guide on the prerequisites and how to set up your AZVI container here.