MetaServer > Help > Extract > Replace Text
120-440 MetaServer Edit – Replace Text
With MetaServer’s Replace Text rule, you can clean up text or correct OCR mistakes and make it easier to return correct data.
This rule can be useful when you need to change your text for further processing or for making it easier to find the required data in the text.
A classic example are supplier invoices. Invoices have an invoice date, number, total amount,… but the data isn’t always in the same format. Dates, for example, can be written as “August 15, 1969”, “AUG 15, 1969”, “08/15/1969”, etc… Using the Replace Text rule, we can change the date to one consistent format.
It’s frequently combined with Find Word Group, Find Word or Find Line rules.
In our example, we will make use of the “CB – FLOATING DATA” workflow. This workflow is automatically installed with CaptureBites MetaServer.
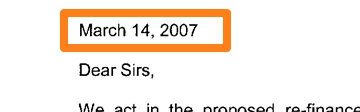
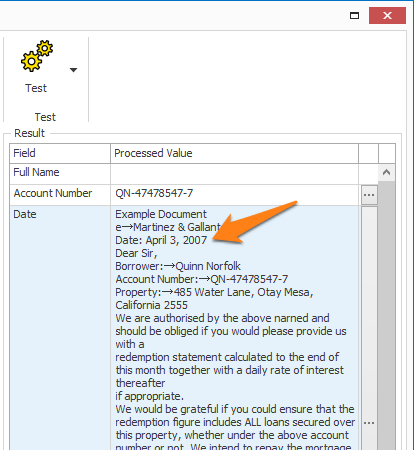
We want to extract dates (US format) from redemption letters. Sometimes the date is fully written out as “March 14,2007” or it’s in a MM/DD/YYYY format.

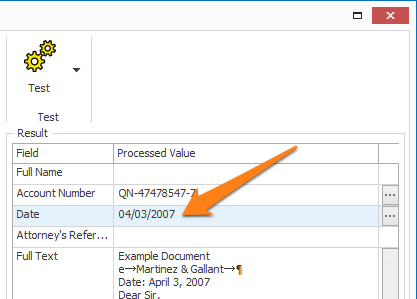
We want to convert these dates to MM/DD/YYYY consistently. So, we use a Replace Text rule to change the long, written-out dates to the MM/DD/YYYY format. This way, the date can be found using a Find Word with Mask / Words rule, and it can go through a final Format Date and Time rule.
Replace Text rules are defined in a MetaServer Extract or Separate Document action.
To add this rule, press the Add button and select Edit -> Replace Text
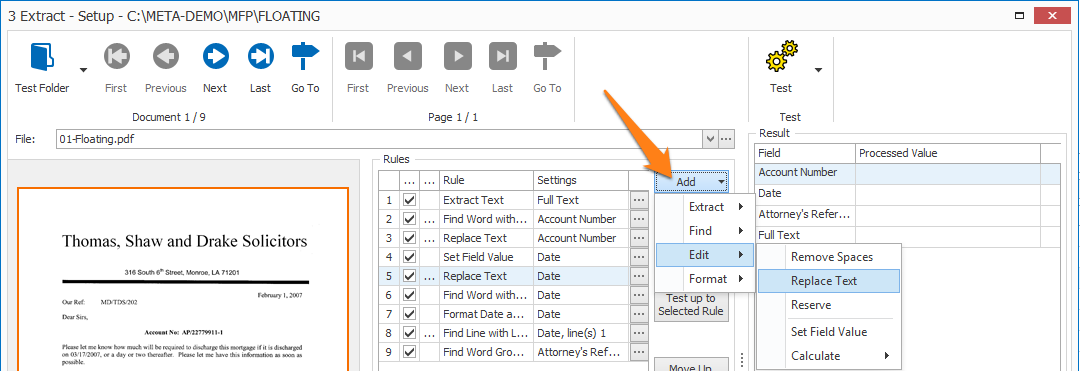
After extracting the text holding the Date, we want to change the long dates to the MM/DD/YYYY format.
TIP: The thumbnail on the right will follow you, so you can easily refer to the Setup window. Click on the thumbnail to zoom in.
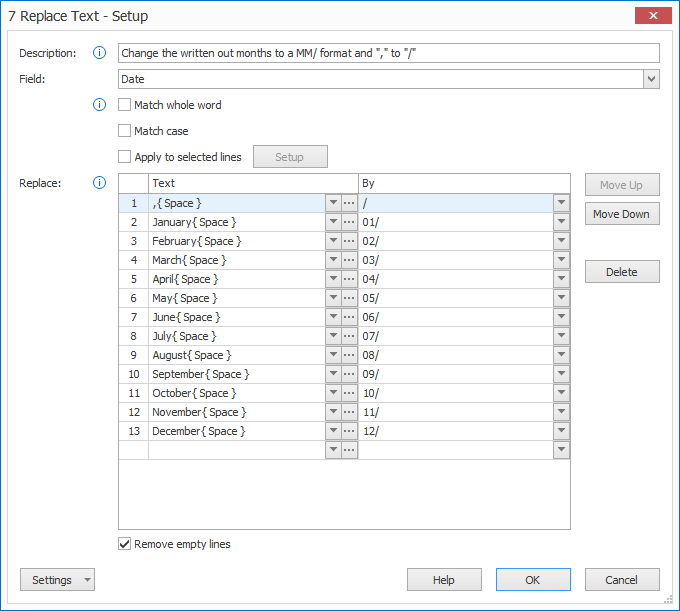
First, add a description to your rule. Then, select the field that holds your text. In this case, we select the field “Date”.
01 – Match whole word: only replaces text exactly matching the specified word(s). When disabled, it will also replace the specified text if it’s a part of a word.
For example: when disabled and replacing the word “jan” with “01”, words containing “jan” like “january” will be replaced and become “01uary”.
02 – Match case: only replaces text that exactly matches the defined word(s)’ case. When disabled, it will replace the specified word(s), regardless the case.
For example: when enabled and replacing the word “Wednesday”, it will only replace “Wednesday” and ignore words like “wednesday”, “WEDNESDAY”, etc.
03 – Apply to select lines: this option is an advanced option to only apply the replace text rule to certain lines containing specific words and/or mask.
For example, you could only replace the “-“ with “/” characters in lines containing the word “date”.
Enable this option and open its setup window by pressing the Setup button.
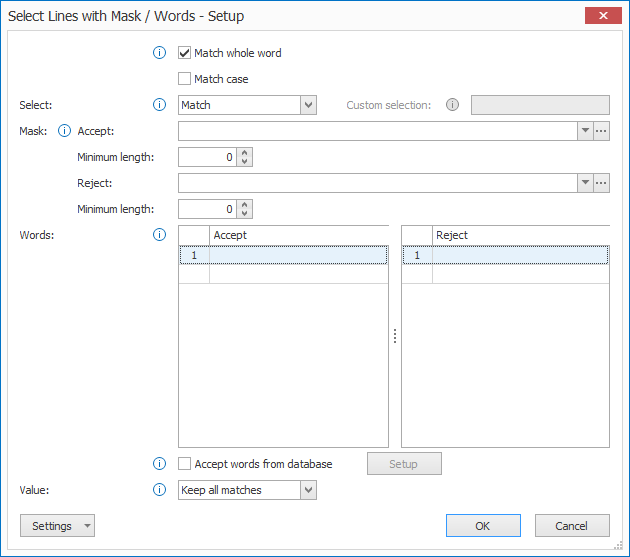
The setup works in exactly the same way as in the Find Line with Mask / Words rule. Only the lines containing words that match the defined mask or Accept words will be affected by the Replace rule.
We will not use this option in our example.
04 – Replace: enter the text you want to replace in the left column. In the right column, you enter the values that the text in the left column will be replaced with.
Press the drop-down arrow to select different system and index values to compose your text.
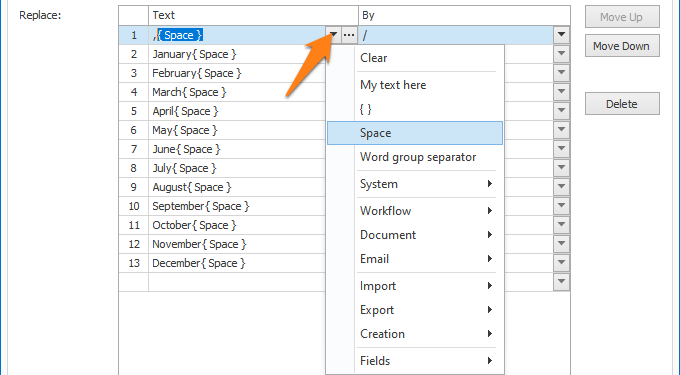
In our example, we replace the months in long name format followed by a space with their MM/ format. We also replace “,” followed by a space with a “/”. So, a date like “August 15, 1969” would become “08/15/1969”.
05 – Text Location: if you’re replacing text to fix OCR mistakes, you can specify the location of that text to get a more accurate result. Press the “…” button next to the drop-down arrow to open the setup window for the text location.
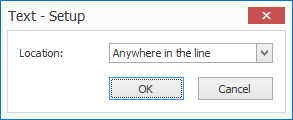
You can select one of the following options:
– Anywhere in the line
– Beginning of line
– End of line
– Beginning of word group
– End of word group
– Beginning of word
– End of word
To learn more about the difference between lines, word groups and words, please refer to this guide.
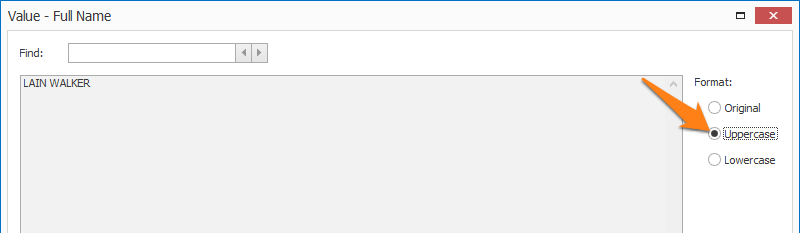
For example, you want to fix the OCR mistake in “lain Walker” from this application form.
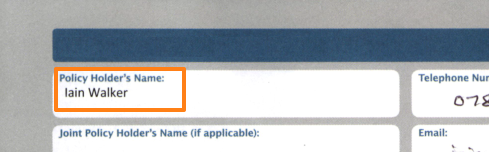
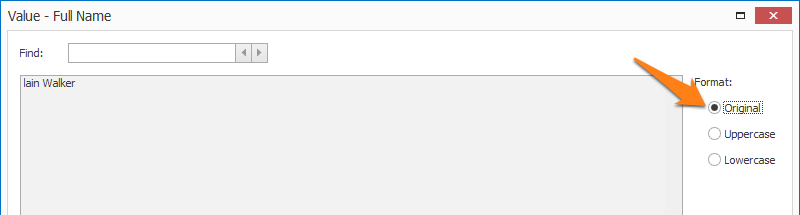
The first “I” (uppercase i) was recognized as a “l” (lower case L), as you can see in the processed value window below.
You only want to replace the first “l” (lower case L) with “I” (uppercase i), so you set up the following things in your replace rule:
- Replace l (lowercase L) with I (upper case i)
- Enable “Match case”
- Press the “…” button and select “Beginning of word” as the text location

Incorrect result with “Anywhere in the line” as text location. All the “l” (uppercase i) characters have been replaced.
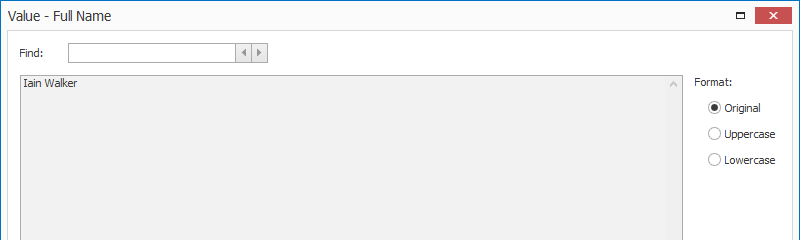
Correct result with “Beginning of word” as text location. Only the first “l” (uppercase i) character is replaced.
06 – Remove empty lines: this option removes any empty lines in your result. Disable this option if you are formatting line items and you need to keep empty records so that the number of line items remains intact.
07 – Move Up / Move Down / Delete: the replacement of the defined words will occur in the sequence of the words that are entered in the replace rule. You can use the Move Up and Move Down buttons on the right to change the sequence of the selected text. You can also press the Delete button to remove it.
For example:
You have invoices that also have dates like “JAN 7, 08”.
If you first replace “Jan” with “01/” and then “January” with “01/” the rule will not work correctly. This would convert a date like “JAN 7” to “01/7” just fine, but a date like “January 7” would become “01/uary 7”.
In this example, it is important that the longest month formats are replaced first, followed by the short month format. So, first replace “January” with “01/” and only after that, replace “Jan” with “01/”, etc.
TIP: you can copy the current settings and paste them in another setup window of the same type. Do this by pressing the Settings button in the bottom left of the Setup window and by selecting Copy. Then open another setup window of the same type and select Paste.


After:
- Extracting the text holding the date
- Using a Replace Text rule to replace the long months with their MM/ format and “,” with “/”
- Using a Find Word with Mask / Words, Format Date and Time and Find Line with Line Number rule to only keep the first valid date.
we get the following result:
Before
After