MetaServer > Help > Extract
120 MetaServer Extract
With the Extract action, you can define a sequence of rules to extract and format data. A basic set of rules could be:
1) Extract the full text of page 1
2) Find a word in the full text matching a specific mask. For example, a word matching an account number format.
3) Find a date that can be found around the words “Invoice Date” Typically, you define a set of rules for each field that you want to extract.
You can define as many rules and add as many Extract actions to your workflow as you want. There are many types of rules and even the most complex extraction processes can be defined. All this by combining easy to configure Extract rules.
Testing your rules is very easy. The viewer in the Extract action setup shows the documents in your current Test documents folder. You can just press the Test button at any moment to try out your rules on any of the documents in your Test folder. Instantly, the test result is displayed in the results panel.
Here is an overview of all rule types. Press the link for a detailed help guide:
– Extract Barcode
– Mark Detection
– Extract Text
– Extract Text (Azure AI Vision)
(FKA “Azure Computer Vision”)
– Extract Text (Azure AI Document Intelligence)
(FKA “Azure Form Recognizer”)
Edit data rules:
– Remove
– Replace Text
– Reserve
– Set field value
– Calculate Date
– Calculate Number
– Calculate Time Span
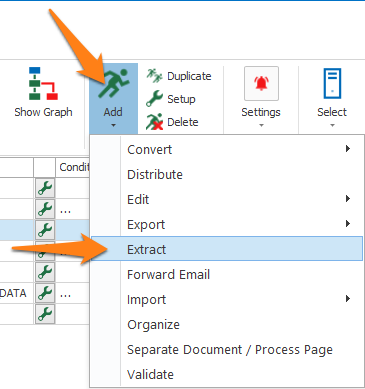
To add an Extract action, select the action after which you want to insert the Extract action and press Add -> Extract. The Setup window will automatically open.
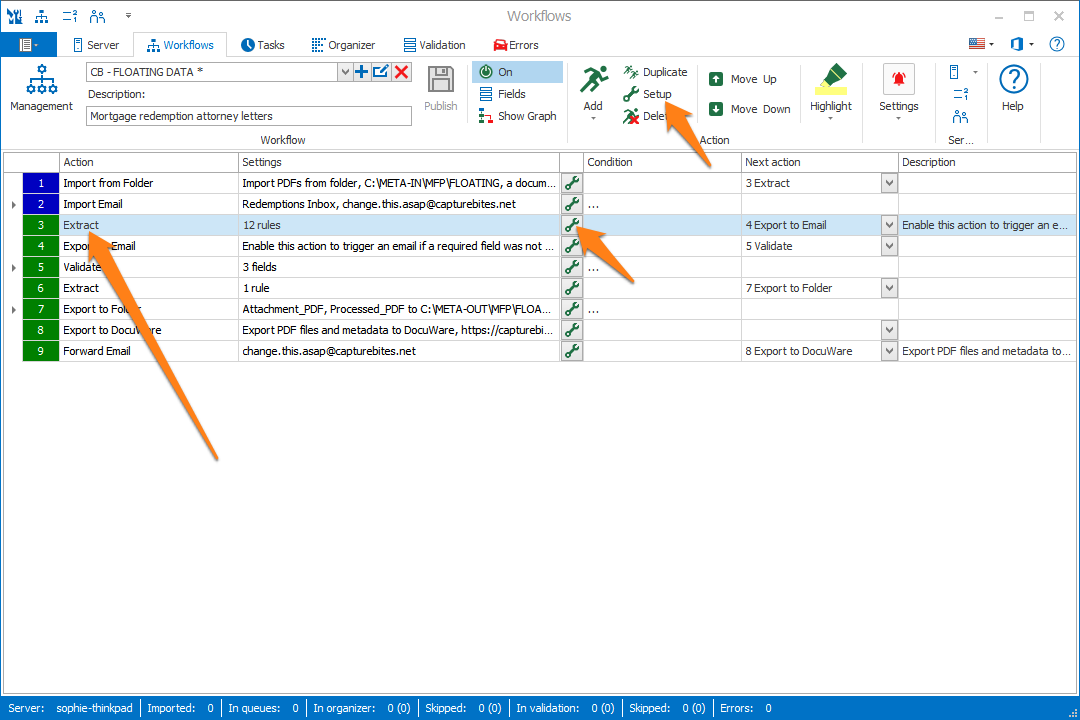
You can also open the setup window of an existing Extract action by double-clicking the action or by pressing the setup button on the right side of the action or in the ribbon, as shown below.
As our example, we will make use of the “CB – FLOATING DATA” workflow. This workflow is automatically installed with CaptureBites MetaServer.
As our example, we will make use of the “CB – FLOATING DATA” workflow. This workflow is automatically installed with CaptureBites MetaServer.
TIP: The thumbnail on the right will follow you, so you can easily refer to the Setup window. Click on the thumbnail to make the image larger.
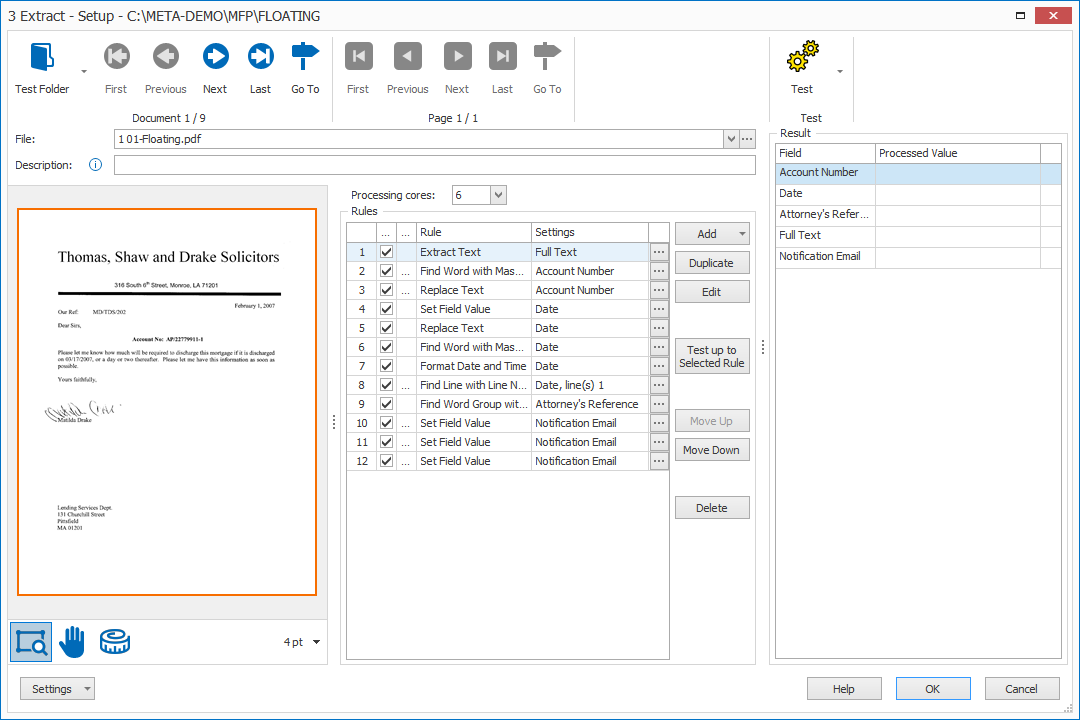
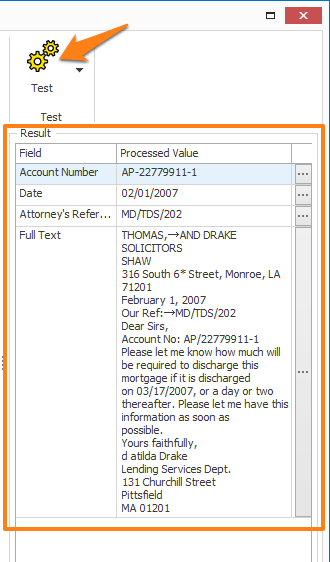
The Extract Setup shows the pages of the first Test document in your current Test Folder in the left panel. The orange zone indicates the extraction zone of the selected Extract Text or Extract Barcode rule.
The middle panel shows your Extract rules. You can define as many rules as required.
The right panel show the fields defined in your current workflow. The Processed Value column shows the result of the Extract action after pressing the Test button.
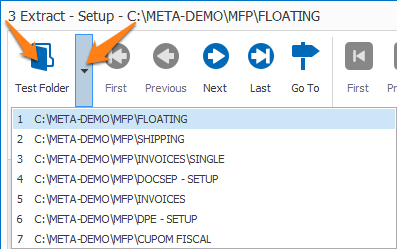
1) Test Folder: to test your rules, you need some test documents. Just press the Test Folder button to browse to the folder containing your test documents or select one of your recently used test folders using the drop-down arrow. The last selected Test Folder is memorized per workflow.
2) Document buttons: use the blue arrow buttons to navigate through the documents in the current test folder.
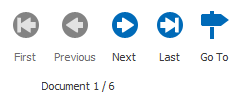
Use the Go to document button to directly navigate to a specific document.
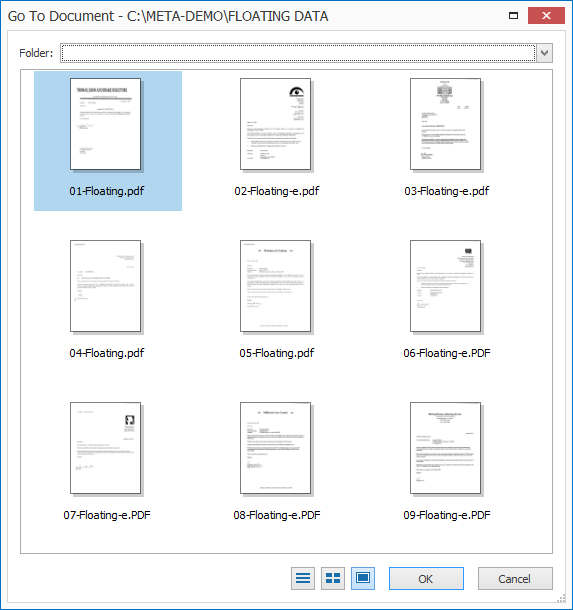
Note: If you don’t see thumbnails in this window, you need to install a Windows PDF plugin to display PDF thumbnails. Please refer to these instructions for more details.
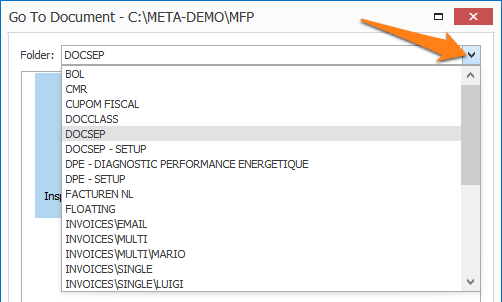
You can also use the drop-down arrow to browse in the test folder’s subfolders:
3) Page buttons: if a document has more than one page, use the green arrow buttons to navigate through the pages of the document.

Use the Go to page button to directly navigate to a specific page of the current document:

MetaServer provides the option to support additional cores to speed up extraction.

The number of additional cores that you can use for extraction, depends on the hardware’s CPU specifications. You can find this information under Task Manager -> Performance -> CPU

You can calculate an estimation of the total process time and recommended number of extra cores to increase your extraction speed / page using our online Core Calculator.
If you’ve applied for a trial of MetaServer, we have included support up to 3 additional cores for you to try out.
01 – Add: press the Add button to add an Extract rule.
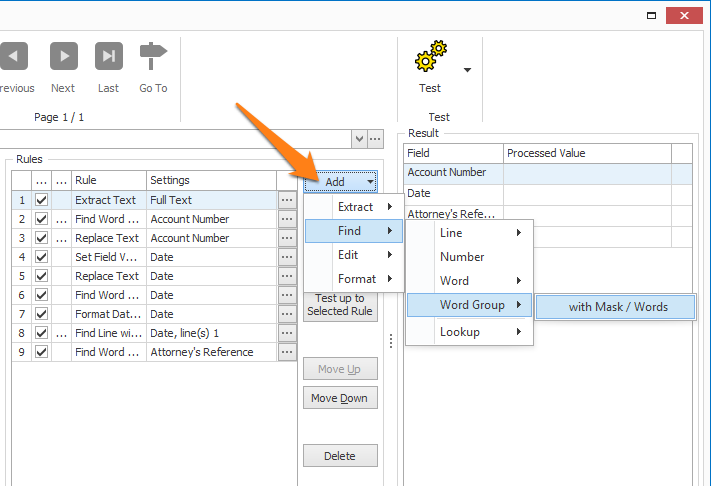
02 – Duplicate: press the Duplicate button to copy the selected Extract rule. The duplicated rule will automatically be added after the selected rule and the setup of the duplicated rule will open. Adjust it to your liking or press Cancel to stop the creation of the duplicate rule.
03 – Edit: press the Edit button or double-click a rule to open its setup window.
04 – Test up to Selected Rule: press this button to test up to a selected rule. This is useful if your rules don’t generate the desired result, you typically would test the rules step by step to find the issue and “debug” your rules.
05 – Move Up / Move Down: press the Move Up or Move Down button to change the order of the Extract rules.
The rules are executed in the sequence of the rules list. Therefore, the order of the rules in the list influences the result.
06 – Delete: press the Delete button to remove the currently selected Extract rule.
Press the Test button to show the result in the Processed Value column.
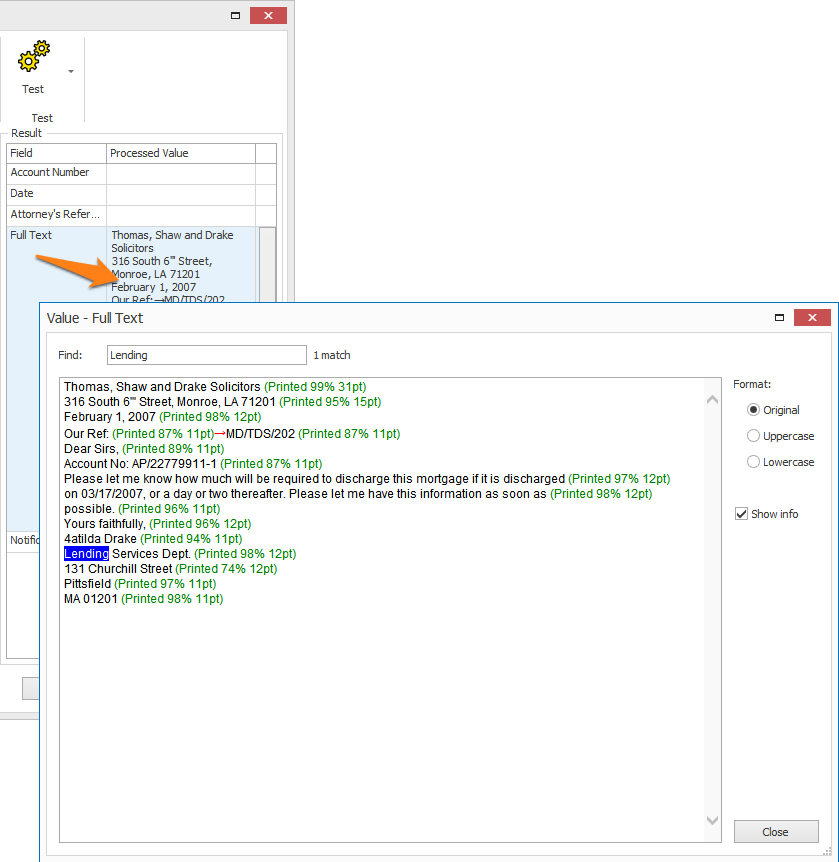
If you want to search in a result or inspect it in a bigger window, double-click on the Processed Value result. A separate window will pop up, displaying the complete value. You can search for specific words using the Find feature. Analyzing your text can be very useful for debugging your Extract rules.
01 – Format: You can use one of the Format options to switch the text to another case. In uppercase, it is easier to detect OCR errors like l versus I (in uppercase, that would be L versus I).
For example, the Registration # PRl1452 is hard to interpret for the OCR engine. The second position could be a lower-case l, upper case I or a pipe character |:

By switching the case, you can detect these kinds of problems much easier:

The result showing an l in the Original format

The result in Uppercase format showing that the uppercase l was interpreted as a lowercase l
After you’ve diagnosed the problem, you could, for example, disable the lowercase l and pipe character | from your Extract Text rule so the engine can only return an uppercase I:

Original format result, after l and | are disabled in the Extract Text rule

Uppercase format result, after l and | are disabled in the Extract Text rule
02 – Show info: by default, this option is enabled. It shows the data type, confidence level and font-size of each word group of the result value.
For example: (Printed 85% 10pt) = The machine printed word group was extracted with a confidence level of 85% and has a 10pt font size.
There are a total of 6 possible data types:
1) Printed = machine written data extracted with OCR.
2) Handwritten = handwritten data extracted with Azure Computer Vision ICR using the Extract Text (Azure Computer Vision) rule.
3) PDF text = text directly extracted from the text layer of an electronic PDF or a Searchable PDF.
4) Barcode = barcoded data extracted using the Extract Barcode rule.
5) Mark = data originating from a check box extracted with the Mark Detection rule.
6) Set value = data that was populated with a Set field value rule to set the current date or time or something similar.
TIP: If you need to design a document and you are not sure what the ideal font type is for OCR processing to avoid these kind of OCR errors, have a look here.
Press the drop-down arrow next to the Test button to show more Test options:

01 – Auto test: use this to automatically test each document while going through them using the blue document navigation buttons.
02 – Test up to Selected Rule: this allows you to only test the selected rule and the rules before. This is a useful function to debug your rules. There is also a Test up to Selected Rule button available in the Extract Rules’ side bar.
03 – Result List Setup: this allows you to show/hide specific fields in the result list of each Extract action. This is very useful when you have defined a lot of fields.
The setup window:

Show all fields:


The viewer controls are used in several MetaServer Setup windows. So, the buttons and shortcuts to zoom, pan, measure the image works in the same way across all those screens.

From left to right:
01 – Zoom on Rectangle: draw a rectangle on the image. The viewer will fit to the rectangle. Single-click on the image to fit it to the whole page. Hold Ctrl to temporarily switch to the Pan tool, Shift+Ctrl to temporarily switch to the Measure tool.
02 – Pan: pan / move around a zoomed image. Hold Shift to temporarily switch to the Zoom tool, Shift+Ctrl to temporarily switch to the Measure tool.
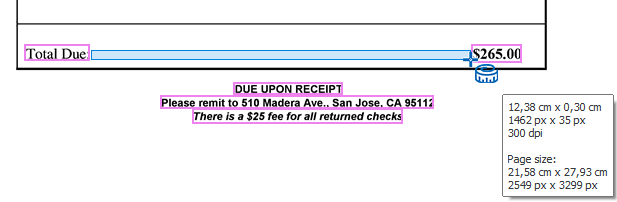
03 – Measure: measure objects on the image. You can see the zone’s dimensions in cm/inches (depending on your regional settings) and also in pixels. Below that you’ll find the page’s resolution in DPI and the page size in cm/inch (depending on your regional settings) and pixel.
We recommend you scan your documents with a resolution of 300 DPI for the best OCR result and compact file size.
This tool is useful when setting up the Radar in a Find Word Group with Mask / Words rule.
For example, the distance between the word groups “Total Due:” and “$265.00” is 12.36 cm. The units will switch to inches depending on the Windows regional settings.
04 – Fit Page to…: you can fit the page to the viewer window, width, height and original size (this means that 1 pixel on the image matches 1 pixel on your display).
05 – Zoom slider: slide to the left to zoom out, right to zoom in on your image. You can also specify the zoom-range based on the font-size (in pt).
TIP: you can copy the current settings and paste them in another setup window of the same type. Do this by pressing the Settings button in the bottom left of the Setup window and by selecting Copy. Then open another setup window of the same type and select Paste.

