MetaServer > Help > Server
220 MetaServer Server
Use the Server tab in the Administration client to view the status of the different MetaServer actions and manage global settings of the MetaServer.

Select Worfklows
Select one or more workflows to filter the server status list. Only the import actions of the selected workflows will be listed.
The icon turns red if not all workflows are selected to clearly indicate that not all import actions will be listed.
Select Server
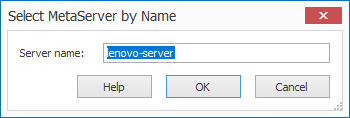
A system can contain several MetaServers. Select the MetaServer you want to work with.
If the MetaServer is not on the same domain as the client, you can enter the server's name manually by pressing the arrow under the icon and by selecting "Select by Name".
You can easily find the correct Name by opening this setup window on the server.
Click on the image to enlarge.
Counters
This shows counters of all documents being processed by MetaServer and resource usage.
The 1st list shows a total document count per action and totals across all workflows.
The 2nd list shows the number of document sets and individual documents per workflow.
When you select an action or workflow, you can press the "Details" button to see a more detailed overview of the documents in that selected action or workflows.
At the bottom you can check your current system's usage of CPU, RAM, disk activity and disk space.

Monitoring
MetaServer updates a “metaserver-monitoring.json” file on disk.
The system’s CPU usage is automatically monitored. As soon as it is 100% busy for more than 5 minutes, the monitor waits until the CPU usage drops below 100% and then writes a warning log in the log folder located in:
C:\CaptureBites\MsData\Log
Queue counters: When enabled, the monitor file will contain all counters as displayed in the “Counters” pop-up and other server level data like SystemUpTime, MetaServerUpTime, MemoryInUse, etc. You can use this for server monitoring systems such as “Centreon”.
The interval (by default, every minute), the folder and file name can be adjusted.
Memory consumption: When enabled, all important memory information will be registered. The file name of the “Memory consumption” is pre-defined as:
YYYY-MM-[ SERVER COMPUTER NAME ]-Memory.CSV
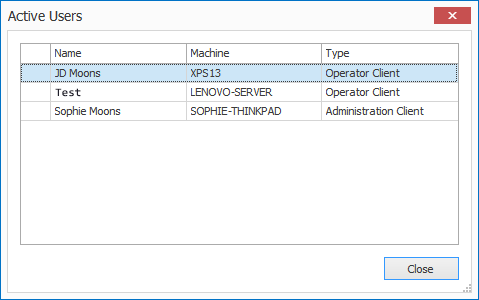
Active Users
You can see a list of all active users and the type of client they're using on the current MetaServer.
Pause Server
Pausing MetaServer, pauses all actions.
If an action is in the middle of processing a document, it will first finish the document and only then switch to a paused state.
Only when all actions are colored yellow, the server is fully paused and will not perform any importing, processing or exporting anymore until it is resumed.
Resume Server
After pausing MetaServer, you can resume it with this function.
As soon as all actions are colored green, the server has fully resumed.
Restart Server
In the unusual event that an import action fails and turns red (error state), correct the cause of the error and Restart MetaServer. Other actions can be individually restarted with the Restart Action button.
Advanced Users: If you manually copy workflow files from one server to another, you also need to Restart MetaServer.
Server Cores
Here you can adjust the number of cores used for certain actions.
The number of additional cores that you can use for these actions, depend on the hardware’s CPU specifications.
To avoid a system overload, we strongly recommend to not set the total number of cores higher than the number of physical cores available in your system.
You can find this information under Task Manager -> Performance -> CPU

To help you determine the number of physical cores your system needs, you can refer to our online Core Calculator.
If you’ve applied for a trial of MetaServer, we have included support up to 3 additional cores* for you to try out.
* The following actions already include support up to 4 cores, by default:
– Convert to Multipage TIFF
– Convert to Searchable PDF
– Preprocess Document
– Scale Pages

Import Limit
This sets the maximum number of documents that can be imported. Once this number is reached, importing of additional documents is paused (import actions will be colored yellow) until documents are exported and make place to import additional ones.
Only increase the value when you want to extract data from a lot of documents overnight to queue them up for validation during day time.
The maximum allowed number of documents in the queue is limited to 10000.
Priority Queue Limit
This sets the maximum number of documents that can be imported in priority mode. Priority documents can only overtake documents that are scheduled for processing. A document that is in the middle of being processed cannot be overtaken.
When the limit is reached, MetaServer pauses the import of more priority documents until the current imported priority documents are completely processed.
The “Priority Queue” works independently from the main import queue. If the overall “Import Limit” is not reached but the “Priority Queue Limit” is reached, priority documents need to be processed first before additional priority documents can be imported.
You can also check the number of priority documents in the queue through the Counters window.
The maximum allowed number of priority documents in the queue is limited to 250.
Load Balancing
Enable this option if you watch the same folder(s) with multiple MetaServers.
You can also specify the Load Balancing Limit. Be aware that this limit does not consider imported documents that are still in Validation or the Organizer. It also does not consider documents that have 1 or more documents after separation that are still in Validation or the Organizer.
We recommend keeping it at a low value, like the default value of 10.
Network Folders
Being a service, MetaServer runs without a logged user account under a special system account. System accounts do not have access rights to shared folders on the network, only user accounts have such rights.
The Network Folders setup makes it possible to define credentials for shared network folders.
This gives MetaServer access to import and export to these shared network folders or connect to databases located on shared folders through ODBC.
If a network drive is unavailable because the file server is switched off or because the LAN is not connected, MetaServer will retry until the drive is available again.
Import Actions from unavailable network folders will turn orange until they are available again.
By default a warning message is sent if a network drive is unavailable for more than 10 minutes (configurable).
Open Database
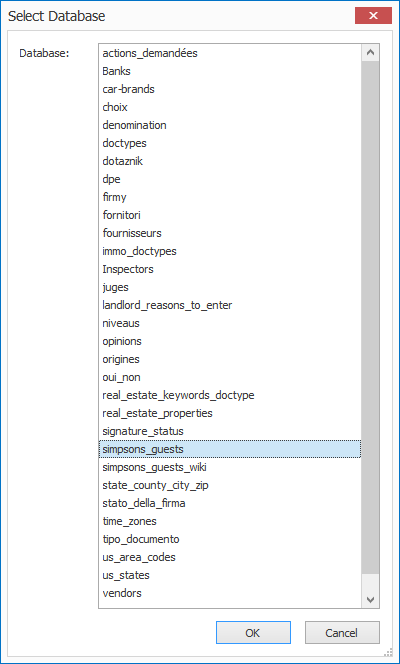
Open your last selected MetaServer Database with the default Windows program. Below, we opened the “simpsons_guest” MetaServer database in CSVFileView.
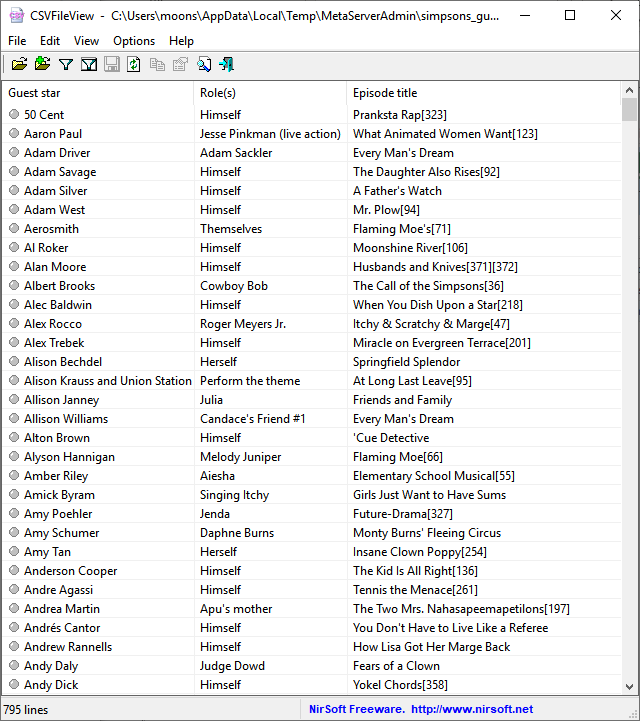
To open another MetaServer Database, press the “Open Database” drop-down arrow and press the “Select Database” button.
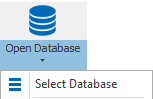
Select Database
You can select a MetaServer Database from a list.
Azure Resources
You define your Azure Resources (e.g. Azure AI Vision, Azure AI Document Intelligence, etc.) here. You can then use that resource from any Azure-related action or rule by selecting it from a dropdown list.
Any changes applied to these resources, like changing the key of a resource, will be automatically applied to the related rules or actions.

You can find more detailed instructions on how to apply and set up an Azure AI resource below.
Data Drive
By default, MetaServer’s data files are stored on the server’s C drive.
You can change the location of these data files to another fixed drive of the server.

Pause Import
If you want to process all documents in the MetaServer queue to clear the queue completely, use the Pause Import function.
All pending documents will be processed and exported without importing new ones until the queue is reduced to 0 documents.
Paused import actions are colored yellow.
Resume Import
After you paused import actions (colored yellow), you can resume them with this function.
After you have resumed import actions, they will be colored green.
Refresh Action List (F5)
The action list is automatically refreshed every 10 seconds.
You can force a refresh by pressing the Refresh List button or by pressing the F5 key.
Active Queues Only
When enabled (= default), all queues that haven’t been active for more than 6 hours, as indicated by the “Last time applied” time stamp, are hidden.
The queues list will then only show active queues and be more compact.
When disabled, it shows all available queues, regardless if they are active.
Restart Action
Some actions can turn red (critical error) because of mistakes in the workflow definition. For example a field was deleted but still used in a separation action.
Other reasons for critical errors are issues external to MetaServer. Such as an offline SQL Server, accidental changes to external database tables or XML or CSV files by external programs such as Excel that therefore cannot be updated by MetaServer anymore.
After you have fixed the cause of the error, you can restart the action with the Restart Action button to resume processing of your documents.
The documents that initially triggered the critical error will be moved to the Errors Tab because the document itself can be the cause of the error, like a corrupt PDF file for example. Open the Errors Tab to decide what to do with the error documents.
Clients Settings
The clients settings apply to all clients connected to the MetaServer. Enable or disable these functions to hide or expose them on the client stations.
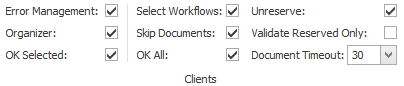
When you change any of the settings, they are automatically applied next time a client is restarted.
Document Timeout
With this you can change the document timeout time in minutes.
When an operator opens a document in the Organizer or Validation, the document is automatically locked for other users. The document will close and unlock itself automatically for other users after a certain time to avoid documents being stuck in validation or the organizer if, for example, someone went for lunch and forgot to close their document.
The action list refreshes every 10 seconds. Press the Refresh List button or press the F5 key to instantly refresh the list. The actions are color coded:
Green = running & healthy
Yellow = paused
Orange = recoverable non-blocking error, e.g. network folder offline. MetaServer will automatically retry the connection every 10 seconds.
Red = blocking error, a server or action restart is required

Columns Description
Action queue:
Short description of the action type
Activity:
Waiting for document means that the action is idle. Otherwise it describes what the action is doing. In case of an error, it will display the error message in detail. The document that triggered the error can be viewed and processed using the Errors tab.
Last activity report:
Last time that the data was refreshed for a given action.
Last time applied:
Last time that a document was processed by this action with an indication of the internal GUID of the document.
If you cannot find the cause of a critical error (red), you can contact us through our online support form. Please describe the issue as detailed as possible.
If the cause of the critical error is related to pending documents in the server, you can reset the server by following steps documented here.
Server: The name of the machine MetaServer is running on.
Started on: The date and time MetaServer was started and has run without interruption since then.
Imported: The total number of documents imported in MetaServer across all workflows. The counter does not get filtered by the Select Workflows function and always shows the total document count for both selected and unselected workflows.
For example, if you apply Separate Document / Process Page(s) actions in your workflows, this counter won’t be affected. It shows the original number of imported documents and is unaffected by other actions in your workflows.
In queues: The total number of documents in the MetaServer queue across all workflows. The counter does not get filtered by the Select Workflows function and always shows the total document count for both selected and unselected workflows.
In contrast to the “Imported” counter, this counter shows the total number of documents after your workflows’ actions have been applied. For example, if you apply Separate Document / Process Page(s) actions in your workflows, this counter will increase depending on the way your documents are split.
In organizer: Number of documents available (not locked by any user) for Organizing. The counter only shows the count of the selected workflows. See Select Workflows button.
Skipped: Number of documents available (not locked by any user) for Organizing with skipped status. The counter only shows the count of the selected workflows. See Select Workflows button.
In validation: Number of documents available (not locked by any user) for Validation. The counter only shows the count of the selected workflows. See Select Workflows button.
Skipped: Number of documents available (not locked by any user) for Validation with skipped status. The counter only shows the count of the selected workflows. See Select Workflows button.
Errors: Number of documents in error state. These documents triggered a red error. Errors and the documents that caused them can be viewed and managed in the Errors tab. The counter only shows the count of the selected workflows. See Select Workflows button.
Memory in use: the currently memory being used by the MetaServer service.
NOTE: If the current memory being used by the MetaServer service is over 1 GB, this can cause erratic behaviour. If this is the case, please check your currently active workflow for any loops or make sure you optimize the use of any memory-heavy actions (e.g. “Extract Text” with OCR).
If you’re not sure what the underlying cause is, please contact us through our online support form.
Peak memory used: the highest peak of memory used by the MetaServer service since the server has been running.
– Azure AI Document Intelligence
– Prebuilt models (Invoice, Other form, etc.)
– Azure Language Service (e.g. Azure AI Summarize)
How to sign up for a key
1) Log in to the Azure portal: https://portal.azure.com/#home
NOTE: If you don’t have a Microsoft or Azure account yet, you can sign up for free. You can find more info here:
https://azure.microsoft.com/en-us/free/

3) In the “AI Apps and Agents” section, create a “Document Intelligence” Resource:

NOTE: If you don’t have an Azure account, you can start one for free for 12 months. Just select “Start Free Trial” and follow the instructions.
4) Select the region closest to your system’s location, give your instance a unique name (this will be used in the endpoint URL) and select the pricing tier.
Which region should I choose to ensure the fastest possible Azure AI processing speed?
To check which Azure AI Service region is the fastest for your system, you can refer to the following online tool:
https://www.azurespeed.com/Azure/Latency
Select your system’s location’s continent and, after a few seconds, it lists each of the selected regions’ available Azure AI Service’s latency time, ranking from lowest latency (= fastest response time) to highest (= slowest response time).
In the example below, “Switzerland North” and “West Europe” are the regions with the fastest response time.

You can choose between 2 pricing tiers*:
F0 plan (Free): 12 months Free (500 pages/month)
– If you use the invoice model with the free plan, maximum 2 pages for each invoice will be processed.
– The page file size must be less than 4 MB.
– With the 12 month free plan, the Azure server can only handle 1 call every 2 seconds for the recognizer API. Because of this speed limit, we recommend to run extraction and separation only on one core with the free plan.
– Every 28th of the month, the counter is reset to 500 pages.
– When you run out of free calls before the 28th of the month, MetaServer will move documents to the Error tab and will report to wait until the 28th of the month to continue processing documents or to switch to a paid plan.
– Documents that ended up in the errors tab, can be reprocessed with a paid plan or retried when the free counter is reset on the 28th of the month.
– After the 12-month period, you will receive an email from Microsoft one month before the expiration, stating that the 12-month free service is about to expire and will stop working.
You will then need to switch from your free plan to a “pay-as-you-go” S0 plan (see below). You have 30 days to switch from your free plan to a “pay-as-you-go” S0 plan or to stop using the service.
S0 plan: Pay-as-you-go ($10 per 1000 pages for prebuilt models, $1.50 per 1000 pages for the Read model or $3 per 1000 pages for a Custom Classification model*)
– The page file size can be up to 500 MB.
– The Azure server can handle 15 calls per seconds. You can run Extraction and Separation on multiple cores with a paid plan.
– Microsoft only charges for READ calls. GET calls are free
– For high volumes, starting from > 20.000 pages / month, you can find special pricing here.
IMPORTANT: Besides the subscription fee, building a Custom Classification model is $ 3 per hour. When you’ve prepared good samples, you, at most, need to train your model a few times. The building time will only take minutes, not hours.
More detailed information about the pricing* can be found here:
https://azure.microsoft.com/en-us/pricing/details/ai-document-intelligence/
* = The Azure AI services subscription prices are set by Microsoft and can be subject to change.
You can pay the subscription with a credit card or request to pay by check or wire transfer here:
https://docs.microsoft.com/en-us/azure/cost-management-billing/manage/pay-by-invoice

5) Press “Review + create” to check your Resource details. If they are correct, press the “Create” button.
6) You can find your resource’s Keys and Endpoint in your Microsoft Azure Dashboard. The “Go to Azure Portal” button will open the portal in your default browser.
The example below shows a resource called “MetaServerAZDI-DEV”.

In the “Azure Resources” setup, add an “AI Document Intelligence” resource.

01 – Key, Endpoint, Name: enter your Azure AI Document Intelligence resource key, endpoint and enter a fitting name for your Azure AI Document Intelligence resource. You can find this information in your Microsoft Azure Dashboard. The “Go to Azure Portal” button will open in the portal in your default browser.
The example below shows a resource called “MetaServerAZDI-DEV”.
In your portal, you can also check your remaining calls. This can be useful to check if you’re not exceeding your current Microsoft Azure AI Document Intelligence’s pricing tier plan.
If you haven’t signed up for a key yet, please refer to the instructions above.
02 – Proxy: if you want to connect to a proxy server, press the Proxy button to open the setup window.

1) Type, Host, User name, Password: press the drop-down arrow to choose your proxy protocol and enter the connection settings to your proxy server. When in doubt, contact your IT department.
2) Port: enter the specified port of your Proxy server. When in doubt, contact your IT department.
03 – API version: here you can specify the API version for the Azure AI Document Intelligence.
Microsoft regularly releases new API versions. New versions add new functionality, like more supported languages or improved recognition etc.
You can find more details about what is new in Azure AI Document Intelligence’s current API here:
https://learn.microsoft.com/en-us/azure/applied-ai-services/form-recognizer/whats-new
The “Invoice” model automates processing of invoices to extract header data like vendor name, vendor tax id, invoice number, invoice date, due date, payment terms, total amount, etc.
The model also extract line items like article codes, unit price, quantity, etc..
This model reads machine printed text, cursive handwriting, barcodes and CMC7 text.
You can find more details regarding pricing in the pricing explanation above.
More detailed information about this model can be found here:
https://learn.microsoft.com/en-us/azure/applied-ai-services/form-recognizer/concept-invoice
The “Other Form” model automatically detects key value pairs for fields, tables and check boxes on any form type. You set one sample of your forms as a Master Form to detect the data elements on the form which can then be mapped with MetaServer fields. This reduces the time to configure the extraction of a form considerably.
The “Other Form” model reads machine printed text, cursive handwriting and barcodes. Unlike the other models, it currently does not read CMC7 text.
You can find more details regarding pricing in the pricing explanation above.
The “Receipt” model automatically extracts merchant name, dates, line items, quantities, and totals from printed and handwritten receipts. The version v3.0 also supports single-page hotel receipt processing. The “Receipt” prebuilt model is more limited then the “Invoice” model. In our tests, for European tax receipts we see better results with the invoice model.
This model reads machine printed text, cursive handwriting, barcodes and CMC7 text.
You can find more details regarding pricing in the pricing explanation above.
The preview model is documented here:
Receipt model:
https://learn.microsoft.com/en-us/azure/applied-ai-services/form-recognizer/concept-receipt
The “ID Document” model automatically extracts information from ID cards, passports, driver licenses, residence permits and US social security cards. It can also automatically classify the ID document, which is shown in the “Document Type” field.
You can find more details regarding pricing in the pricing explanation above.
More detailed information about this model can be found here:
https://learn.microsoft.com/en-us/azure/ai-services/document-intelligence/concept-id-document
The “Read” model automatically extracts the full text. This model limits itself to only extracting the full text, but it often returns better results than the Extract Text (Azure AI Vision) rule’s engine.
Since it does not include any special extraction logic like the prebuilt models, it is also a cheaper pricing tier. You can find more details regarding pricing in the pricing explanation above.
This model reads machine printed text, cursive handwriting, barcodes and CMC7 text.
The preview model is documented here:
Read model:
https://learn.microsoft.com/en-us/azure/applied-ai-services/form-recognizer/concept-receipt
With a “Custom Classification” model, you can detect your document type in a single step. You can then also use the result to automatically separate document sets based on the document type.
You build your classification model using the Azure Document Intelligence Studio (DI Studio).
You can find detailed instructions on how to build a custom classification model here:
https://www.capturebites.com/metaserver/help/extract/120-150/#02-02-02-06
You can find more details regarding pricing in the pricing explanation above.
If you have documents for which there is no prebuilt model (e.g. shipping documents, litigation documents, HR documents, contracts, etc.), you can now create your own custom extraction model.
You build your extraction model using the Azure Document Intelligence Studio (DI Studio).
You can find detailed instructions on how to build a custom extraction model here:
https://www.capturebites.com/metaserver/help/extract/120-150/#02-02-02-07
You can find more details regarding pricing in the pricing explanation above.
08 – Get result after [x] seconds: by default, this time is set to 6 seconds.
We recommend only changing this to a lower number if you have signed up for Microsoft Azure AI Document Intelligence’s paid plan. Because the Free plan is limited to 1 call every 2 seconds, we recommend to run extraction with a Free Plan on a single core and keep the “Get result after [x] seconds” at 6 seconds.
09 – Log: enable this option to create a log file each time the Microsoft Azure AI Document Intelligence engine is called. This option is typically used during diagnosing issues with Microsoft Azure.
On the client side, you can find the log information after running a Test in Extraction in the following folder:
C:\ProgramData\CaptureBites\Programs\Admin\Data\Log
On the server side, after processing some documents, you can find the log information in the following folder:
C:\ProgramData\CaptureBites\Programs\MetaServer\Data\Log
How to sign up for a key
NOTE: If you don’t have a Microsoft or Azure account yet, you can sign up for free. You can find more info here:
https://azure.microsoft.com/en-us/free/
3) In the “AI apps and Agents” section, create a “Computer Vision” Resource:

NOTE: If you don’t have an Azure account, you can start one for free for 12 months. Just select “Start Free Trial” and follow the instructions.
4) Select the server of your region, give your instance a unique name (this will be used in the endpoint URL) and select the pricing tier.
Which region should I choose to ensure the fastest possible Azure AI processing speed?
To check which Azure AI Service region is the fastest for your system, you can refer to the following online tool:
https://www.azurespeed.com/Azure/Latency
Select your system’s location’s continent and, after a few seconds, it lists each of the selected regions’ available Azure AI Service’s latency time, ranking from lowest latency (= fastest response time) to highest (= slowest response time).
In the example below, “Switzerland North” and “West Europe” are the regions with the fastest response time.
You can choose between 2 pricing tiers:
F0 plan (Free): 12 months Free (5000 calls/month = ~2500 pages/month (each page uses 1 read and 1 get call)
– The page file size must be less than 4 MB.
– With the 12 month free plan, the Azure server can only handle 1 call every 2 seconds. Because of this speed limit, we recommend to run extraction and separation only on one core with the free plan.
– Every 28th of the month, the counter is reset to 5000 calls (~ 2500 pages)
– When you run out of free calls before the 28th of the month, MetaServer will move documents to the Error tab and will report to wait until the 28th of the month to continue processing documents or to switch to a paid plan.
– Documents that ended up in the errors tab, can be reprocessed with a paid plan or retried when the free counter is reset on the 28th of the month.
– After the 12-month period, you will receive an email from Microsoft one month before the expiration, stating that the 12-month free service is about to expire and will stop working.
You will then need to switch from your free plan to a “pay-as-you-go” S1 plan (see below). You have 30 days to switch from your free plan to a “pay-as-you-go” S1 plan or to stop using the service.
The prices are available here:
https://azure.microsoft.com/en-us/pricing/details/cognitive-services/computer-vision/
S1 plan: Pay-as-you-go (> 2500 pages/month. $1 per 1000 pages)
– The page file size can be up to 50 MB.
– The Azure server can handle 10 calls per second. You can run Extraction and Separation on multiple cores with a paid plan.
– Microsoft only invoices READ calls. GET calls are free
– For high volumes >1M pages per month, find special pricing here.
– You can pay the subscription with a credit card or request to pay by check or wire transfer here:
https://docs.microsoft.com/en-us/azure/cost-management-billing/manage/pay-by-invoice

The example below shows a resource called “MetaServer”.

In the “Azure Resources” setup, add an “AI Vision” resource.
01 – Key, Endpoint, Name: enter your Azure AI Vision resource key, endpoint and enter a fitting name for your Azure AI Vision resource. You can find this information in your Microsoft Azure Dashboard. The “Go to Azure Portal” button will open in the portal in your default browser.
The example below shows a resource called “METASERVER”.
In your portal, you can also check your remaining calls. This can be useful to check if you’re not exceeding your current Microsoft Azure AI Vision’s pricing tier plan.
If you haven’t signed up for a key yet, please refer to the instructions above.
1) Type, Host, User name, Password: press the drop-down arrow to choose your proxy protocol and enter the connection settings to your proxy server. When in doubt, contact your IT department.
2) Port: enter the specified port of your Proxy server. When in doubt, contact your IT department.
03 – Model / Preview version: The “General Available” model uses AZVI’s official, general model.
If you select the “Preview” model, you can enter a specific “Preview version”. By default, this is set to preview version “2022-01-30-preview”. If you want to use another preview version, just enter the correct name of the preview model in the field.
Release info and preview model names are documented here:
https://learn.microsoft.com/en-us/azure/ai-services/computer-vision/whats-new
04 – Get result after [x] seconds: by default, this time is set to 6 seconds.
We recommend only changing this to a lower number if you have signed up for Microsoft Azure AI Vision’s paid plan. Because the Free plan is limited to 1 call every 3 seconds, we recommend to run extraction with a Free Plan on a single core and keep the “Get result after [x] seconds” at 6 seconds.
05 – Log: enable this option to create a log file each time the Microsoft Azure AI Vision engine is called. This option is typically used during diagnosing issues with Microsoft Azure.
On the client side, you can find the log information after running a Test in Extraction in the following folder:
C:\ProgramData\CaptureBites\Programs\Admin\Data\Log
On the server side, after processing some documents, you can find the log information in the following folder:
C:\ProgramData\CaptureBites\Programs\MetaServer\Data\Log
How to sign up for a key
NOTE: If you don’t have a Microsoft or Azure account yet, you can sign up for free. You can find more info here:
https://azure.microsoft.com/en-us/free/
3) In the “AI apps and Agents” section, create a “Language service” Resource:

NOTE: If you don’t have an Azure account, you can start one for free for 12 months. Just select “Start Free Trial” and follow the instructions.
4) Select the server of your region, give your instance a unique name (this will be used in the endpoint URL) and select the pricing tier.
Which region should I choose to ensure the fastest possible Azure AI processing speed?
To check which Azure AI Service region is the fastest for your system, you can refer to the following online tool:
https://www.azurespeed.com/Azure/Latency
Select your system’s location’s continent and, after a few seconds, it lists each of the selected regions’ available Azure AI Service’s latency time, ranking from lowest latency (= fastest response time) to highest (= slowest response time).
In the example below, “Switzerland North” and “West Europe” are the regions with the fastest response time.
IMPORTANT: 1 text record = 1000 characters
You can choose between 2 pricing tiers:
F0 plan (Free): 5000 text records/month
– Every 28th of the month, the counter is reset to 5000 text records.
– When you run out of free calls before the 28th of the month, MetaServer will move documents to the Error tab and will report to wait until the 28th of the month to continue processing documents or to switch to a paid plan.
– Documents that ended up in the errors tab, can be reprocessed with a paid plan or retried when the free counter is reset on the 28th of the month.
– After the 12-month period, you will receive an email from Microsoft one month before the expiration, stating that the 12-month free service is about to expire and will stop working.
You will then need to switch from your free plan to a “pay-as-you-go” S plan (see below). You have 30 days to switch from your free plan to a “pay-as-you-go” S plan or to stop using the service.
The prices are available here:
https://azure.microsoft.com/en-us/pricing/details/cognitive-services/language-service/
S plan: Pay-as-you-go (> 5000 text records/month. $2, per 1000 text records for summarization)
– Speed of 1000 calls / minute.
– First 5000 text records / month are free of charge.
– For high volumes >10 M text records per month, please contact Microsoft Sales for special pricing here.
– You can pay the subscription with a credit card or request to pay by check or wire transfer here:
https://docs.microsoft.com/en-us/azure/cost-management-billing/manage/pay-by-invoice
S1 plan: Pay-as-you-go (> 2500 pages/month. $1 per 1000 pages)
– The page file size can be up to 50 MB.
– The Azure server can handle 10 calls per second. You can run Extraction and Separation on multiple cores with a paid plan.
– Microsoft only invoices READ calls. GET calls are free
– For high volumes >1M pages per month, find special pricing here.
– You can pay the subscription with a credit card or request to pay by check or wire transfer here:
https://docs.microsoft.com/en-us/azure/cost-management-billing/manage/pay-by-invoice

6) You can find your resource’s Keys and Endpoint in your Microsoft Azure Dashboard. The “Go to Azure Portal” button will open the portal in your default browser.
In the “Azure Resources” setup, add a “Language Service” resource.
01 – Key, Endpoint, Name: enter your Azure Language Service resource key, endpoint and enter a fitting name for your Azure Language Service resource. You can find this information in your Microsoft Azure Dashboard. The “Go to Azure Portal” button will open in the portal in your default browser.
The example below shows a resource called “MetaServer-SUMM”.
In your portal, you can also check your remaining calls. This can be useful to check if you’re not exceeding your current Microsoft Azure Language Service pricing tier plan.
If you haven’t signed up for a key yet, please refer to the instructions above.
1) Type, Host, User name, Password: press the drop-down arrow to choose your proxy protocol and enter the connection settings to your proxy server. When in doubt, contact your IT department.
2) Port: enter the specified port of your Proxy server. When in doubt, contact your IT department.
03 – Model / Preview version: The “General Available” model uses the Azure AI Summarize’s official, general model.
If you select the “Preview” model, you can enter a specific preview model version. By default, this is set to preview version “2023-11-15-preview”. If you want to use another preview version, just enter the correct name of the preview model in the field.
Release info and preview model names are documented here:
https://learn.microsoft.com/en-us/azure/ai-services/language-service/whats-new
04 – Get result after [x] seconds: by default, this time is set to 6 seconds.
We currently only know the speed of Microsoft Azure AI Summarize’s paid plan. This is 17 calls / second (= 1000 calls / minute). Because of this, we recommend keeping the “Get result after [x] seconds” at 6 seconds
05 – Log: enable this option to create a log file each time the Microsoft Azure AI Summarize engine is called. This option is typically used during diagnosing issues with Microsoft Azure.
On the client side, you can find the log information after running a Test in the setup in the following folder:
C:\ProgramData\CaptureBites\Programs\Admin\Data\Log
On the server side, after processing some documents, you can find the log information in the following folder:
C:\ProgramData\CaptureBites\Programs\MetaServer\Data\Log