
MetaServer > Help > How to share a Custom Extraction / Classification model
How to share a Custom Extraction / Classification model
For the Extract Text (Azure AI Document Intelligence) action, you can make use of custom extraction and custom classification models.
If you need to share these custom models with a client, someone outside of your organization or you need to migrate it to another Azure account, you can use the following guide.
With the Azure account, from which you want share a custom model:
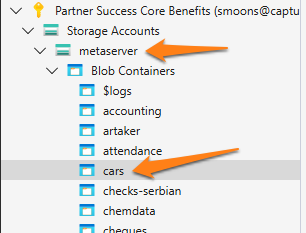
1) Install the "Azure Storage Explorer": With the "Azure Storage Explorer" you can browse to your custom extraction / classification model and download it as a ZIP file. You can then share this ZIP file by any other means.
You can download the "Azure Storage Explorer" from here:
https://azure.microsoft.com/en-us/products/storage/storage-explorer/
In the example below, we want to share the "cars" custom classification model.
The Azure account where you want to copy your custom model to:
1) An active Azure AI Document Intelligence resource: if this hasn't been created yet, you can find instructions on our Extract Text (Azure AI Document Intelligence) online help page.
On the Azure account where you want to copy your custom model to, a storage account needs to be created. This storage account will contain the custom extraction / classification model files.
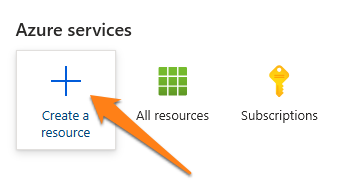
Step 1: In their azure portal, select "Create a resource"
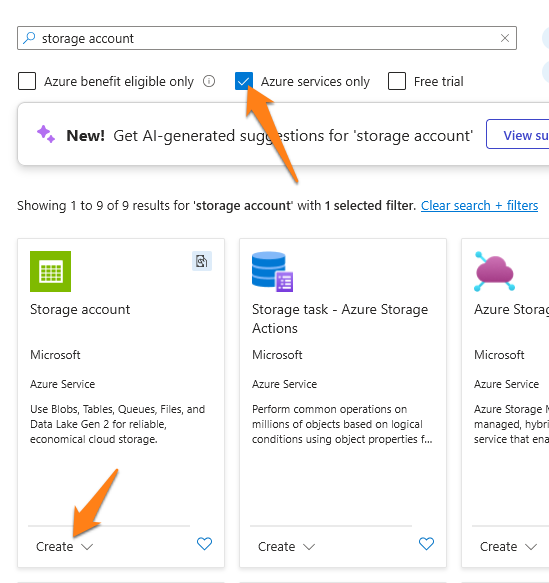
Step 2: Filter on "Azure services only", look for "Storage account" and press "Create".
Step 3: Name your "Storage account name" appropriately. A storage account can hold many different containers for custom extraction / classification models. It's comparable to a root drive.
Step 4: Select the region closest to your MetaServer system's location. If you're not sure, you can use the Azure Latency Tool.
Step 5: Select "Azure Blob Storage or Azure Data Lake Storage" as the preferred storage type.
Step 6: For "Redundancy", we recommend selecting "Locally Redundant Storage (LRS)".
For all other parameters, you can use the default values.
Step 7: After checking if step 3-6 were correctly applied, press the "Review + Create" button.
Step 8: After the validation process has been completed and no problems were found, press the "Create" button. The creation of the storage account could take a couple of minutes to complete.
Via the Azure Portal or "Azure Storage Explorer", go to the Storage Account that was created in the previous step.
There are 3 levels:
1) Storage account (like the drive)
2) Container (like root folders)
3) Directories (like subfolders)
Step 1: Create a container with an appropriate name.
Step 2: Create a directory (or more) with an appropriate name.
Step 3: Unzip your shared ZIP file and upload the contents to your specified directory using the "Upload" button.
Step 4: Make a note of your "file path" where your custom model files are stored. You'll need to connect your Custom Model to those files in the next steps.
In the example below, the path to the custom classification model is:
metaserver/cars/classification
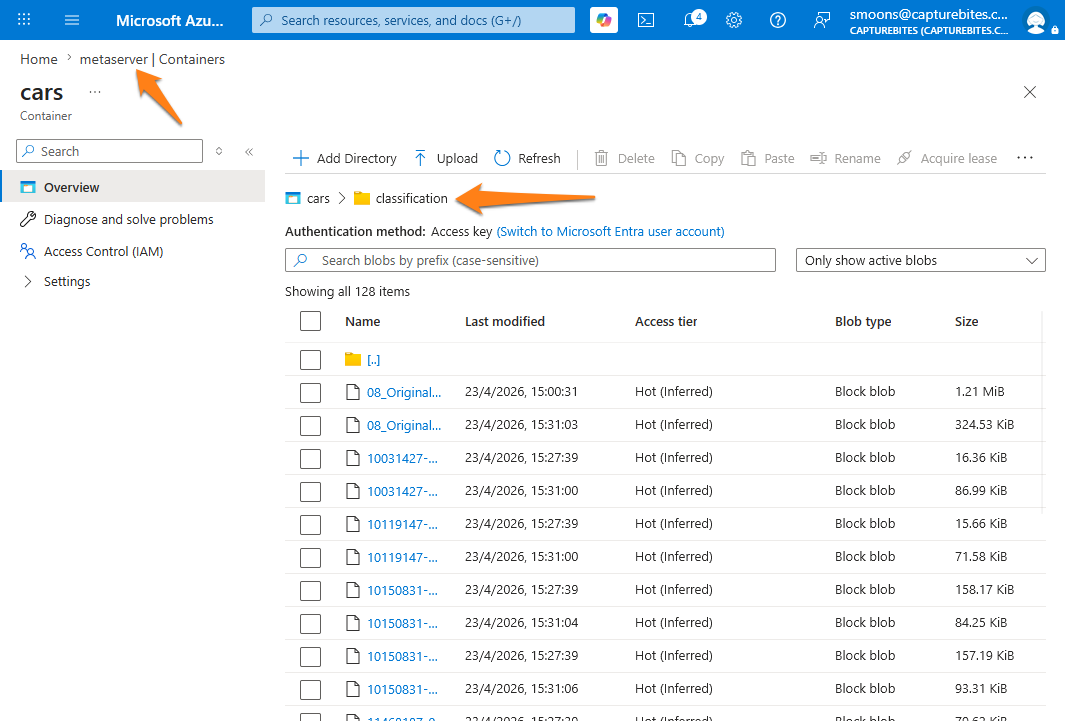
Now we have our shared custom model's files stored in a storage account. The last step is to connect a Custom Extraction / Classification model to those files.
Step 1: Go to the Azure AI Document Intelligence Studio.
Step 2: Create a "Custom extraction" or "Custom classification" model.

Step 3: Press the "Create a project" button

Step 4: Give your project an appropriate name and description.
Step 5: Select your correct subscription, resource group and the storage account you've created in the previous steps (e.g. "metaserver").
Step 6: Select your correct blob container (e.g. cars) and add the remaining directories of your path.
In our example case, our full path is:
metaserver/cars/classification
So we set "classification" as our remaining path.
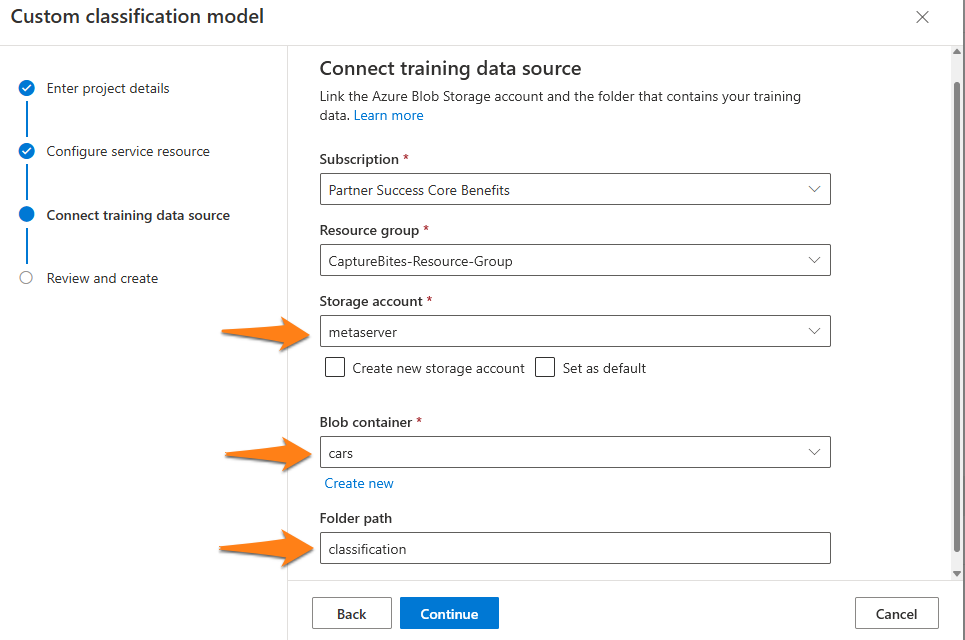
Step 7: Press "Continue", check if everything is correct and then press "Create project".
Step 8: You should now see all the sample documents, already prepped for training, in your custom model. If everything looks good, press the "Train" button.
Give your model an appropriate name and description. It will then build your own custom extraction / classification model linked to your azure account.
Training a custom classification model takes a few minutes. A custom extraction model can take between 30-60 minutes.

Step 9: After building is complete, you can use this custom extraction / classification model in any of your MetaServer workflows that are connected to the associated Azure AI Document Intelligence resource
For more detailed information about using custom models, please refer to the Extract Text (Azure AI Document Intelligence) help:
Custom Classification model
Custom Extraction model