MetaServer > Help > Export to REST API
030-150 Export to REST API
The Export to REST API action allows you to create your own MetaServer export connector to export to any web service that has a REST API available.
Besides exporting, you can also connect to a web server to retrieve information or trigger an action in another service.
The way you configure these HTTP requests for this action is similar to the API platform PostMan.
Some example use cases:
1) Use the VIES API to check if a VAT ID is valid and to retrieve the company name,
2) Use the MarketCheck CARS API to check if a VIN (Vehicle Identification Number) is valid and retrieve additional information about the car like model, build year, etc.
NOTE: This action is included with the "Export to Web Server" license.
To add an Export to REST API action, select the action after which you want to insert the Export to REST API action and press Add -> Export -> to REST API. The Setup window will automatically open.

You can also open an existing Export to REST API action by double-clicking the action or by pressing the setup button on the right side of the action or in the ribbon, as shown below.

TIP: The thumbnail on the right will follow you, so you can easily refer to the Setup window. Click on the thumbnail to zoom in.

The Export to REST API Setup shows your HTTP Requests (GET, POST, PUT, PATCH, DELETE, HEAD, OPTIONS). You can add as many as you like.
The right panel show the result of your selected request, using the "Test Selected" button, or all requests in sequence after pressing the "Test" button.
1) Test Folder: to test your requests that require a document (e.g. uploading a document to a web server), you can select your test documents. Just press the Test Folder button to browse to the folder containing your test documents or select one of your recently used test folders using the drop-down arrow.
The last selected "Test Folder" is memorized per workflow.

2) Document buttons: use the blue arrow buttons to navigate through the documents in the current test folder.
Use the Go to document button to directly navigate to a specific document.
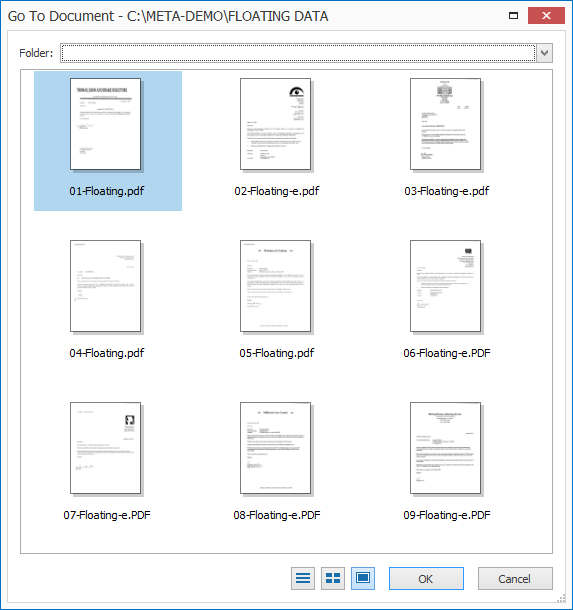
Note: If you don’t see thumbnails in this window, you need to install a Windows PDF plugin to display PDF thumbnails. Please refer to these instructions for more details.
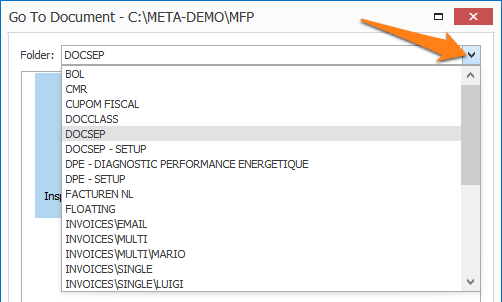
You can also use the drop-down arrow to browse in the test folder's subfolders:

01 - Fields: These fields' values are used during runtime. By default, we already provide the following Exporter Fields, for which you can specify the value (if applicable):
- Access token
- Expires in
- Expires at
- Refresh token
You can also change a field's sequence, delete, add new exporter fields and add a description.
02 - Workflow Fields: to test your requests, you can set test values for your existing workflow fields.
IMPORTANT: these values are only used during testing within the action and NOT during runtime.
If you need to use OAuth 2.0 to connect to your REST API, you can use the OAuth2 Login wizard to receive your required response values.

01 - Provider: You can choose any provider by selecting the "Custom" option. We also have presets for the following providers available:
- DropBox
- Google Drive
- Microsoft OneDrive
02 - Authorization url: enter the endpoint of your provider's OAuth 2.0. This is where users are sent to authenticate with your API. This endpoint is accessible only over "HTTPS". Plain "HTTP" connections are refused.
03 - Token url: enter the endpoint for your authentication server. This is used to obtain an access token.
04 - Client id: enter the application's client ID.
05 - Client secret: enter the application's client secret.
IMPORTANT: Secrets are stored encrypted at rest and in transit. They are never visible to consumers.
06 - Redirect url: the Redirect url needs to be registered in your OAuth2 provider's application settings.
07 - Scope (optional): enter a comma-separated list of authentication scopes to restrict what the Export to REST API action can access. For example, read:public_key, write:org.
08 - Additional parameters: enter custom parameters to send with auth requests or token requests.
These key-value pairs are sent in the request URL. If you add multiple keys with same key name, they’re sent with the request as an array.
09 - Result: this is where the raw response of your auth request is shown.
IMPORTANT: Pressing the "OK" button will restart the authentication process and you will lose your previous result. Press the "Cancel" button to keep the result. This will be improved in a next build.

1) Add: press the Add button to add HTTP Request.

2) Duplicate: press the Duplicate button to copy the selected HTTP Request. The duplicated rule will automatically be added after the selected request and the setup of the duplicated request will open. Adjust it to your liking or press Cancel to stop the creation of the duplicate request.
3) Edit: press the Edit button or double-click a HTTP request to open its setup window.
4) Test Selected: press this button to test the selected HTTP request. This is useful if your request sequence doesn’t generate the desired result. You typically would test the requests step by step to find the issue and “debug” your HTTP request sequence.
5) Move Up / Move Down: press the Move Up or Move Down button to change the order of the selected HTTP request.
Each reques is executed in the listed sequence. Therefore, the order of each request in the list influences the result.
6) Delete: press the Delete button to remove the currently selected HTTP request.

First, add a description for your request. Then, select the method (GET, POST, PUT, PATCH, DELETE, HEAD, OPTIONS) and specify your endpoint url.
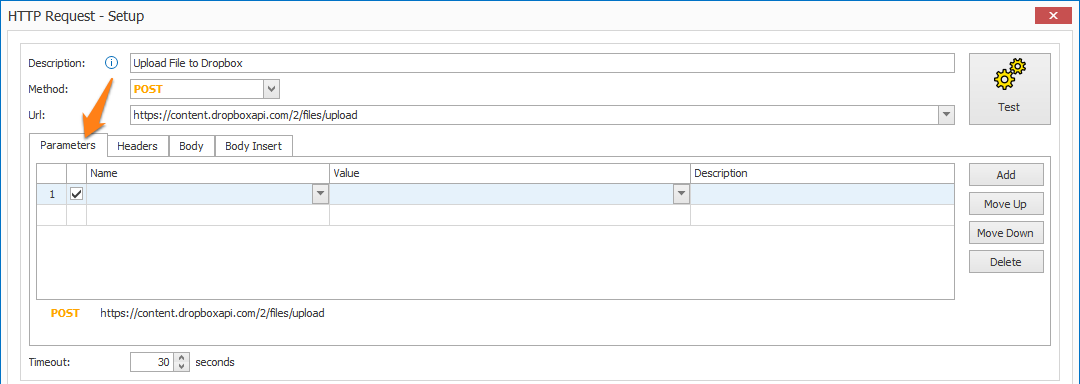
In the Parameters tab, you can specify query parameters for a request.
To specify a query parameter, just enter the name and value. You can also add a description for each parameter.
The query parameters are then automatically appended to the end of the endpoint URL, following "?" and separated by "&".
For example: ?id=1&type=new
1) Add: press the Add button to add a parameter.
2) Move Up / Move Down: press the Move Up or Move Down button to change the order of the selected parameter.
Each parameter is applied to the endpoint url in the listed sequence.
You can see an example of your url with the specified parameters below the table:

3) Delete: press the Delete button to remove the currently selected parameter.
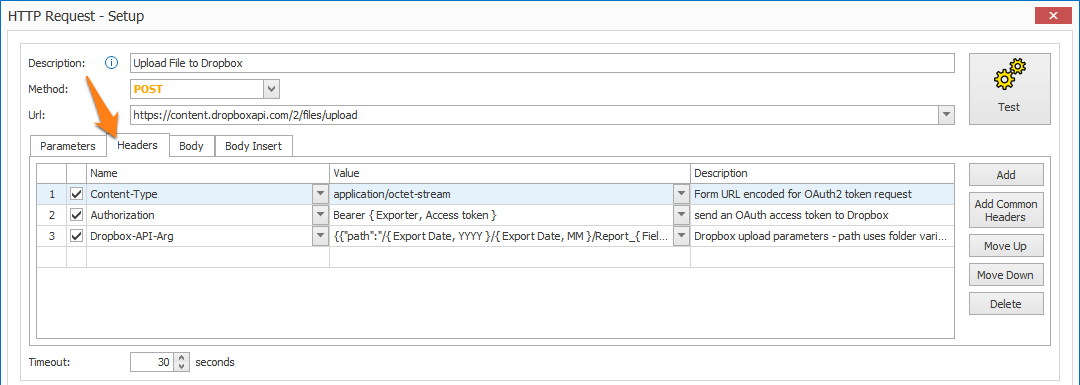
In the Headers tab, you can configure headers with requests to provide metadata about the operation you’re performing.
To specify a header, just enter the name and value. You can also add a description for each header.
IMPORTANT: the sequence of your headers can have an effect on the response, so, before testing, check if this is correct.
1) Add: press the Add button to add a header.
2) Add Common Headers: press the "Add Common Headers" button to add and auto-populate the following common headers:
Like any other header, you can adjust the name, value and description to your liking.
| Name | Value | Description |
| Authorization | Access token { Exporter, Access token } | |
| Content-Type | application/json | Request content type |
| Accept | application/json | Expected response type |
| User-Agent | MetaMan/1.0 | Client identifier |
3) Move Up / Move Down: press the Move Up or Move Down button to change the order of the selected header.
Each header is executed in the listed sequence. Therefore, the order of each header in the list influences the result.
4) Delete: press the Delete button to remove the currently selected header.
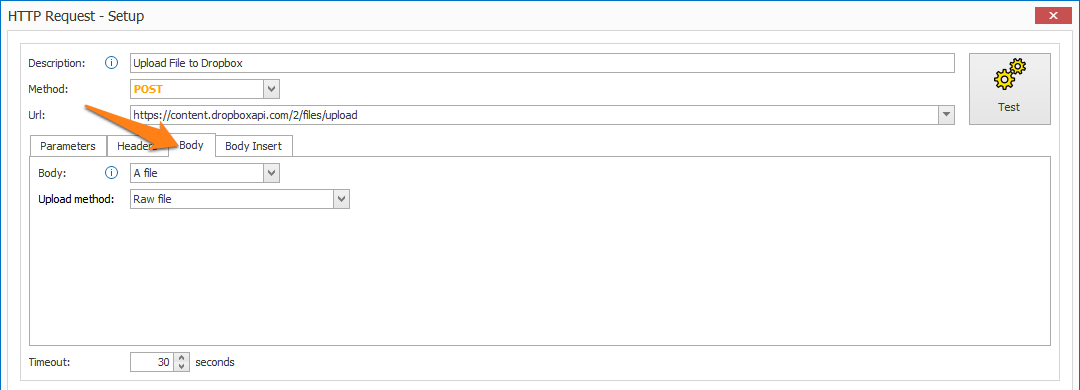
In the Body tab, whenever you want to add or update structured data, you can configure your body. For example, if you’re sending a request to add a new customer to a database, you might include the customer details in JSON. Typically you use body data with POST, PUT or PATCH requests.
IMPORTANT: When using JSON in your body, make sure to use double curly brackets, "{" and "}", for initializing your JSON body script.
For example:{{
"grant_type":"refresh_token",
"refresh_token":"{ Exporter, Refresh token }",
"client_id"="{ Exporter, ClientId }",
"client_secret"="{ Exporter, ClientSecret }"
}}
Select the body type of your request:
1) None: select "None" if you don't want to add a body to your request. This is typically used for GET or DELETE requests.
2) Text (JSON, XML,...): select "Text (JSON, XML,..)" if you want to add a body to your request. The supported content types are:
-
- application/JSON
- application/XML
- application/ x-www-form-urlencoded
- text/plain
- text/XML
3) A file: select "A file" if you want to include the processed document in your body using one of the following upload methods:
-
- Base64 in JSON body
- Raw file
- Multipart form

In the Body Insert tab, you can insert a portion of a body in JSON, XML or Base64 format within your configured Body
To add this "Body Insert" in your main Body, use the "Body insert" exporter field:

IMPORTANT: When using JSON in your body insert, make sure to use double curly brackets, "{" and "}", for initializing your JSON body script.
For example:
{{
"Document_Date":"{ Field, DOCUMENT DATE }",
"Total_Amount": { Field, TOTAL AMOUNT }",
"BT_Amount": { Field, TOTAL BEFORE TAX }",
"Tax_Amount": { Field, TOTAL TAX }",
"Currency_Code": "{ Field, CURRENCY }",
"DocType": "{ Field, INVOICE OR CREDIT }",
"SupplierName": "{ Field, SUPPLIER NAME }",
"SupplierVAT": "{ Field, SUPPLIER TAX ID }",
"Company":"{ Field, COMPANY }",
"Base64File": "{ Export File Content Base64 }"
}}
As soon as you set up your request and press the "Test" button within the setup window, the response will be shown in the "Result" section.
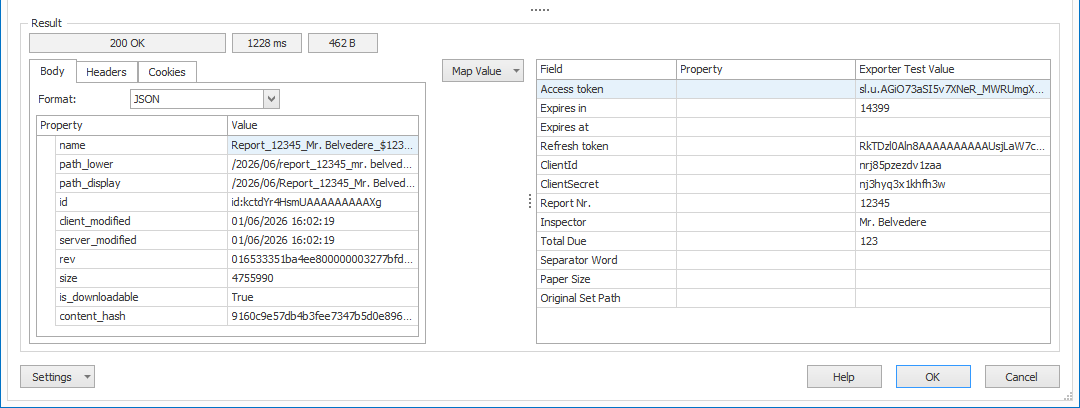
01 - Response Code / Time / Size: from right to left, the response code, time and size of your request's test result are shown here.
02 - Body: shows the body of your request's test result. You can display it as Raw, JSON, XML or HTML format.
03 - Headers: shows the headers of your request's test result. Headers are displayed as key-value pairs.

04 - Cookies: any response cookies of your test result are displayed here. A cookie’s entry includes its name, value, the associated domain and path, and other information about the cookie.
05 - Map Value: after you've performed a test, you can map the value of your result's body properties to any of your workflow or exporter fields.
To map a field, just select the body property you want to map, press the "Map Value" dropdown button and select the field you want to map your selected property to.
The example below uses the MarketCheck CARS API to retrieve the vehicle information based on the VIN number.

Press the "Test" button to show the result of your complete HTTP request sequence.
NOTE: You can check/uncheck requests if you want to enable/disable them.

01 - History: each time a new test is run, a history version of that test's response, including its body, headers and cookies, will be saved to your client's system. Each version is named after you last test's time stamp, description and response code.
02 - Response Code / Time / Size: from right to left, the response code, time and size of your test result are shown here.
03 - Body: shows the body of your test response. You can display it as Raw, JSON, XML or HTML format.
04 - Headers: shows the headers of your test response. Headers are displayed as key-value pairs.

05 - Cookies: any response cookies of your test result are displayed here. A cookie’s entry includes its name, value, the associated domain and path, and other information about the cookie.
TIP: you can copy the current settings and paste it in another setup window of the same type. Do this by pressing the Settings button in the bottom left of the Setup window and selecting Copy. Then, open another setup window of the same type and select Paste.