MetaServer > Help > Separate Document / Process Page

060 MetaServer Separate Document / Process Page

The Separate Document / Process Page action performs the following functions:
Automatic document separation:

– You can automatically separate documents based on unique words or barcodes found on the first or last page of the document.

– You can also use separator sheets during scanning to indicate the beginning of each document. Separator sheets can be useful if you don’t have any free space on your document for a barcode or there aren’t any unique values on the first or last page.

– You can also separate every n page(s). In other words, if you separate every “1” page, a PDF file of 20 pages will be converted to 20 individual PDF files with each 1 page. This is useful when you want to scan a stack of, for example, single page delivery notes.

Page Processing:

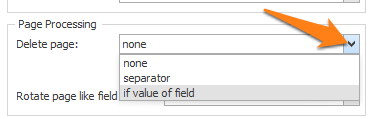
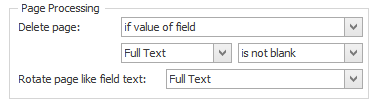
– To auto-delete certain pages, you can automatically delete documents using rules. For example, delete a page if no text is found using OCR

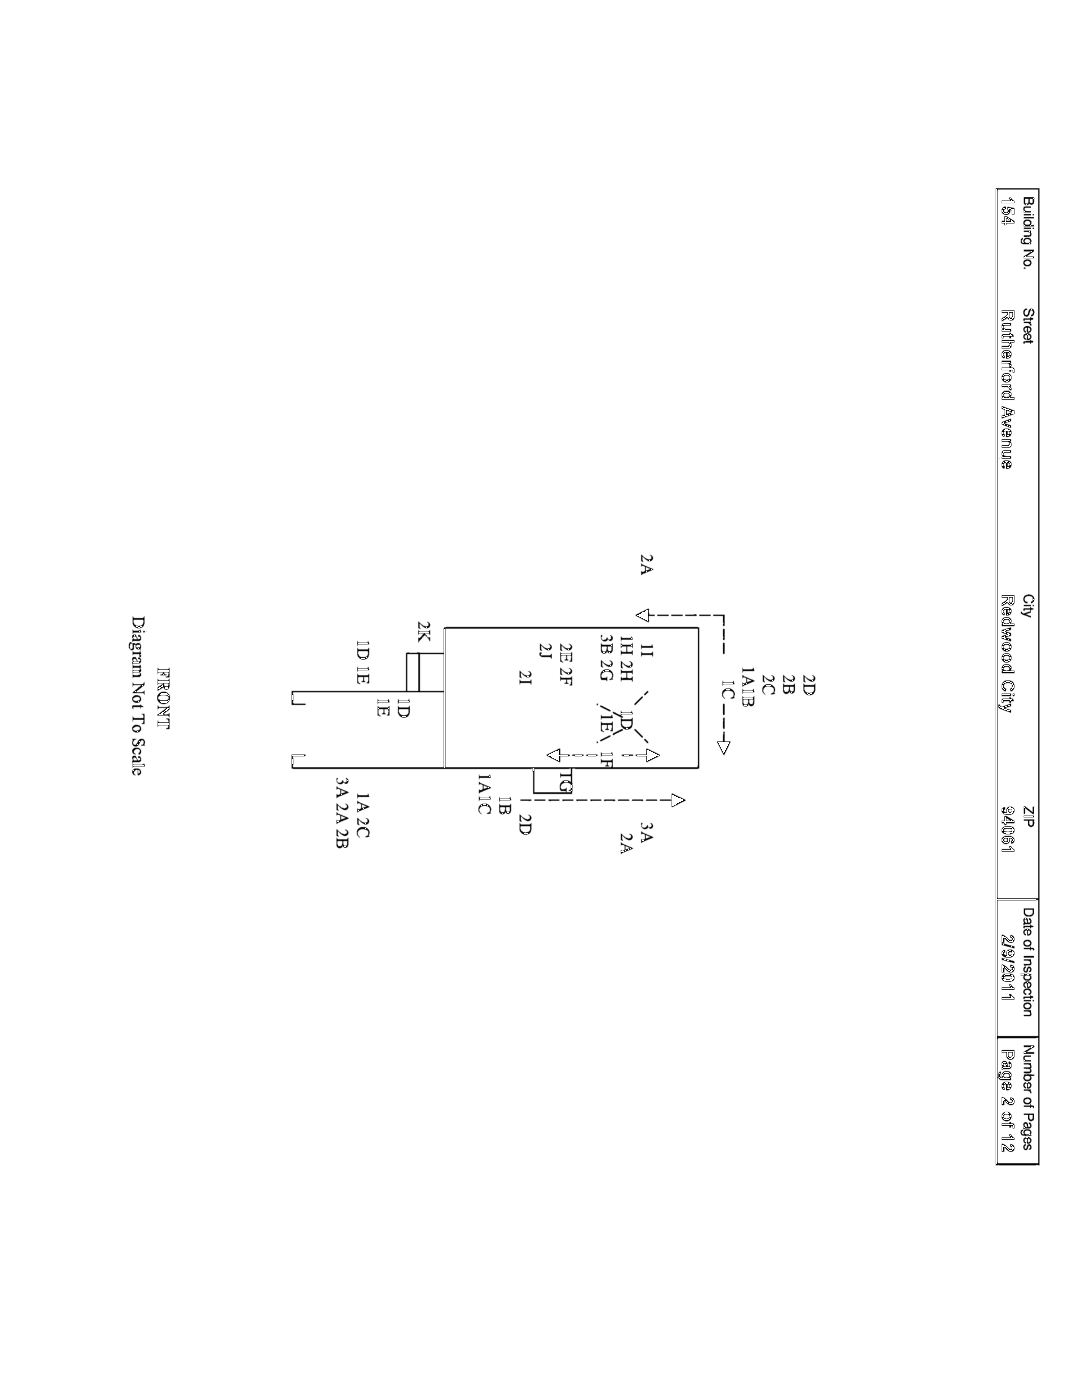
– To auto-rotate pages, you can automatically correct the orientation of your pages based on the text orientation on each page or based on the orientation of a barcode.

If you want more detailed instructions on how to set up auto-rotation and deletion of blank pages, please refer to the following online guide.

Instant Testing:

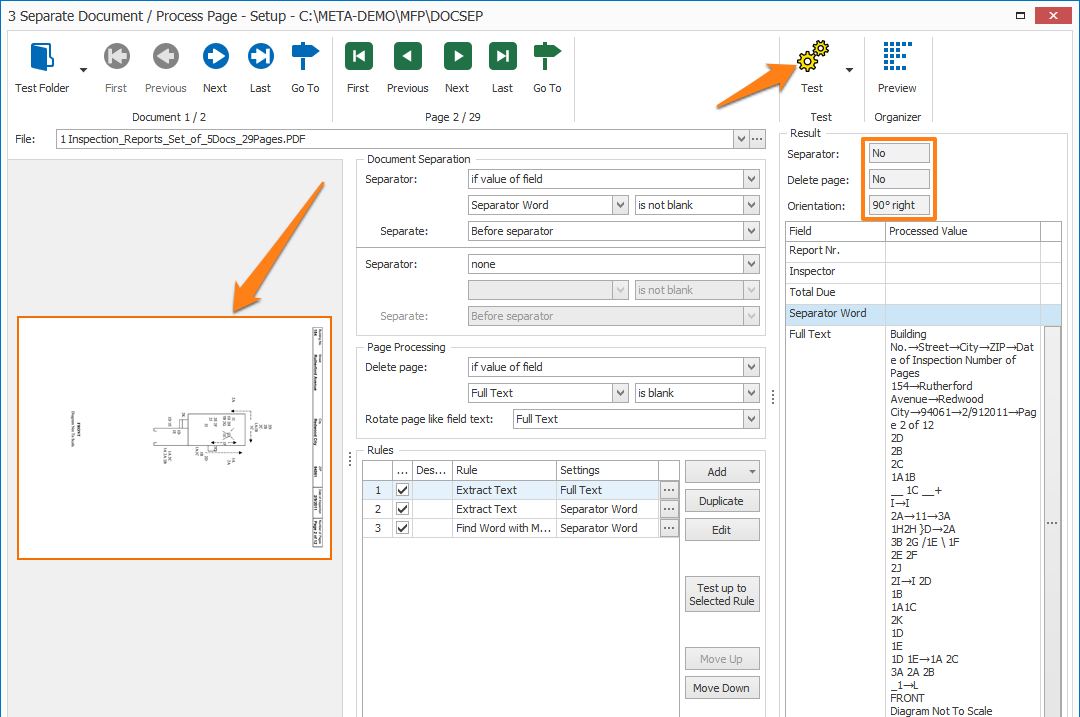
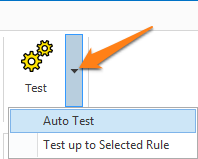
You can test your document separation and page processing configuration instantly using a sample document.

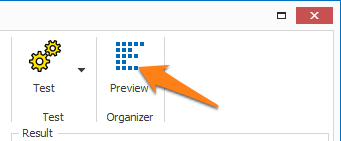
The Separate Document / Process Page action is also sometimes combined with the Organize action to double-check the result of the Separate Document / Process Page action or to manually adjust the documents (e.g. moving pages around, etc.).


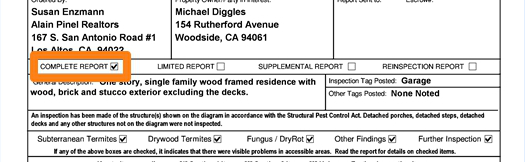
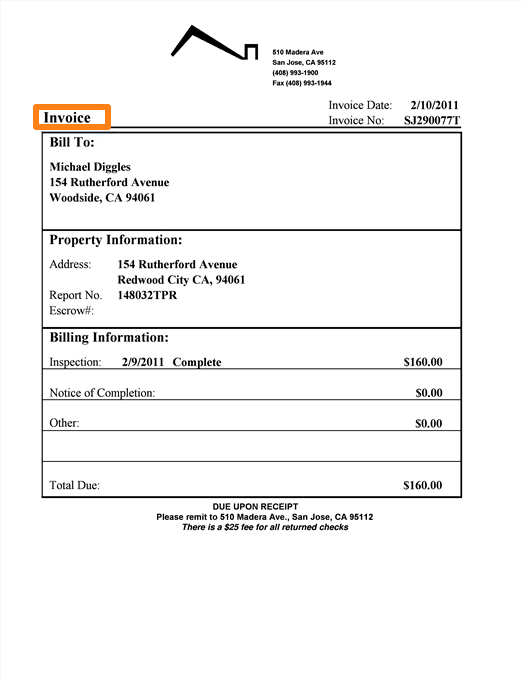
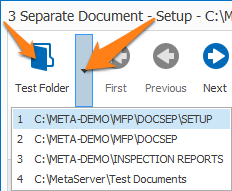
In our example, we will make use of the “CB – INSPECTION REPORTS” workflow. This workflow is automatically installed with CaptureBites MetaServer.

Each inspection report has a different number of pages depending on the size and condition of the property. This can vary between 5 to 30 pages. You can split these documents by the first or the last page. At the top of each first page of an inspection report, there’s a unique title containing the words “WOOD”, “DESTROYING”, “PESTS” and “ORGANISM INSPECTION REPORT”.
Other good separator words could be “Page 1” below “Number of pages” or “COMPLETE REPORT”.
If the first page of your document doesn’t contain any unique elements, you can try looking at the last page. In our example, another good separator value could be the word “Invoice” on top of the last page.
To add a Separate Document / Process Page action, select the action after which you want to insert the Separate Document / Process Page action and press Add -> Separate Document / Process Page. The Setup window will automatically open.
You can also open an existing Separate Document action by  double clicking the action or by pressing the setup button on the right side of the action or in the ribbon, as shown below.

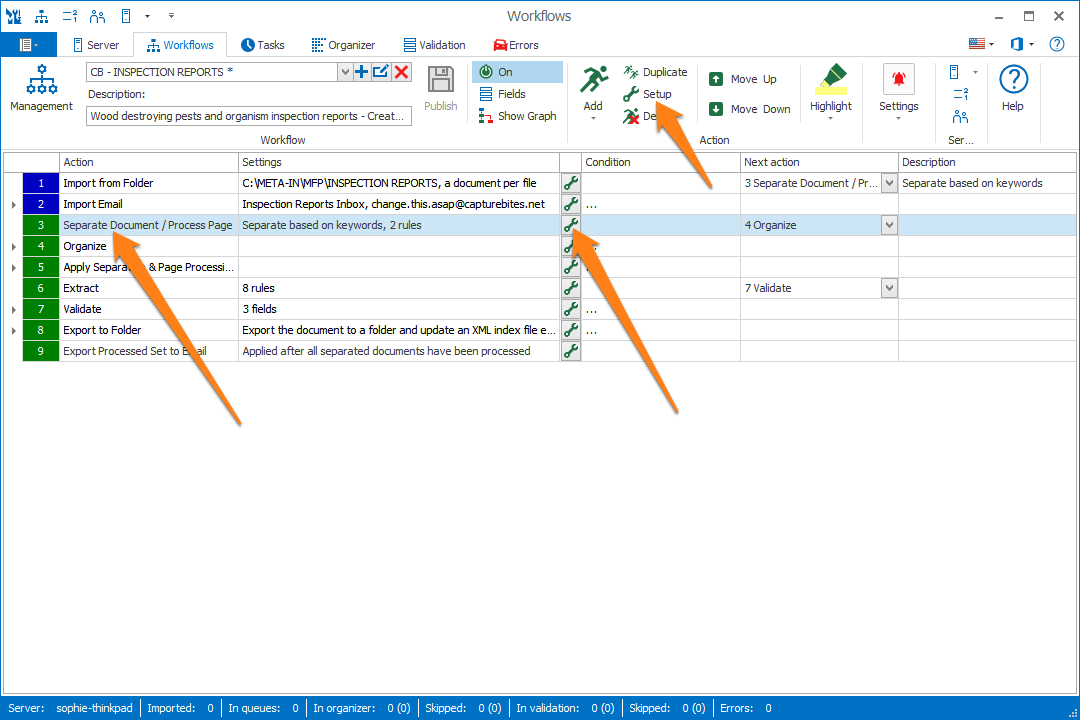
NOTE: By default, an Apply Separation & Page Processing action is added after your Separate Document / Process Page action. The same applies to the Organize action.

This action will ultimately apply the separation of your document. Before this action, your document will only be bookmarked based on your separation points.

If you only want to bookmark your document and apply the page processing (e.g. rotating, deleting, rearranging pages, etc.), you can replace the Apply Separation & Page Processing with an Apply Page Processing Only action.

For more detailed information about this action, please refer to the Apply Separation & Page Processing or Apply Page Processing Only help page.

TIP: The thumbnail on the right will follow you, so you can easily refer to the Setup window. Click on the thumbnail to make the image larger.

The Separate Document / Process Page Setup shows the pages of the first test document in your current Test Folder in the left panel. The orange zone indicates the extraction zone of the selected Extract Text, Barcode or Mark Detection rule.

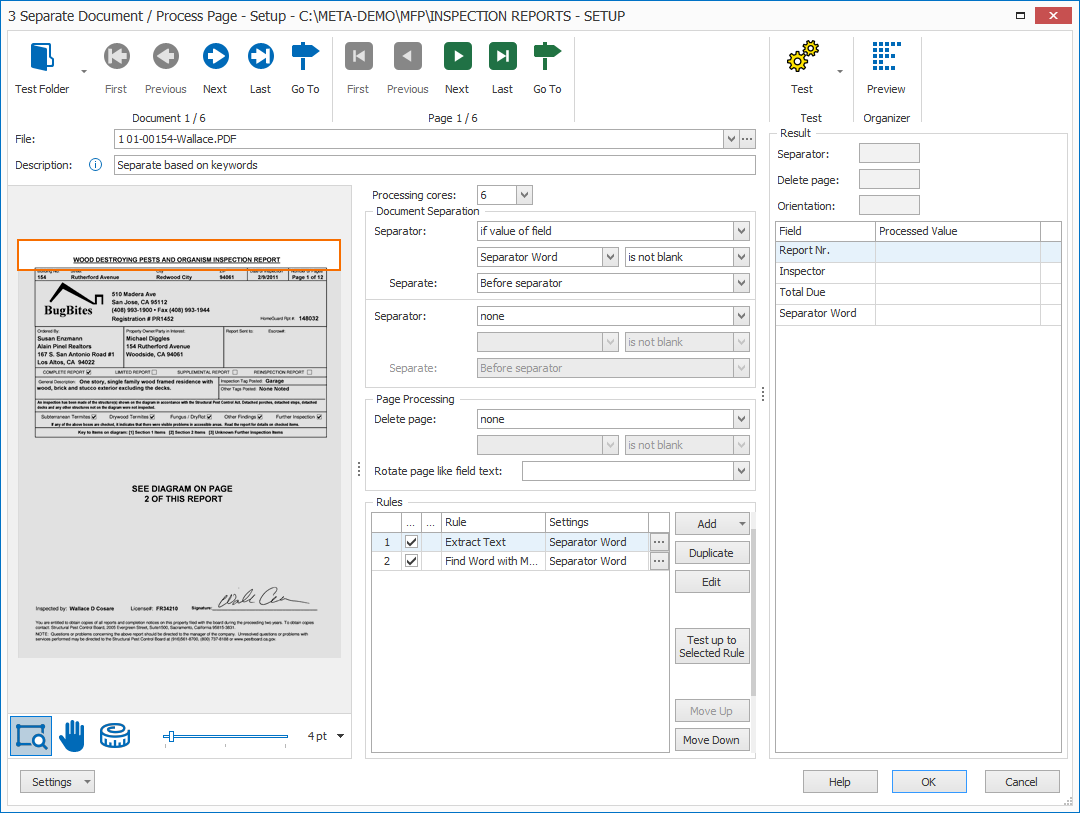
The middle panel shows your Extract rules. You can define as many rules as required.

1) Test Folder: to test your rules you need some test documents. Just press the Test Folder button to browse to the folder containing your test documents or select one of your recently used test folders using the drop-down arrow. The last selected Test Folder is memorized per workflow.
3) Document buttons: use the blue arrow buttons to navigate through the documents in the current test folder.
Use the Go to document button to directly navigate to a specific document.
Note: If you don’t see thumbnails in this window, you need to install a Windows PDF plugin to display PDF thumbnails. Please refer to these instructions for more details.
You can also use the drop-down arrow to browse in the test folder’s subfolders:
4) Page buttons: if a document has more than one page, use the green arrow buttons to navigate through the pages of the document.
Use the Go to page button to directly navigate to a specific page of the current document:

MetaServer provides the option to support additional cores to speed up extraction.

The number of additional cores that you can use for extraction, depends on the hardware’s CPU specifications. You can find this information under Task Manager -> Performance -> CPU

Below you can find an estimation on the increase of the extraction speed / page:

300 DPI A4 / LETTER SIZE 6 CORES / 12 LOGICAL PROCESSORS
Processing Time per Image in Seconds
EXTRACTION ONLY
6 PROCESSING CORES 0,55
NO EXTRA PROCESSING CORES 4,00

If you still need to decide your hardware and / or you’re not sure how many extra cores would be best for your particular solution, don’t hesitate to contact us.

If you’ve applied for a trial of MetaServer, we have included support up to 3 additional cores for you to try out.

Here you can set up the conditions to consider a page as a separator. You can set up a total of 2 conditions.
01 – Separator: press the drop-down arrow to choose between using a specific field value or separating every n page(s).
Use the separate every n page(s) if you want to convert a multi-page PDF to multiple PDFs each holding a fixed number of pages. In other words, if you set n to 2, a PDF file of 20 pages will be converted to 10 individual PDF files holding 2 pages. This is useful when you want to scan a stack of, for example, two-page application forms.
If you use a field value as your separator, then you can have the option to consider it a separator if the value is not blank or when the field value changes.

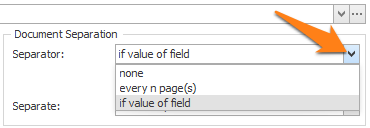
The “is not blank” option is used in combination with a set of rules to find unique keywords on the first or last page of each document and load them in a field. If that field is not blank, it means one of the keywords is present and the page can be considered as a separator.

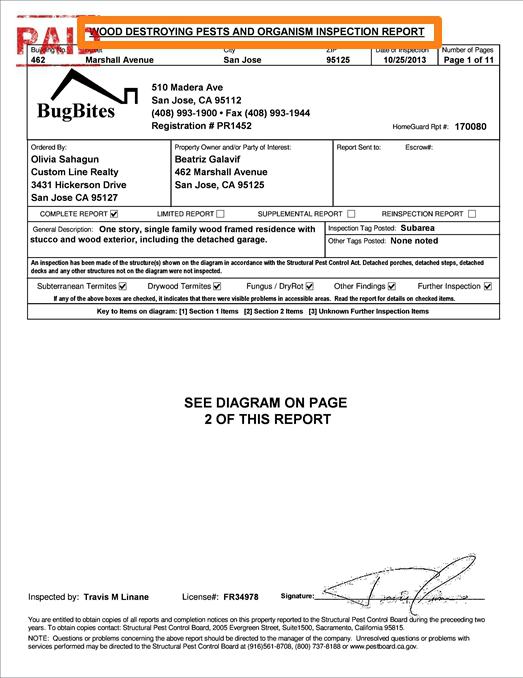
The “if field value changes” option is useful when the separator value appears on every page of the document. For example, a barcode holding the report number appears on every page of each report, but its value changes when a new report starts.

To disable Document Separation, select none.

02 – Separate: press the drop-down button to choose if you want to separate before or after the separator. If you choose “after”, the separator page will become the last page of the previous document. In most cases, you want to use the default “before” option to make the separator page the first page of a new document.

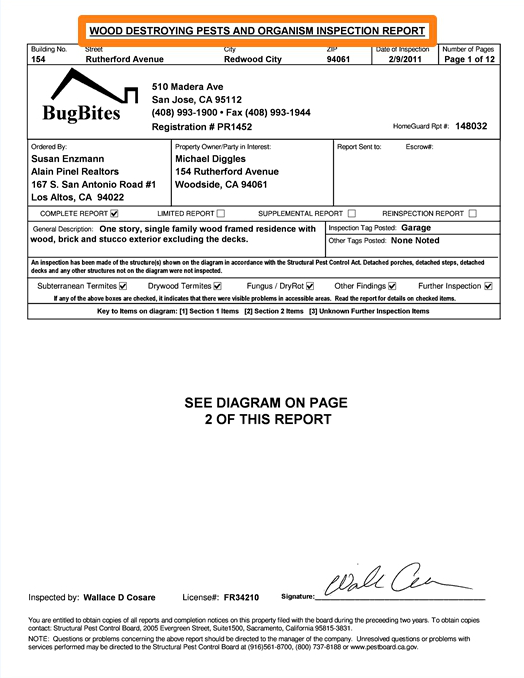
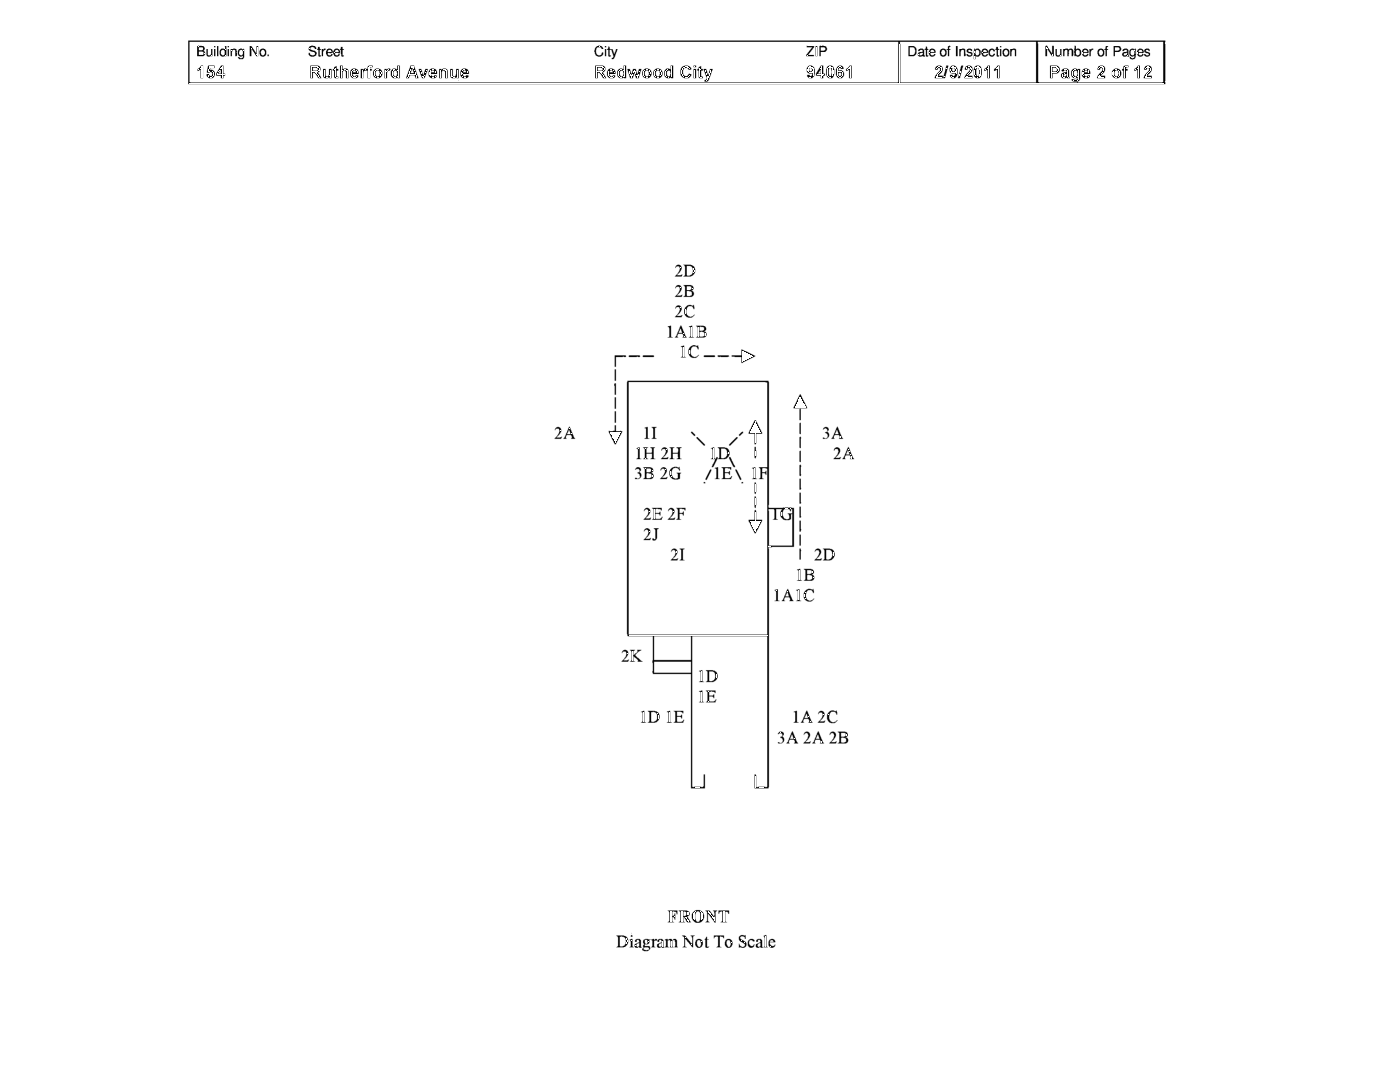
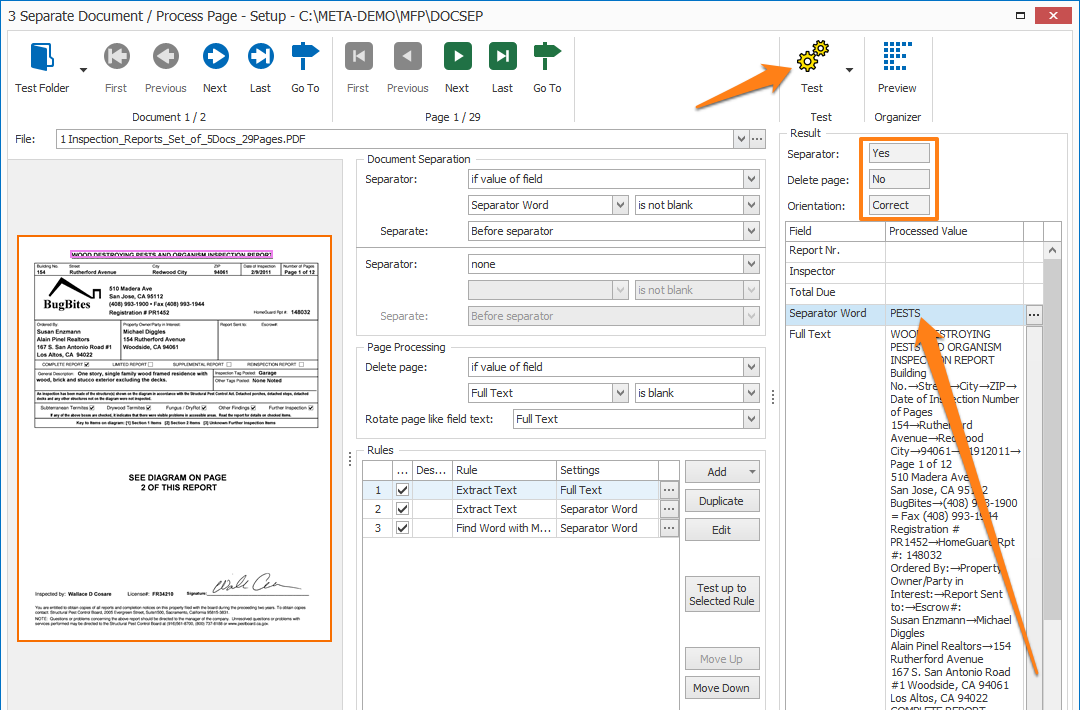
In our example, we only want to separate when we find the big title on top of the page. So, we created a field “Separator Word” and we will separate our documents when the field value is not blank.

Below the Document Separation settings, you can set up the conditions to delete a page or rotate a page based on the orientation of the text in the specified field. The text needs to be generated through an Extract Text or Extract Barcode
01 – Delete page: press the drop-down arrow to choose between using a specific field value or deleting the separator page.

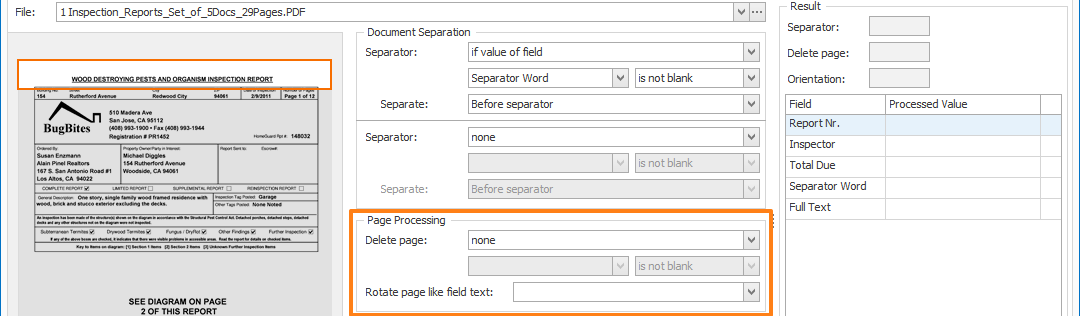
Select separator if you want to delete the page holding the separator value.

If you use field value, then you can delete the page where the selected field value is blank or not blank.
02 – Rotate page like field text: press the drop-down button to choose if you want to rotate the page based on the field value’s rotation. To disable this option, leave it blank.

For example, you can have landscape-oriented page in a document.

To automatically rotate it to the correct orientation, you select a field with extracted text using an Extract Text (OCR) or Extract Barcode rule, and the page will be rotated according to the orientation of the majority of the text contained in the selected field or according to the orientation of the bar code if you used an Extract Barcode rule to fill the field.
To find the separator key words, detect the presence or lack of text, delete a page or to load text in a field to set the correct orientation of each page, you make use of Extract rules. You can refer to the Extract help guides for a detailed explanation of each rule.
Typically, for separation, you use an Extract Text rule to extract a text block and use a Find Word or Find Word Group rule to extract specific words from that text block. If any of the specified words exist on a page, the separator field “is not blank” and the document will be separated. If none of the words exist in the text block on a page, the separator field is empty (is blank) and the page is simply attached to the last document.
In case of deletion: you use an Extract Text rule to extract the content of the whole page and load it in a Full Text field. If the Full Text field is empty on a page, there is no text on that page (is blank), and the page will be deleted. If the Full Text has content (is not blank), the page remains in the document.
TIP: to refine this process, you can add a Find Word with Mask / Words rule to only recognize words of 2 characters or more. If the text only contains single character words, then this is text is typically generated by the OCR extraction recognizing some random single characters in the noise on the images or converting the perforation holes on blank pages to 0’s or O’s.

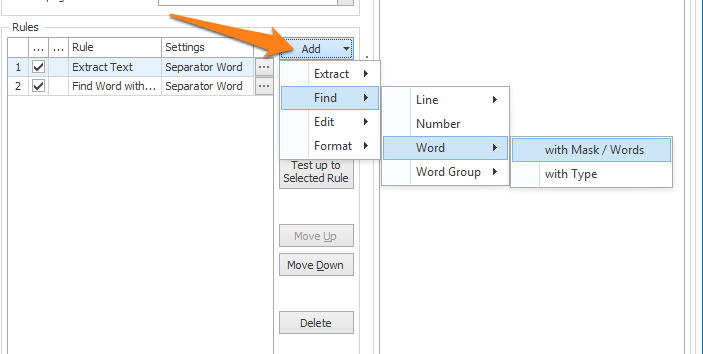
In other words, with a Find Word with Mask / Words rule where you only keep 2-character words or longer, blank pages with noise will also return as blank and will also be deleted.

To speed up the deletion process, you can first extract a small zone of text where you expect some text on most of the pages. But, when that Extract Text rule returns nothing, you are not sure yet if the page is completely blank. So, in that case, you would need to extract the full page. You can do this by adding a second Extract Text rule for the full page and applying the following condition: Apply if field value is blank.

Press the “…” button to open the setup window and select the field where the condition applies to.
With this approach, you would immediately know if there is text by reading the small zone. Only on blank pages or on pages with a small amount of text, the zone could be empty. Only then will it apply the slower full page OCR to make sure there is absolutely no text on the image.

For full, detailed instructions on how to achieve this for auto-rotation and deletion of blank pages, please refer to the following online guide.

Typically, for rotation, you would extract a text block or barcode and use the field holding the text to detect the orientation and rotate the pages.

Often, the field to detect the text orientation can be the same field as you use to detect the presence of text to delete the page or not.

01 – Add: press the Add button to add rules.
02 – Duplicate: press the Duplicate button to copy the selected rule. The duplicated rule will automatically be added after the selected rule and the setup of the duplicated rule will open. Adjust it to your liking or press Cancel to stop the creation of the duplicated rule.
03 – Modify: press the Modify button or double-click a rule to open its setup window.
04 – Test up to Selected Rule: press this button to test up to a selected rule. This is useful if your rules don’t generate the desired result, you typically would test the rules step by step to find the issue and “debug” your rules.
05 – Move Up / Move Down: press the Move Up or Move Down button to change the order of the rules.

The rules are executed in the sequence of the rules list. Therefore, the order of the rules in the list influences the result.

06 – Delete: press the Delete button to remove the currently selected rule.
Press the Test button to show the separator value result in the Processed Value column and to check if the current page is:

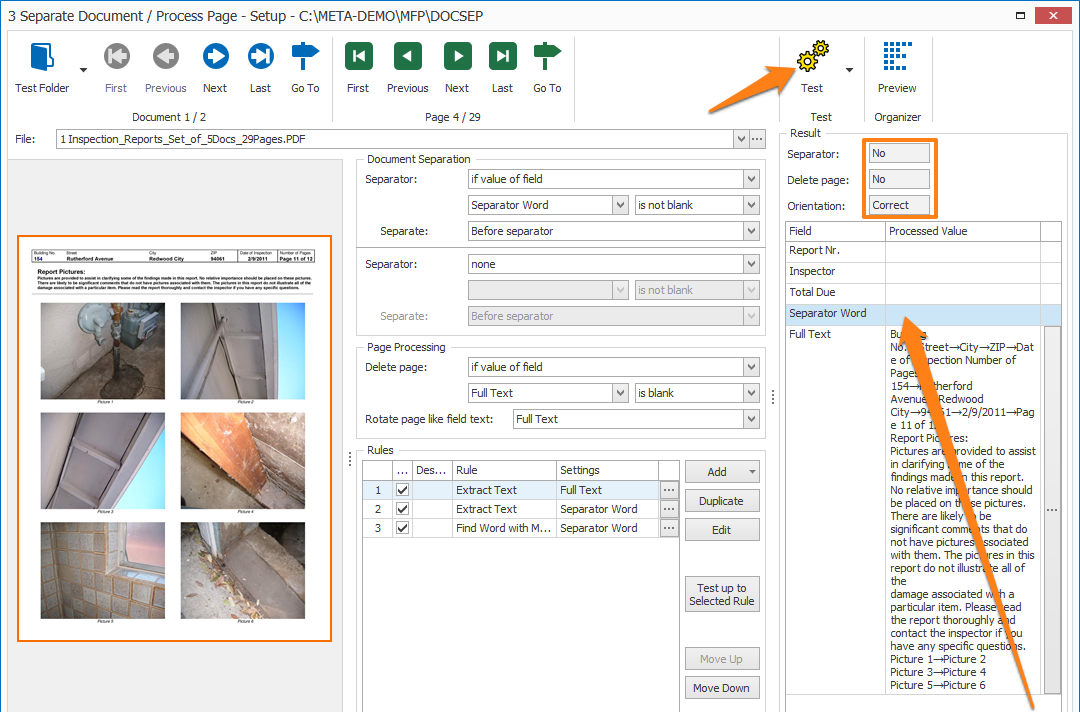
– Considered a separator, yes or no
– Going to be deleted, yes or no
– Going to be rotated. When enabled, the detected orientation of the page is displayed as 90° right, 90° left, 180° or Correct.

The report title is not present, so the separator field value is blank. This page is not a separator
We have found the separator word “DESTROYING” in the report title, this page is a separator
This page is not a separator, won’t be deleted BUT it will be rotated 90° to the right
If you want to search in a result or inspect it in a larger window, double-click on the Processed Value result. Another window will pop up, displaying the complete value. You can search for specific words using the Find feature. Analyzing your text can be very useful for debugging your rules.

01 – Format: You can use one of the Format options to switch the text to another case. In uppercase, it is easier to detect OCR errors like l versus I (in uppercase, that would be L versus I).

For a more in-depth example, please refer to the following help page.

02 – Show info: by default, this option is enabled. It shows the data type, confidence level and font-size of each word group of the result value.

For example: (Printed 85% 10pt) = The machine printed word group was extracted with a confidence level of 85% and has a 10pt font size.

There are a total of 6 possible data types:

1) Printed = machine written data extracted with OCR.

2) Handwritten = handwritten data extracted with Azure Computer Vision ICR using the Extract Text (Azure Computer Vision) rule.

3) PDF text = text directly extracted from the text layer of an electronic PDF or a Searchable PDF.

4) Barcode = barcoded data extracted using the Extract Barcode rule.

5) Mark = data originating from a check box extracted with the Mark Detection rule.

6) Set value = data that was populated with a Set field value rule to set the current date or time or something similar.

TIP: If you need to design a document and you are not sure what the ideal font type is for OCR processing to avoid these kind of OCR errors, have a look here.

Press the drop-down arrow next to the Test button to show more Test options:
01 – Auto test: use this to automatically test each page while going through them using the green page navigation buttons.
02 – Test up to Selected Rule: use this to only test the selected rule and the rules before. This is a useful function to debug your rules. There is also a Test up to Selected Rule button available in the rules’ side bar.
To apply your rules to every page of your currently selected test document, press the Preview button.
A process window pops-up, showing the progress.
When it’s finished, a Thumbnail Preview window opens, showing you a visual representation of where the document was separated, deleted and / or rotated.
You can have a closer look at a page by double-clicking its thumbnail or pressing the Preview Page button to open the preview window. You can browse through the document by scrolling through the pages or clicking on them.

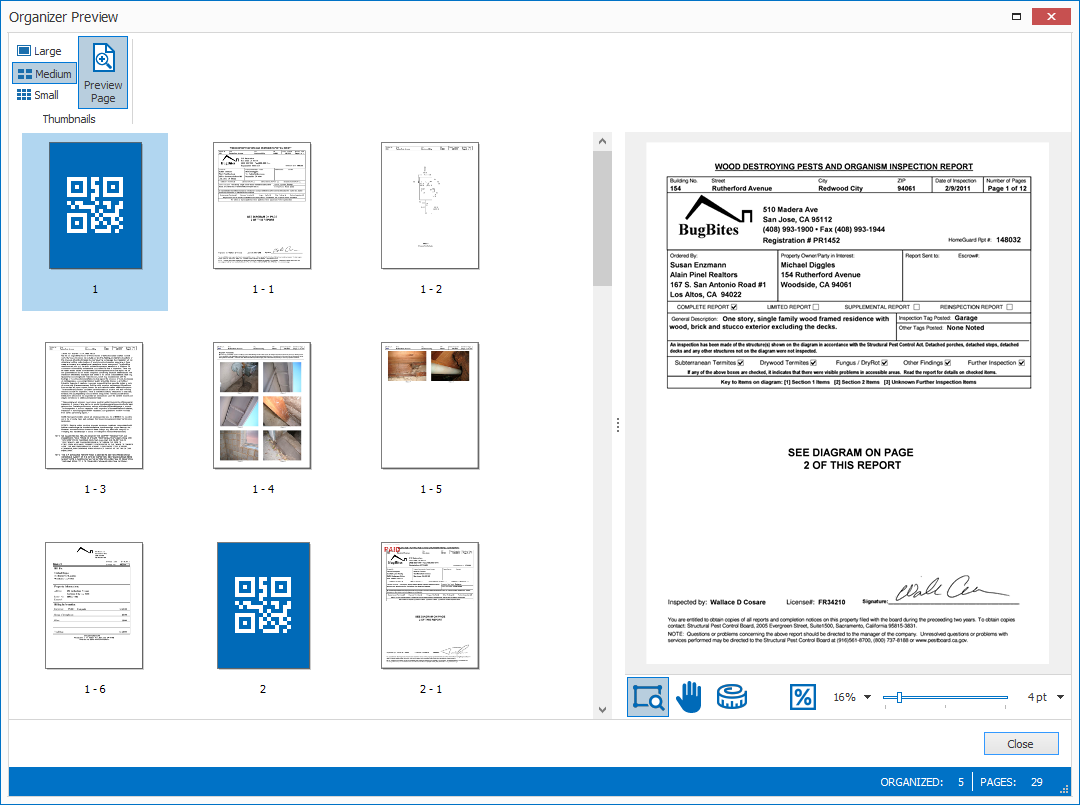
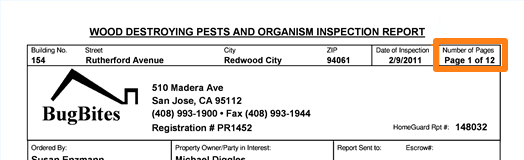
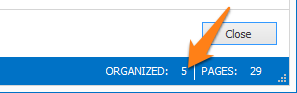
You can also see the total number of documents generated with your rules in the right corner of the status bar.

The viewer controls are used in several MetaServer Setup windows. So, the buttons and shortcuts to zoom, pan and measure the image works in the same way across all those screens.
From left to right:
01 – Zoom on Rectangle: draw a rectangle on the image. The viewer will fit to the rectangle. Single-click on the image to fit it to the whole page. Hold Ctrl to temporarily switch to the Pan tool, Shift+Ctrl to temporarily switch to the Measure tool.
02 – Pan: pan / move around a zoomed image. Hold Shift to temporarily switch to the Zoom tool, Shift+Ctrl to temporarily switch to the Measure tool.
03 – Measure: measure objects on the image. This tool is useful when setting up the Radar in a Find Word Group with Mask / Words rule. For example, the distance between the word groups “Total Due:” and “$265.00” is 12.36 cm. The units will switch to inches depending on the Windows regional settings.
Hold Shift to temporarily switch to the Zoom on Rectangle tool or hold Ctrl to temporarily switch to the Pan tool.
04 – Zoom slider: slide left to zoom out, slide right to zoom in. You can also specify the zoom-range based on the font-size (in pt).

TIP: you can copy the current settings and paste them in another setup window of the same type. Do this by pressing the Settings button in the bottom left of the Setup window and by selecting Copy. Then open another setup window of the same type and select Paste.

Subscribe to our Newsletter


Please check the box below to agree to the privacy policy and continue *


NOTE: if you're experiencing trouble with submitting this form, please try again using another browser.